Hi and welcome!
My card today is a simple A2 size card that will easily mail in a standard A2 envelope.

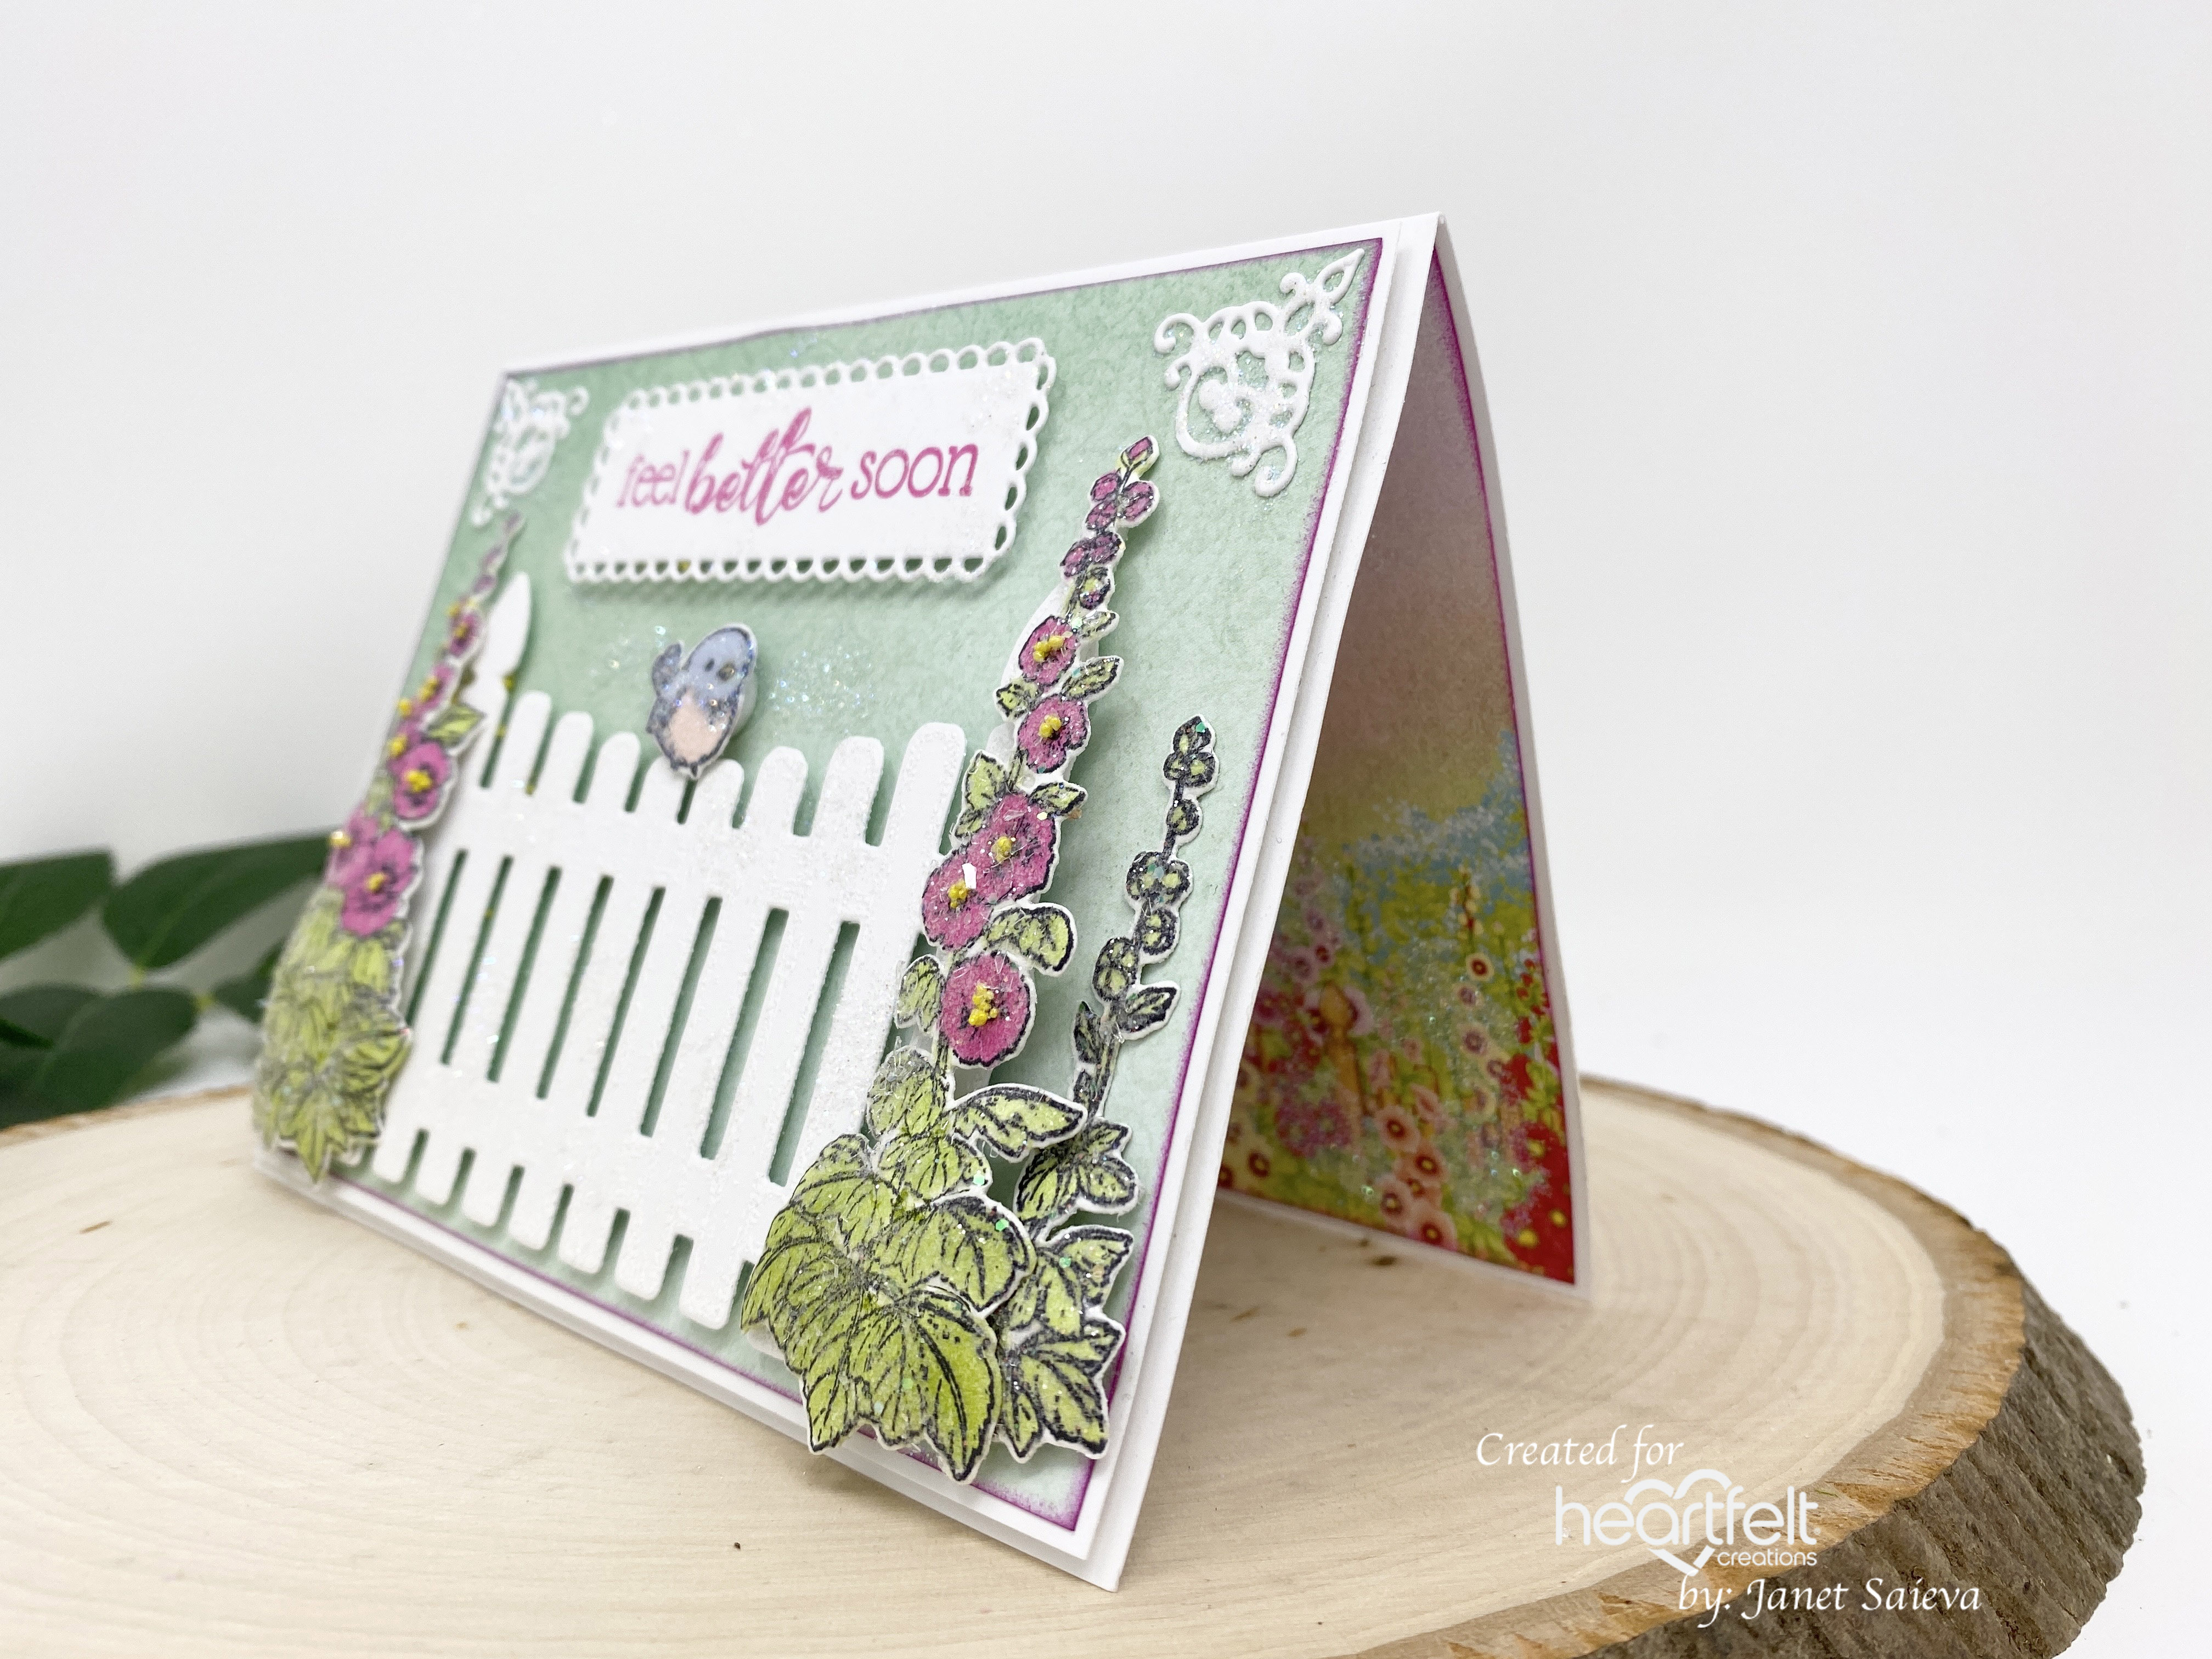


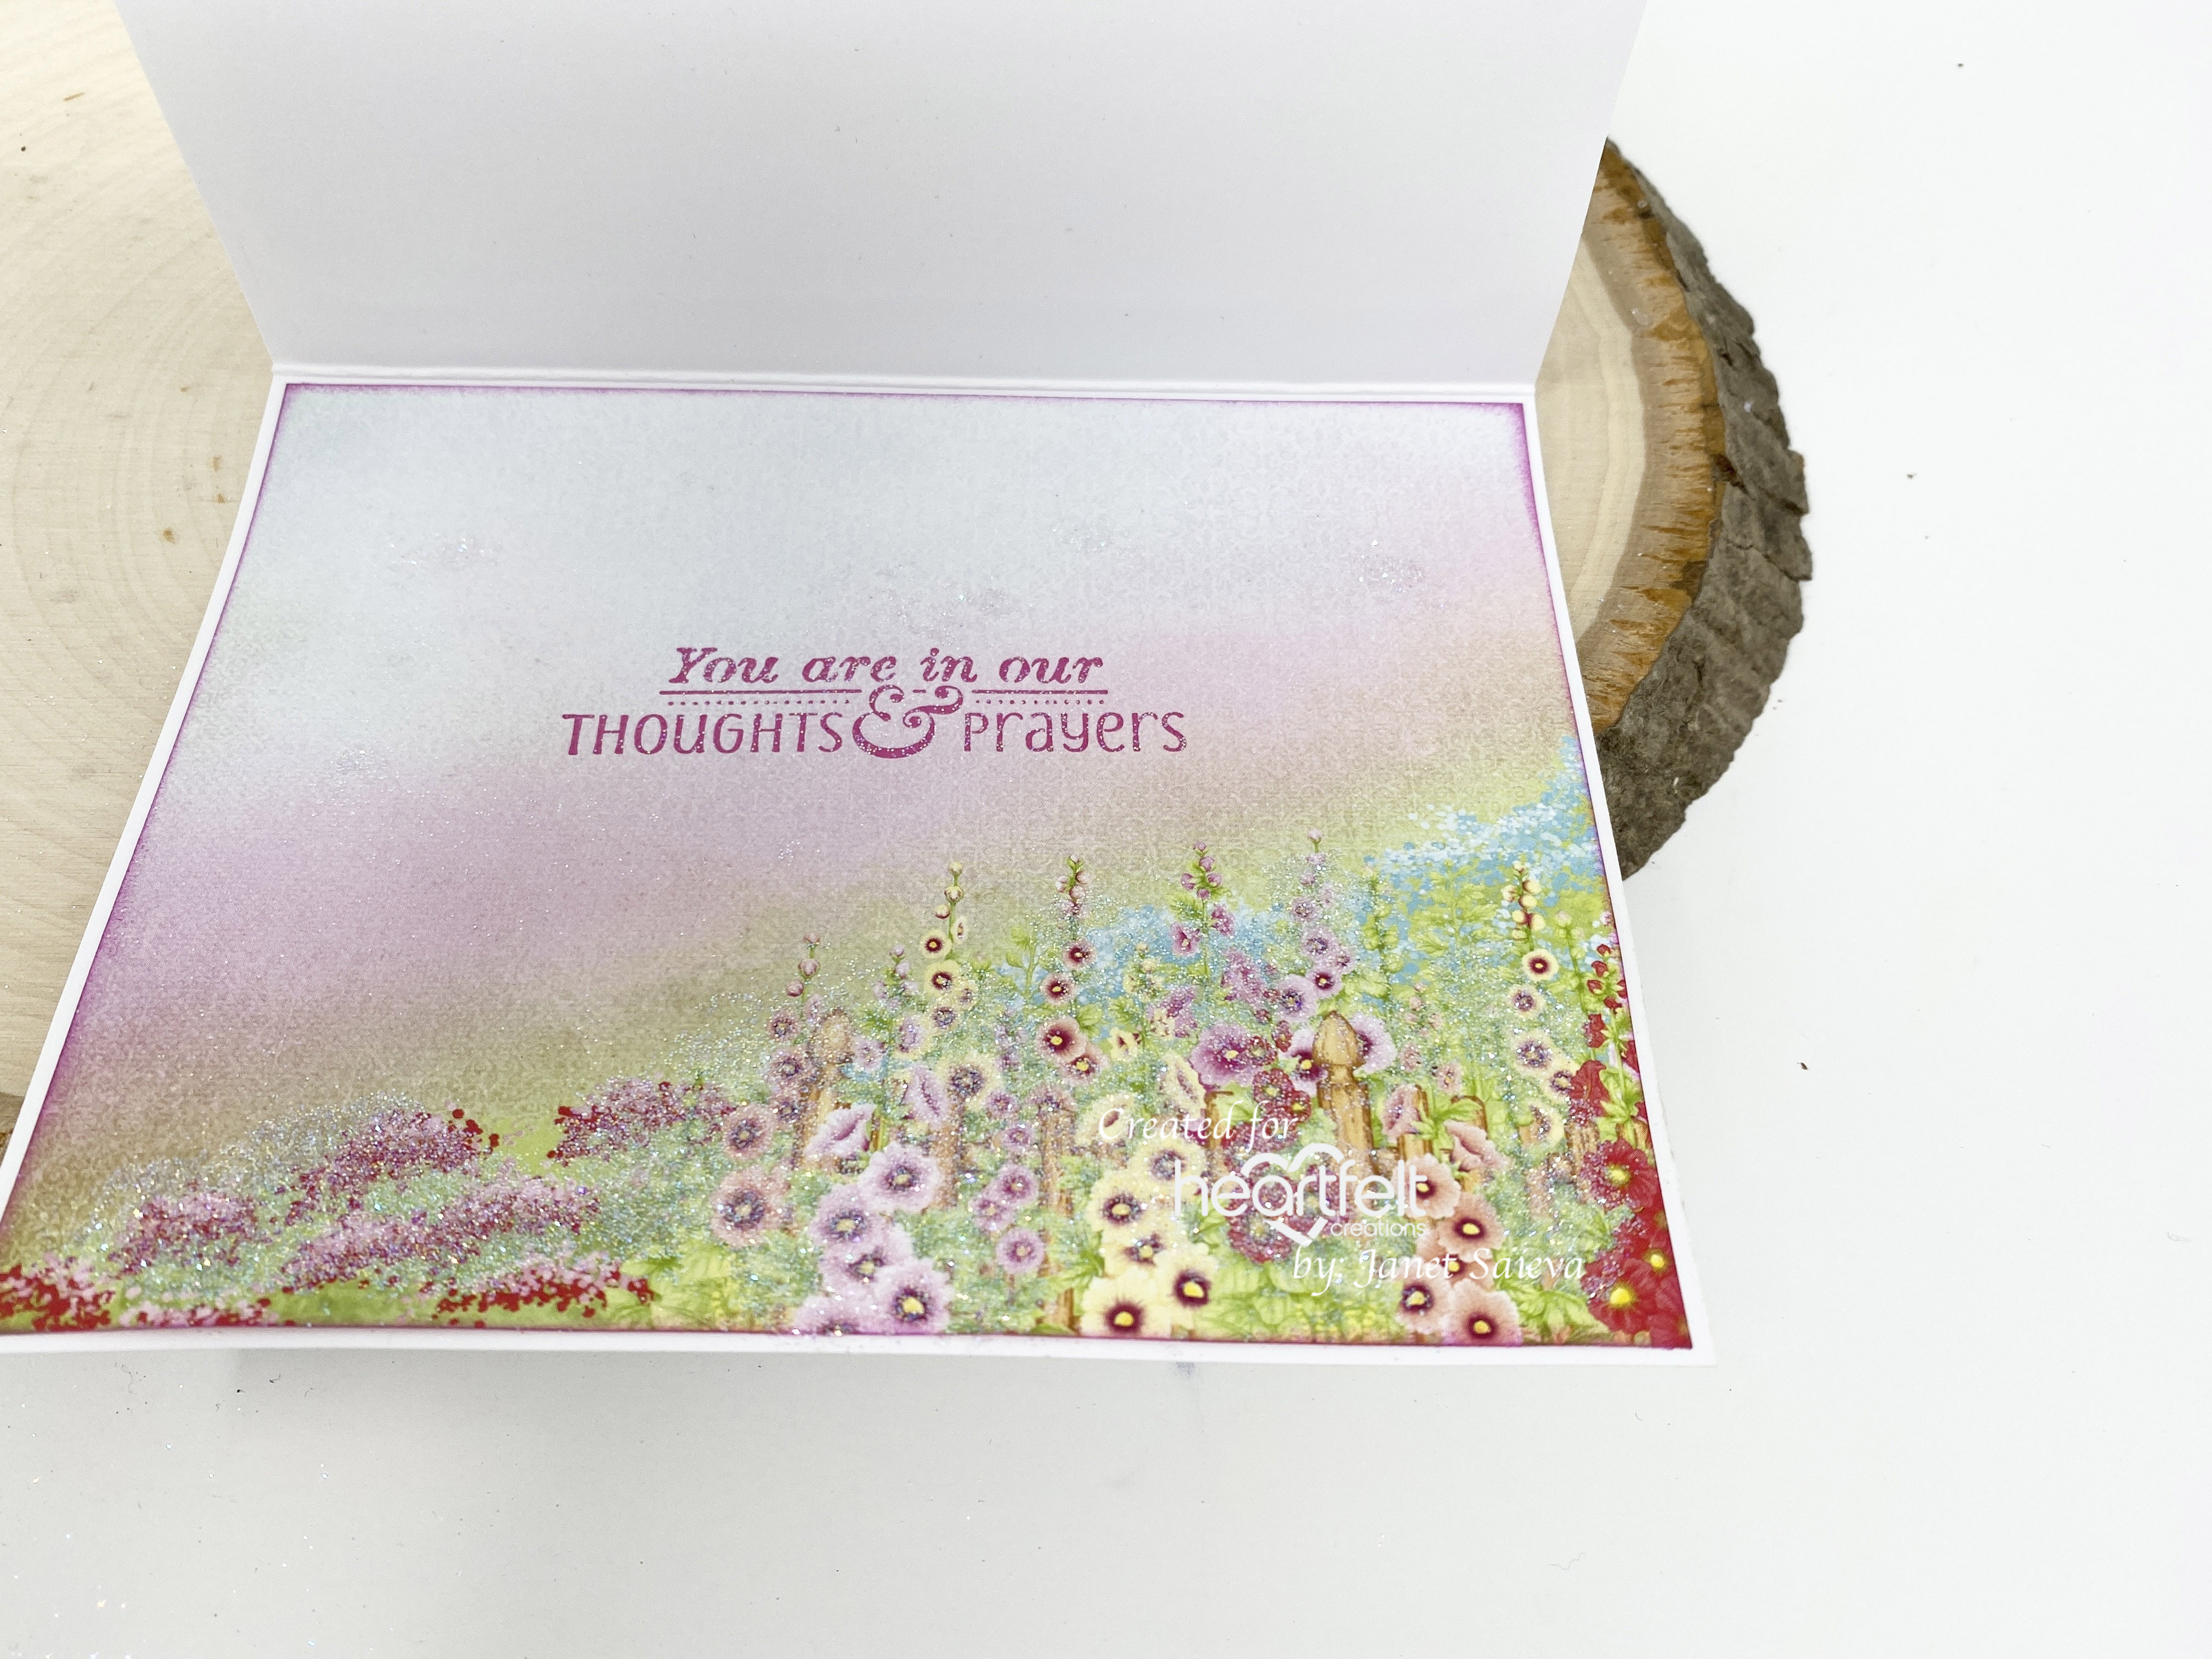
Instructions: Card size is 5 1/2 x 4 1/4”. Score and fold 11 x 4 1/4” white cardstock at 5 1/2” on the long side to create tent fold card base. Cut white cardstock 5 3/8” x 4 1/8” and sheet 4A from the Hollyhock Garden Paper Collection to 5 1/4 x 4”. Ink the edges of the designer paper with Vibrant Fuchsia Archival ink, adhere it to the white cardstock using dries clear adhesive and then adhere to card base using foam tape. Cut sheet 9A to 5 3/8 x 4 1/8”, edge with Vibrant Fuchsia ink, stamp ‘You are in our thoughts & prayers’ from Cheerful Note Sentiments with the same ink and adhere to the inside of the card.
Adhere the fence to the bottom center of the card front using adhesive strips. Adhere the hollyhock and stem images to both sides of the fence using dries clear adhesive and dimensional dots. Adhere the little bird to the to center of the fence using dries clear adhesive and dimensional dots. Adhere the sentiment at the top center of the card front using dimensional tape and adhere the window hinge pieces to the top corners using dries clear adhesive.
To add some sparkle, randomly dab all the elements and the card front and inside with dries clear adhesive and sprinkle with Crystal Ultrafine Transparent Glitter.
Please visit the Heartfelt Creations Gallery for the rest of the details on my card.
Please also visit the Heartfelt Creations Blog to see all of the absolutely gorgeous projects created by the fabulous design team.
Thank you so much for stopping by! It was so nice to 'see' you!
Till we meet again please stay safe and be well!
Have a beautiful day!
Crafty Hugs, 🤗🤗🤗
Janet
3 comments:
Absolutely stunning my friend! I'm trying to do more low profile cards to be able to mail with one stamp. It is so expensive these days to send our loved ones beautiful flowers on our cards!
I love the clean and simple look that makes this card so easy to post.
Super cute and pretty card, I love it :)
Post a Comment