Wednesday, February 22, 2023

Heartfelt Creations - Filigree Oval Peacock

 Hi and welcome!

There are only two days left for me in my 70's. On Friday I'll turn 80...where oh where have the years gone? I still feel like a kid!

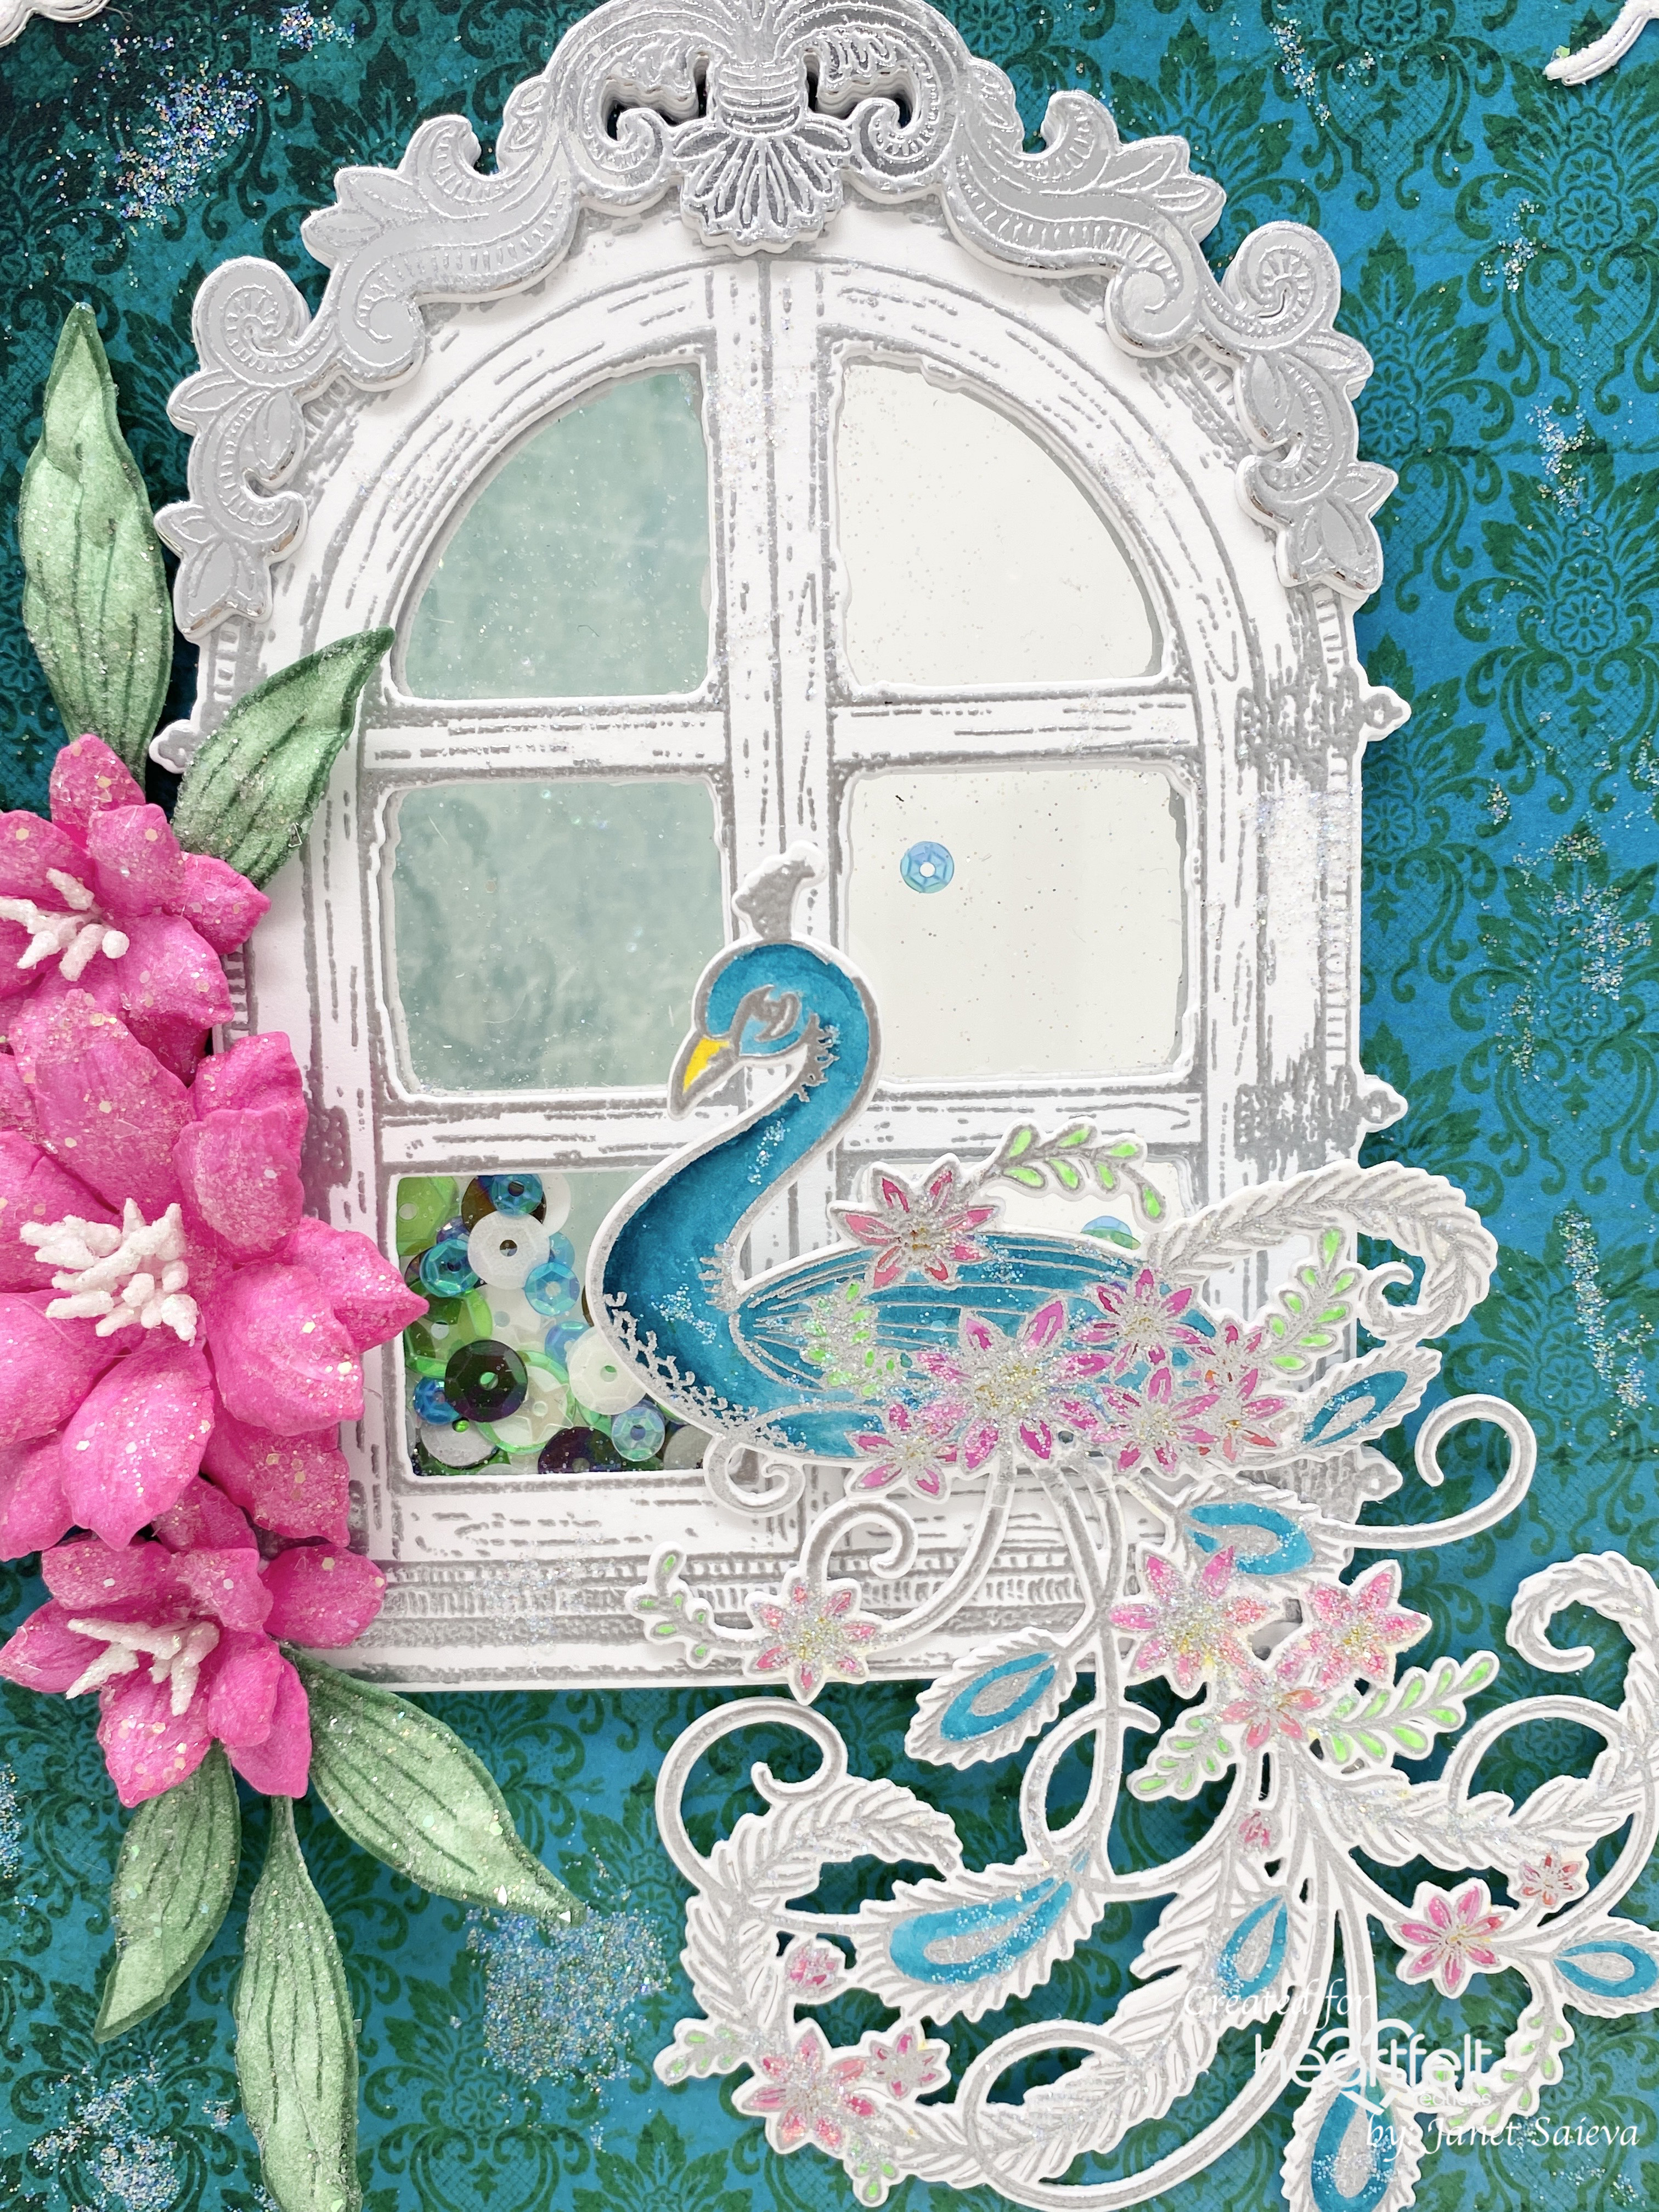
If I was to make myself a birthday card, I would definitely choose the Ornate Peacock Collection. It is so colorful and so full of life (just like me lol).


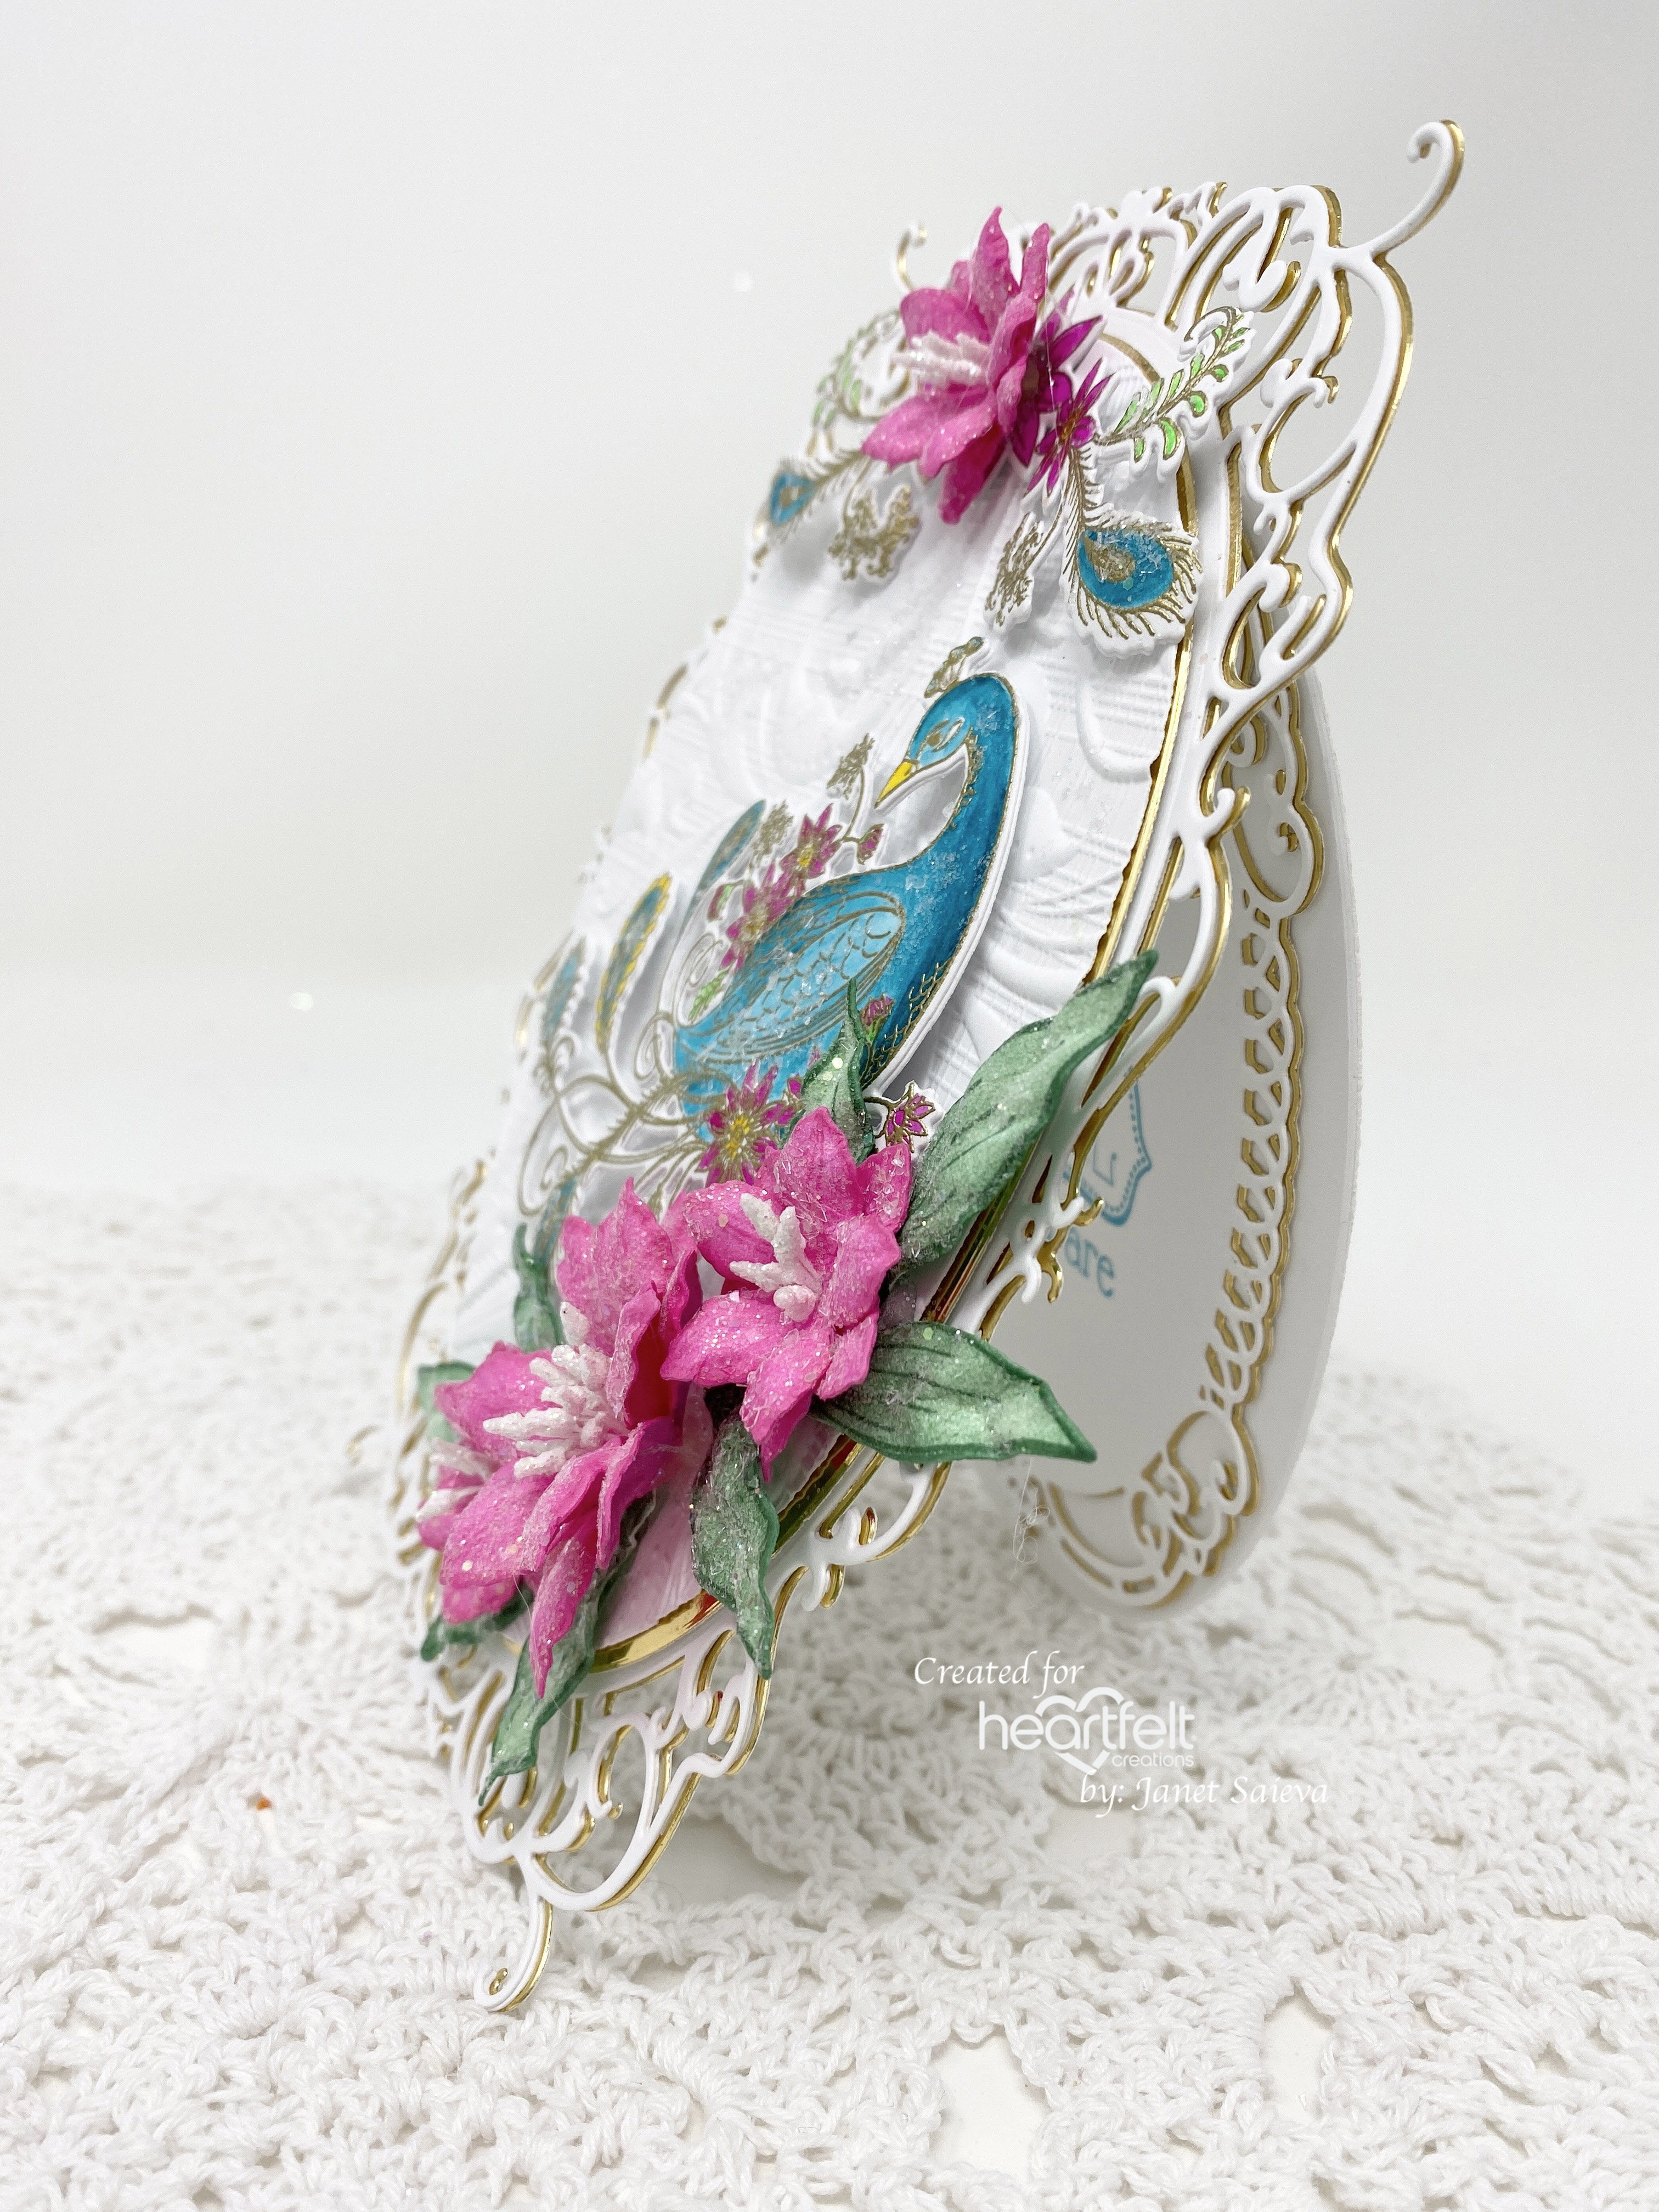
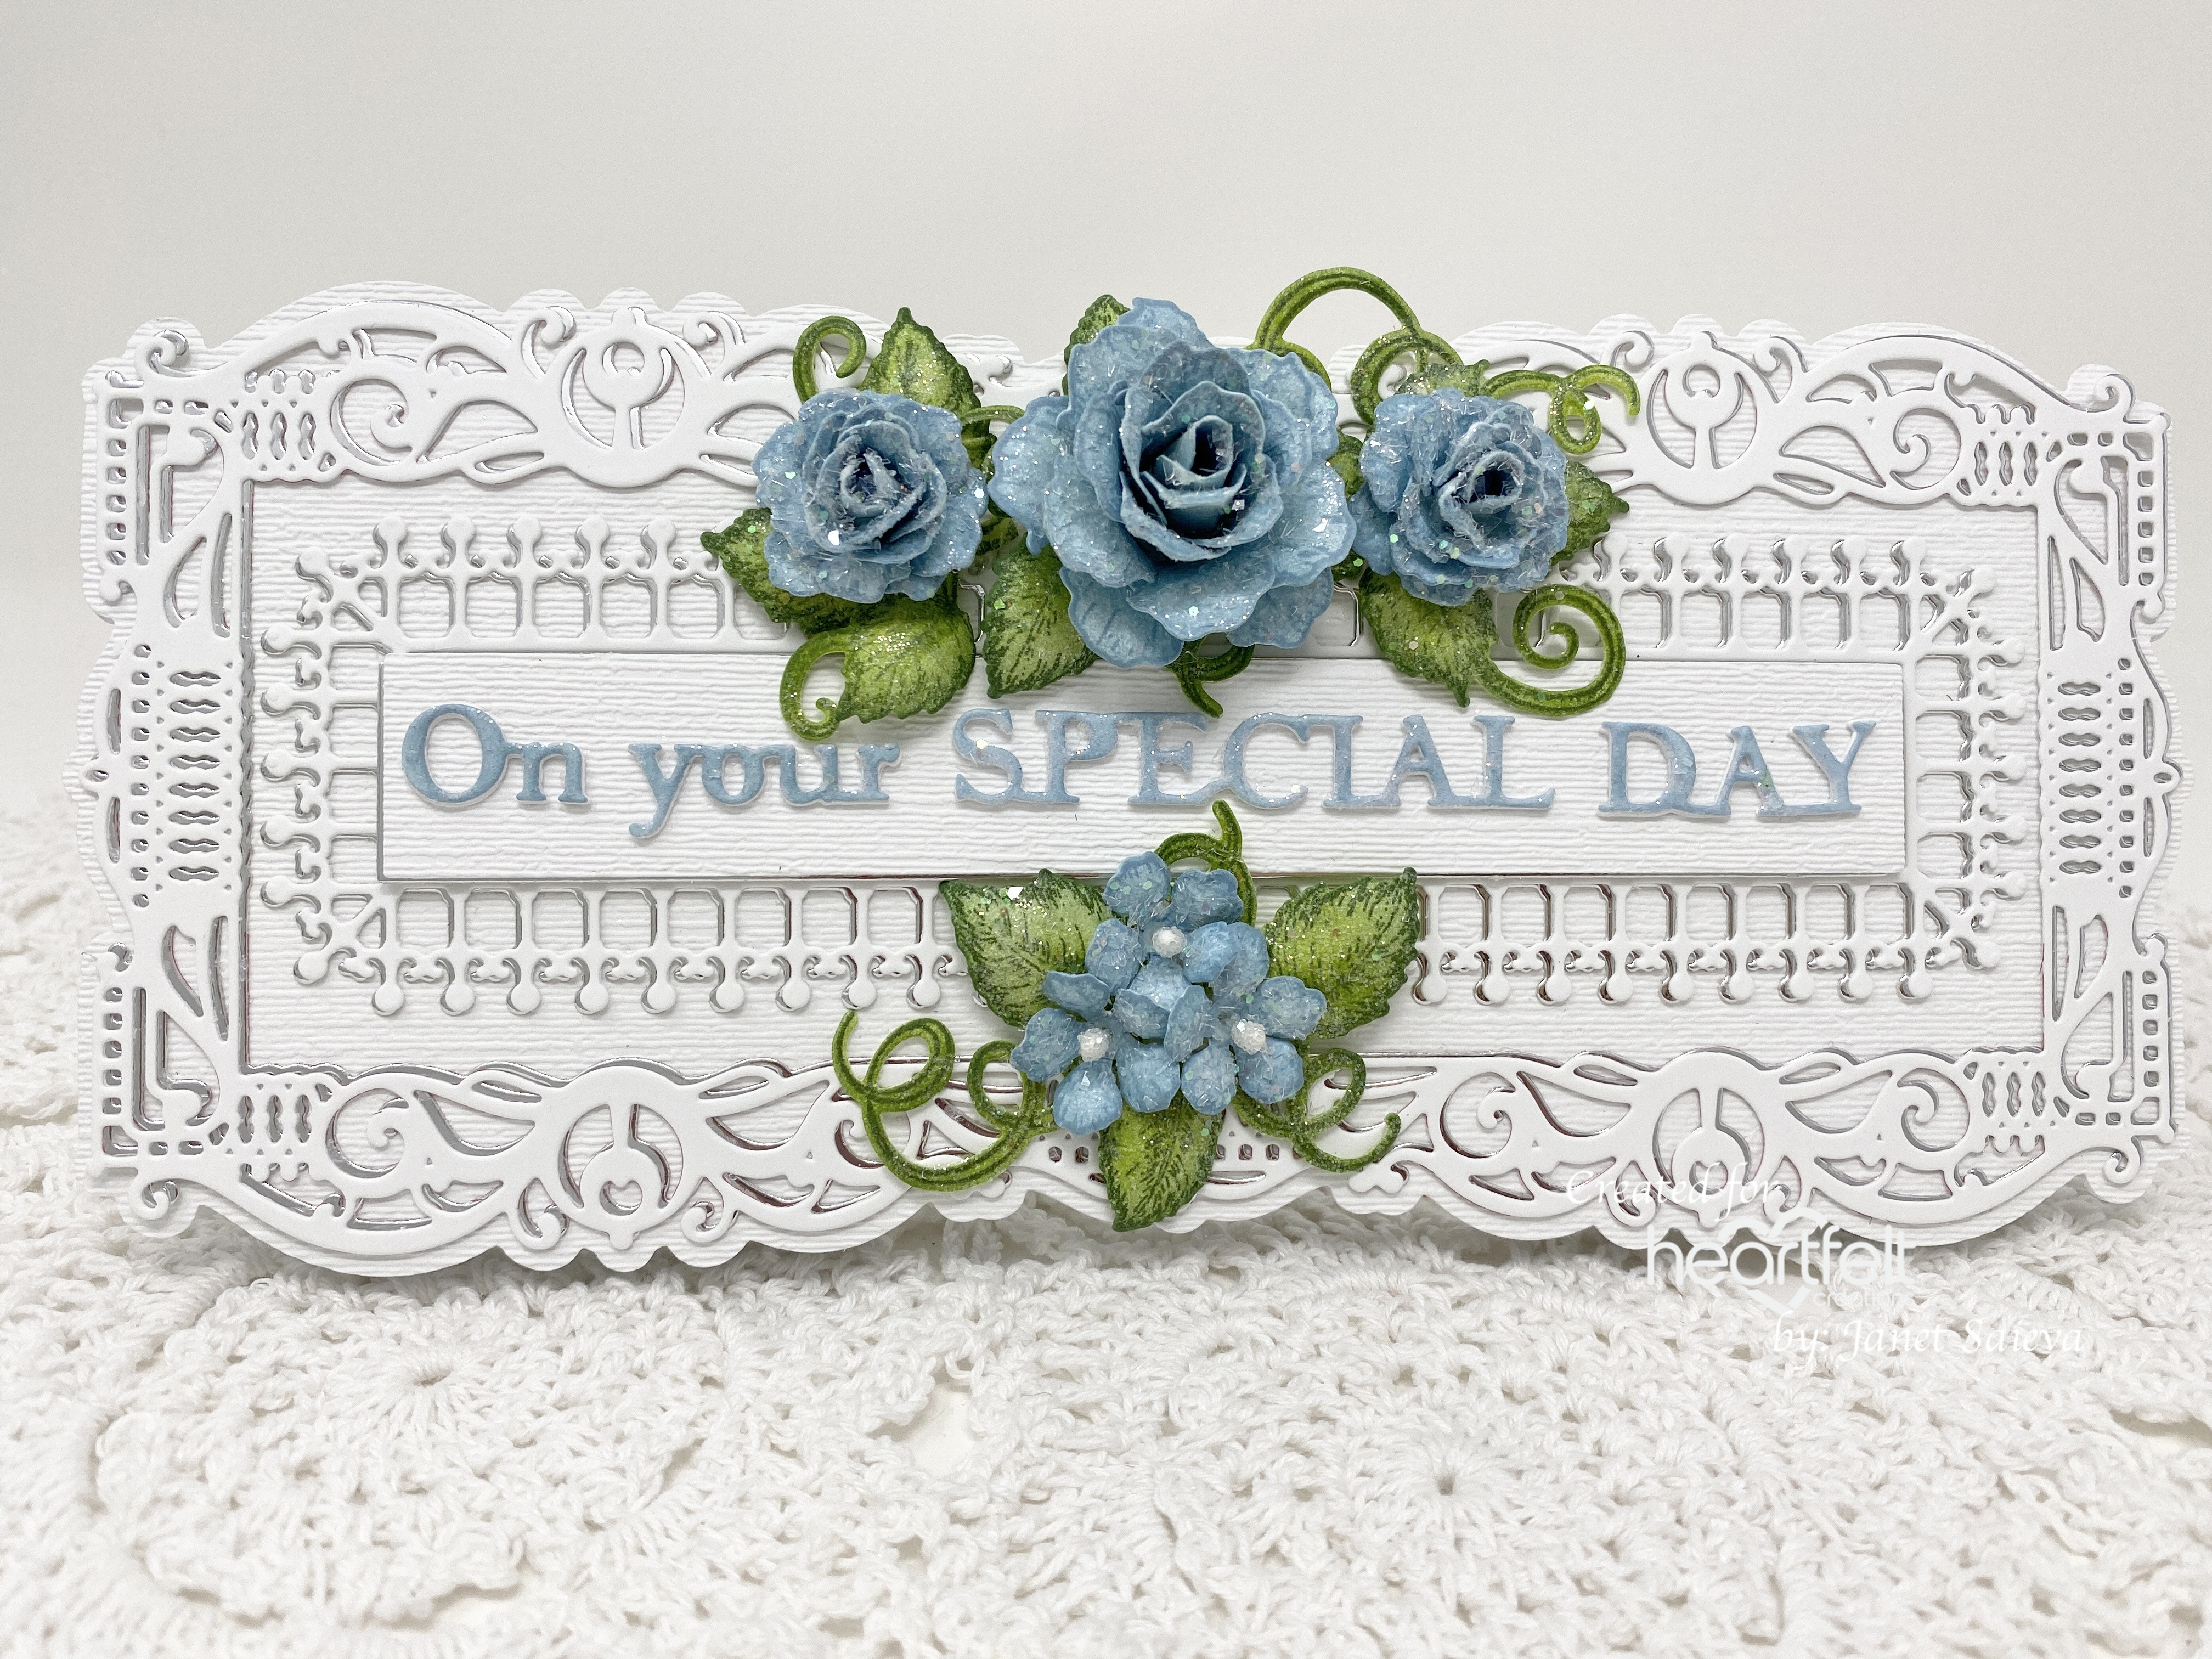
Instructions: Card size is 5 x 7”. Score and fold 5 x 12” Deluxe Flower Shaping Paper at 6” and burnish well. Using the second largest Oval Filigree Frame Die, which is the plain die, place it about 1/2” over the fold and diecut to create the card base. Diecut the largest die from the set 3x, twice from white cardstock and once from Luxe Gold cardstock. Adhere the two white ones together to make a sturdier piece and then adhere to the gold diecut a little offset. Adhere this to the card front. Using the plain oval die, cut 3x, once from white cardstock and twice from Luxe Gold cardstock. Adhere the two gold ovals together slightly offset and adhere to the card front. Place the white oval in an embossing folder, run through the diecutting machine and adhere to the card front. Cut another piece of white cardstock using the plain oval die, trim the top and adhere to the inside of the card. This will make it a little sturdier to balance the heavier card front. Using the third largest Filigree Frame Die, cut 2x, once from white cardstock and once from Luxe Gold cardstock. Stamp the ‘Hope your day is as Special as you are’ on the white diecut using Archival Forget-Me-Not ink, adhere to the gold diecut slightly offset and adhere to the inside of the card. 

Stamp the beautiful peacock and the flourish from Peacock and Posies Cling Stamp set on white watercolor cardstock using VersaMark ink, cover with Ranger Gold Super Fine Detail Embossing Powder and heat set using the Heat It tool. Diecut using the coordinating die and color using Zig Clean Color Real Brush markers – Fl. Green, Yellow, Persian Green and Dark Pink. Diecut each once more from white cardstock and adhere behind the stamped images for stability. Lightly shape the images using the Deluxe Flower Shaping kit. Adhere the images to the card front as shown using dimensional squares and dries clear adhesive.

Stamp the Clematis flowers on Deluxe Flower Shaping Paper using Vibrant Fuchsia ink. Color the fronts and the backs using the same ink, diecut using the coordinating dies and shape using the 3D Clematis Mold. Add additional shaping using the Deluxe Flower Shaping kit. Adhere two petals of the same size together to create each flower and create one large and three small flowers. Pierce the flower centers and add Bridal Bouquet stamens using hot glue. Stamp the Garden Lily leaves on Deluxe Flower Shaping Paper using English Ivy Archival ink, color the fronts and backs with the same color, diecut using the coordinating die, add additional ink to the edges and shape in the 3D Lily mold. Using a paint brush, add dries clear adhesive to the flowers and leaves and sprinkle with Rajni Chawla’s Crystal Clear glitter.

Adhere the flowers and leaves to the bottom right of the Filigree Oval. 

You can find all the products I used on m card in the Heartfelt Creations Gallery. Please be sure to also visit the HC Blog to see all of the absolutely gorgeous projects created by the fabulous design team. 

Thank you so much for stopping by, I really appreciate you!

Till we meet again, please stay safe and be well!

Have a beautiful day!

Crafty Hugs, 🤗🤗🤗 

Janet


Wednesday, February 15, 2023

Heartfelt Creations - Golden Plume

 Hi and welcome!

Wow, what beautiful weather we've been having here on Long Island. I just want to be outside every day. We usually expect snowy cold weather in February but this year it's balmy and beautiful. 

It looks like the peacock on my card is enjoying beautiful weather too. I really love creating shaped cards and this one is so much fun to make. 


Instructions: Card base is 3 7/8 x 5 5/8”. Finished card with the peacock is 5 1/4 x 5 7/8”. Cut white cardstock 2x to 4 x 6”. Add 1” double sided tape to the top of one of the pieces and burnish well. Diecut using the largest Ornate Window Die, score underneath the tape and set aside. Stamp the Ornate window on the other 4 x 6” piece using VersaMark, cover with Ranger Super Fine detail Gold Embossing Powder and heat set using the Heat It tool. Diecut using the coordinating outside die along with the windowpane die to create card front. Diecut a second time from white cardstock and adhere the two together for strength. Using the middle die from the same set, cut clear cardstock and adhere to the back of the window using dries clear adhesive. Cut the journal piece from the Ornate Peacock Paper Collection, sheet 2A, diecut using the outside window die, trim the top, ink the edges with Forget-Me-Not ink, and adhere to the diecut with the tape. Adhere that diecut to the card front to create the shaped card. Stamp the window again on Luxe Gold cardstock using VersaMark, cover with the same gold embossing powder, heat set and diecut using just the window topper die. Diecut 4 more times from white cardstock and adhere the layers together using dries clear adhesive. Adhere to the top of the card front.

Stamp the beautiful Ornate Peacock on white watercolor cardstock using VersaMark ink, cover with Ranger Gold Super Fine Detail Embossing Powder and heat set using the Heat It tool. Diecut using the coordinating die and color using Zig Clean Color Real Brush markers – Fl. Green, Yellow, Persian Green and Dark Pink. Diecut once more from white cardstock and adhere behind the stamped image for stability. Lightly shape using the Deluxe Flower Shaping Kit, seat it on the window and adhere using hot glue. Stamp the flourish from the Peacock and Posies Cling Stamp set on watercolor paper using VersaMark, heat emboss the same as the peacock, diecut using the coordinating, color using the same Zig markers and adhere inside the card so it shows through the window. 

Stamp the Clematis flowers on Deluxe Flower Shaping Paper using Vibrant Fuchsia ink. Color the fronts and the backs using the same ink, diecut using the coordinating dies and shape using the 3D Clematis Mold. Add additional shaping using the Deluxe Flower Shaping kit. Adhere two petals of the same size together to create each flower and create one medium and three small flowers. Pierce the flower centers and add Bridal Bouquet stamens using hot glue. Stamp the Garden Lily leaves on Deluxe Flower Shaping Paper using English Ivy Archival ink, color the fronts and backs with the same color, diecut using the coordinating die, add additional ink to the edges and shape in the 3D Lily mold. Using a paint brush, add dries clear adhesive to the flowers and leaves and sprinkle with Rajni Chawla’s Crystal Clear glitter. Adhere the medium flower and two single leaves to the left bottom of the window. Adhere the three small flowers to the peacock as shown. Try to bunch the three flowers together so that you don’t cover up too much of the gorgeous peacock feathers. 

Stamp the ‘Congrats!’ sentiment from the Celebrate Love Sentiments Cling Stamp set on white cardstock using Archival Forget-Me-Not ink, fussy cut using a small scissor, shape a little with your fingers and adhere above the top left windowpane.

lease check out the Heartfelt Creations Gallery to see all the products used on my card. Also, please be sure to visit the Heartfelt Creations Blog to see all of the magnificent projects created by the fabulous design team.

Thank you so much for stopping by, I really appreciate you. 

Till we meet again, please stay safe be well!

Have a beautiful day!

Crafty Hugs, 🤗🤗🤗

Janet     


Wednesday, February 8, 2023

Heartfelt Creations - Debuting the Ornate Peacock Collection

 Hi and welcome!

Yay! Today we debut the gorgeous Ornate Peacock Collection! 

'Take a stroll through a paper collection straight from a magical garden filled with ornate peacocks and windows, colored in hues of sea blues, vibrant aquas, and summer greens. Decorated with florals, greenery, and of course… ornate peacocks. Combine the stamps, dies, and paper collection to bring these ornate peacocks to life, easier than you thought possible!'

I've created so many cards already with this new collection. It looks like everyone I know will be receiving peacock birthday cards this year lol. 

Here's the first of my cards for Heartfelt Creations.


Instructions: Card size is 6 x 8”. Cut two pieces of white cardstock 6 1/2 x 8” and 6 x 8”. Score and fold the 6 1/2 x 8” piece at 1/2” on the short side. Cut Luxe Silver cardstock 5 7/8 x 7 7/8” and cut sheet 8B from the Ornate Peacock Collection 5 3/4 x 7 3/4”. Ink the edges of the designer paper with Forget-Me-Not Archival ink and adhere the two papers together using dries clear adhesive. Adhere to the 6 1/2 x 8” cardstock using removable tape. Use the middle Ornate Window die to cut an aperture in all three pieces. If it doesn’t cut all the way through, remove the white layer and cut the two layers individually. The first pass through the diecutting machine will leave an indentation so that you will know exactly where to place the die so that everything lines up perfectly. Then, burnish the fold on the 6 1/2 x 8” white cardstock well and adhere to the 6 x 8” white cardstock with dries clear adhesive to create the side fold card base. Adhere the top layer permanently with dries clear adhesive. Cut Luxe Silver cardstock 5 7/8 x 7 7/8” and sheet 4A from the Ornate Peacock Collection 5 3/4 x 6 3/4”, ink the edges with Forget-Me-Not ink, adhere the two together and adhere to the inside of the card. Stamp the ‘Have a Wonderful Birthday’ sentiment from Special Birthday Sentiments Cling Stamp set on white cardstock using Forget-Me-Not ink, diecut using a label die from the Slim Elegant Rectangle Die. Cut a silver label from the same set using a larger die and adhere to the inside bottom of the card.

Stamp the Ornate Window on white cardstock using VersaMark, cover with Ranger Silver Super Fine Detail Embossing Powder and heat set using the heat it tool. Diecut, using the outside Ornate Window Die along with the inside windowpane die. Diecut 8 more times from white cardstock. Diecut clear cardstock using the same die used to cut the aperture, adhere to the back of the stamped window, then adhere the other diecuts together and adhere behind the clear cardstock. Stamp the window again on Luxe Silver cardstock using VersaMark ink, cover with Ranger Silver Superfine Detail Embossing Powder and heat set using the Heat It tool. Diecut just the window topper and then diecut 4 more times from white cardstock. Adhere the diecuts together with the silver on top and adhere to the top of the window on the card front. Open the card and place sequins on the clear cardstock to create the shaker element. Stamp the window two more times using Archival Shadow Gray ink, diecut and adhere the two together back-to-back. Adhere another piece of clear cardstock and adhere over the aperture on the inside of the card using dries clear adhesive. This gives the inside a finished look. 

Stamp the gorgeous Ornate Peacock on white cardstock using VersaMark ink, cover with Ranger Silver Superfine Detail Embossing Powder and heat set using the Heat It tool. Diecut using the coordinating die and color using Zig Clean Color Real Brush markers – Fl. Green, Yellow, Persian Green and Dark Pink. Diecut once more from white cardstock and adhere behind the stamped image for stability. Lightly shape using the Deluxe Flower Shaping Kit, seat it on the window ledge and adhere using dries clear adhesive and dimensional dots. Diecut two flourishes from white and silver cardstocks using the Filigree Accents Die, glitter the white one using Ultrafine Transparent Glitter, adhere the silver behind the white, slightly offset, and adhere to the top corners of the card front. 

Stamp the Clematis flowers on Deluxe Flower Shaping Paper using Vibrant Fuchsia ink. Color the fronts and the backs using the same ink, diecut using the coordinating dies and shape using the 3D Clematis Mold. Add additional shaping using the Deluxe Flower Shaping kit. Adhere two flowers of the same size together to create each flower and create one large and two small flowers. Pierce the flower centers, add Bridal Bouquet stamens using hot glue. Stamp the Garden Lily leaves on Deluxe Flower Shaping Paper using English Ivy Archival ink, color the fronts and backs with the same color, diecut using the coordinating die, add additional ink to the edges and shape in the 3D Lily mold. Using a paint brush, add dries clear adhesive to the flowers and leaves and sprinkle with Rajni Chawla’s Crystal Clear glitter.

Adhere the flowers and leaves to the left side of the window using hot glue. To add some extra sparkle, sponge some dries clear adhesive randomly on the stamped images, the card front and the inside of the card and sprinkle with Crystal Ultrafine Transparent Glitter. 

Please visit the Heartfelt Creations Gallery to get the list of products used for this card. Be sure to also visit the Heartfelt Creations Blog to see all of the stunning projects created by the fabulous Design Team. 

Thank you so much for stopping by, I really appreciate you!

Till we meet again, please stay safe and be well. 

Have a beautiful day!

Crafty Hugs, 🤗🤗🤗

Janet


Wednesday, February 1, 2023

Heartfelt Creations - Ornate Special Day Roses

 Hi and welcome!

How in the world did we get to February 1st already? I guess time flies when you're having fun lol.

My card today would be a great wedding card. What do you think?


Instructions: Card Size is 9 x 4”. Score and fold 9 1/2 x 8 1/2” white cardstock at 4 1/4” on the short side, Place the largest Slim Ornate Rectangle Die about 3/8” over the fold and diecut to create tent fold shaped card base. Cut two more times, trim the top of one to fit inside the card. Stamp the ‘Thinking of you Today’ sentiment from the Elegant Rose Sentiment Cling Stamp Set on this one using Tuxedo Black ink and color using Stampin’ Blend markers. Dry emboss the second white diecut using a textured embossing folder. I used Stampin’ Up Subtle Embossing Folder which has been retired. Adhere to the card front using dries clear adhesive.

Using the decorative Slim Ornate Rectangle Dies, cut from white cardstock and Luxe Silver cardstock. Adhere the white decorative diecuts on top of the silver decorative diecuts, slightly offset so that it creates a beautiful glimmery shadow. Adhere to the card front using dries clear adhesive. Diecut the ‘On your Special Day’ sentiment from the same set 3x, adhere together for dimension and color using Seaside Spray ink and a blending brush. Brush with dries clear adhesive and sprinkle with glitter. Dry emboss the long white rectangle diecut, adhere to the long silver rectangle diecut, slightly offset, and adhere the sentiment to the rectangle using dries clear adhesive. When dry, adhere the rectangle to the center of the card using dimensional tape. 

Stamp the Classic Roses on Deluxe flower Shaping Paper using Seaside Spray ink, diecut with the coordinating dies, color the front and the back using the same ink and shape using the Groove Golf Tools. Use four same size flowers to create each rose. Using the Groove Golf Tool, pierce a hold in the middle of the smallest flowers and insert an Assorted Bead Stamen – Medium. Using a paint brush, cover the flowers with watered down dries clear adhesive and sprinkle with Rajni Chawla’s Crystal Clear glitter.

Stamp the Classic Rose and Leafy Accents leaves on Deluxe Flower Shaping Paper using Archival Olive ink, color using the same ink along with Leaf Green ink and diecut using the coordinating dies. Add additional color to the edges of the leaves using the olive ink. Shape using the Deluxe Flower Shaping Kit. Using a paint brush, cover the leaves with watered down dries clear adhesive and sprinkle with Rajni Chawla’s Crystal Clear glitter.

Adhere the flowers and leaves to the card front using hot glue. 

See all the products I used on my card by visiting the Heartfelt Creations Gallery. Also, please be sure to visit the Heartfelt Creations Blog to see all of the absolutely gorgeous projects created by the fabulous Design Team. 

Thank you so much for stopping by, I really appreciate you. 

Till we meet again, please stay safe and be well.

Have a beautiful day!

Crafty Hugs, 🤗🤗🤗

Janet