Wednesday, May 25, 2022

Heartfelt Creations - Pink Poppy Floral

 Hi and welcome!

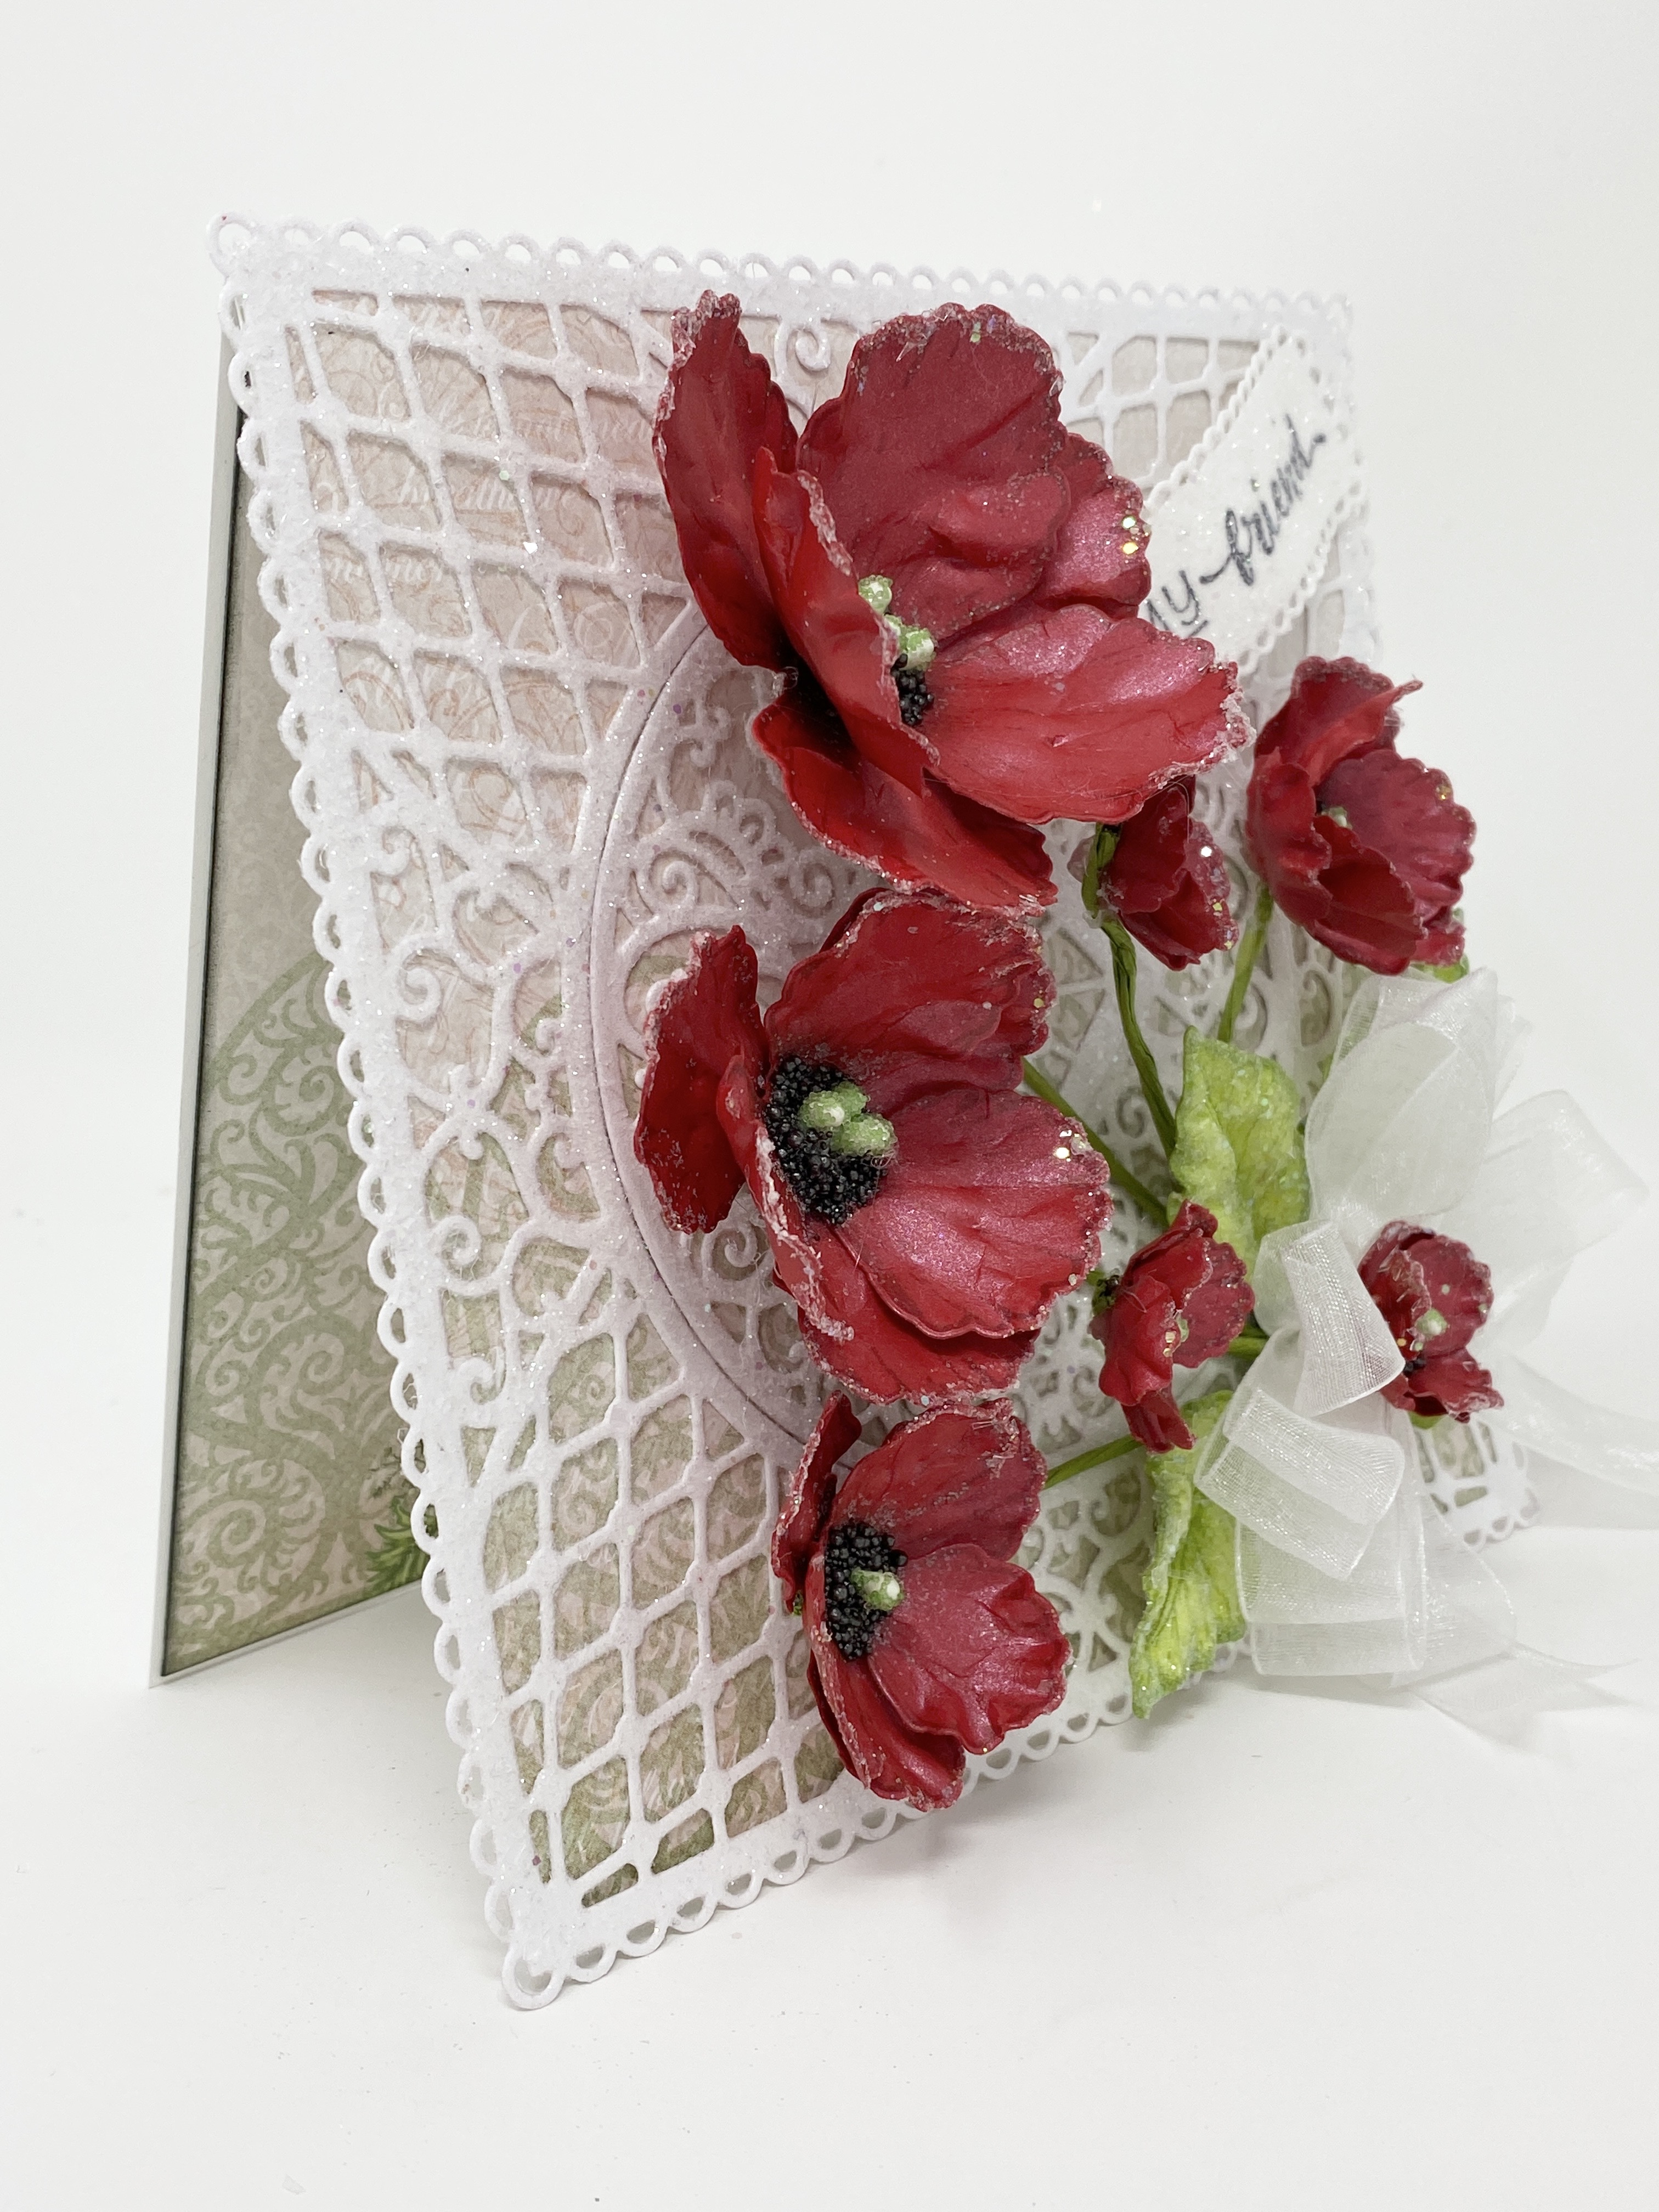
Today I gave the Poppy a totally different look. I love how versatile this flower is!


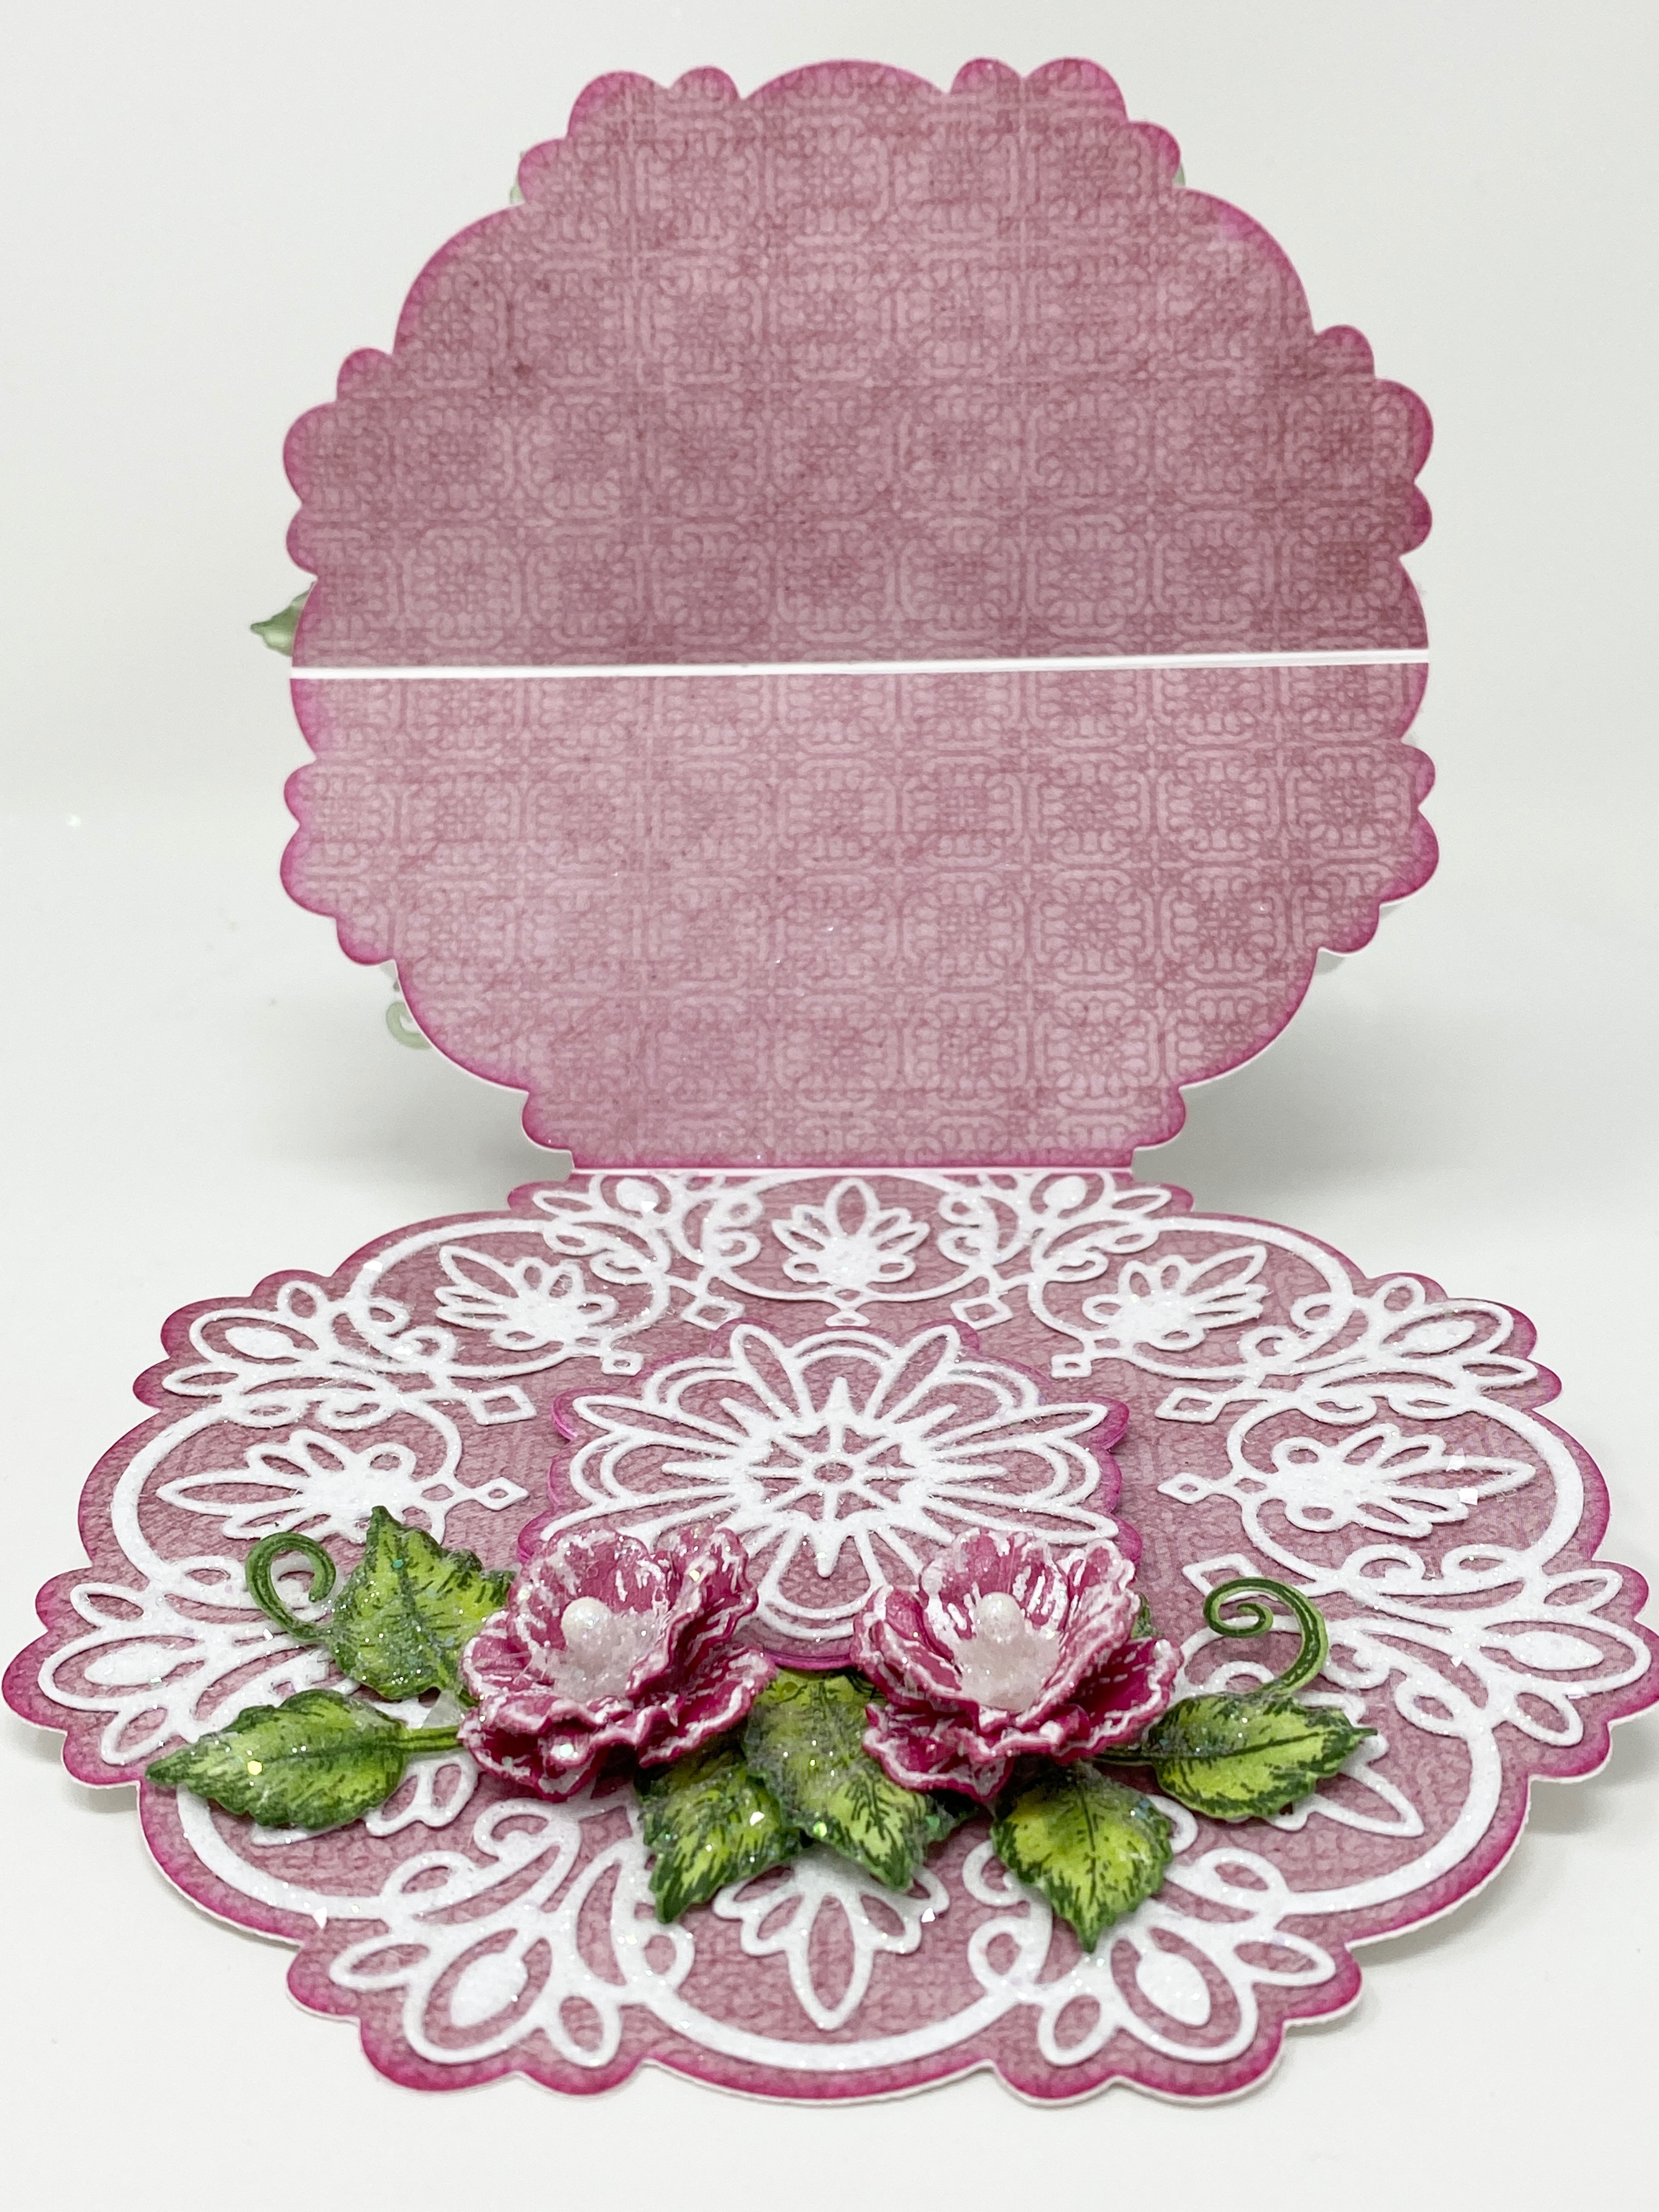
Instructions: Card size is 5 3/4 x 5 3/4”. Using the largest Simply Elegant Centerpiece Die, cut just above the fold of a white Deluxe flower Shaping Paper 6 x 6” tent fold card base to create shaped card. Score and fold the front of the card at the midway point to create easel. Using the same die, cut once from white card stock and three times from Moments in Time Paper Collection, sheet 9B. Cut one of the panels in half and trim to fit the inside top. Trim the second panel at the top to fit the inside bottom. Ink the edges of all three using Vibrant Fuchsia ink and adhere the full one to the white diecut then adhere to the bottom of the folded card base. Adhere the other two to the inside.

Using the decorative Simply Elegant Centerpiece Die, cut two times from white cardstock. Diecut the middle shadow piece one time from designer paper and two times from white cardstock, ink the edges with Vibrant Fuchsia ink and adhere together. Sponge all of the decorative dies with dries clear adhesive and sprinkle with Rajni Chawla’s Crystal Clear glitter. When dry, adhere the two large diecuts to the card base as pictured. Adhere the decorative middle diecut to the shadow diecut and adhere to the center of the bottom using 3D squares. This creates the easel stop. Adhere the other middle diecut to the card front.

Using the Wild Poppy Cling Stamp set, stamp the Wild Poppies on dark pink pearlized cardstock using VersaColor Pigment Ink Pad – White, cover with WOW Sparkling Snow Embossing Glitter and heat set using the Heat It Tool. Diecut using the coordinating dies and shape face down in the 3D Wild Poppy Mold. Adhere three flowers together offset to create the flowers. Add dries white adhesive to the flower centers and cover with Rajni Chawla’s Frosting Powder. When the flower centers are completely dry, pierce the centers using the Groove Golf Tool and insert pearl Rose Hip stamens in the larger flowers that have been covered in dries clear adhesive and then dipped in Crystal Ultrafine Transparent glitter. For the two extra small flowers, use white Pastel Pearl Stamens – Medium that have also been dipped in glitter. Secure the stamens with hot glue.

Stamp the Leafy Accents leaves on Deluxe Flower Shaping Paper using Archival Olive ink, color using Olive and Leaf Green inks, diecut using the coordinating dies, ink the edges with Olive ink and shape in the 3D Leafy Accents mold.

Sponge the flowers and leaves with dries clear adhesive and sprinkle with Rajni Chawla’s Crystal Clear glitter. Adhere to the card front and base using hot glue.

Stamp the sentiment ‘Happy Birthday’ from the Special Birthday Sentiments Cling Stamp set on Flowerite vellum using Vibrant Fuchsia ink and die cut using the banner die from the Arrows and Banner Die set. Adhere to the card front using hot glue.

Check out the Heartfelt Creations Gallery for a complete list of products used on this project.

Please be sure to also visit the Heartfelt Creations Blog to see all of the gorgeous projects created by the fabulous Design Team.

Thank you so much for stopping by, I really appreciate you.

Till we meet again, please stay safe and be well.

Have a beautiful day!!!

Crafty Hugs, 🤗🤗🤗

Janet


Wednesday, May 18, 2022

Heartfelt Creations - Remember Poppy

 Welcome and Happy Wednesday!!!

Today's card is a very simple one that will fit in an ordinary envelope if you leave the sentiment flat instead of shaping it as I did. 


Instructions: Card size is 5 x 7”. Score and fold 10 x 7” black cardstock at 5” on the long side to create side fold card base. Cut sheet 12B of the Wild Poppy Paper Collection 2x to 4 7/8 x 6 7/8”, ink the edges using Distress Oxide Black Soot ink and adhere one to the inside of the card and one to the card front.

Using the third largest Fancy Classic Oval Frame Die, cut 2x from black cardstock. Using the plain oval die from the set, cut out the center of one of the black diecuts. Save the center for the card front. Use the same die to cut out a white oval, stamp the sentiment ‘I will never forget this day’ from the Today’s Quotes Cling Stamp Set using Memento Tuxedo Black ink. Adhere this black diecut and the stamped white oval to the inside of the card. Using the plain oval die again cut 2x from black cardstock, once plain and once combined with the decorative oval die. Adhere the plain black oval diecuts behind the decorative oval diecut for dimension and then adhere to large decorative diecut using dimensional squares. Adhere to the card front using dries clear adhesive.

Stamp the image from the Wild Poppy Bouquet Cling Stamp on white cardstock using Memento Tuxedo Black ink 2x. Color one image completely using Stampin Blend markers Real Red Light and Dark, Granny Apple Green Light and Dark and Smokey Slate Light and Dark. Just color the flower on the second image. Diecut the full image on one and just the flower on the other using the coordinating dies, diecut again from white cardstock, adhere behind the stamped images for strength and lightly shape using the Deluxe Flower Shaping tools. Spray the images with Sheer Shimmer Craft Spray – Sparkle. Adhere the second flower on the full image using hot glue. Adhere to the card front using dimensional squares and hot glue.

Stamp the sentiment ‘Remember’ from the Today’s Quotes Cling Stamp set on white cardstock using Tuxedo Black ink. Cover the words ‘Moments to’ with a post it note when inking the stamp then remove the post it to stamp just the word ‘Remember’. Diecut using the Ticket and Tags Die, shape with fingers and adhere as shown using hot glue.

Please visit the Heartfelt Creations Gallery to find out what products I used for this project. 

Also, please be sure to visit the Heartfelt Creations Blog to see all of the gorgeous projects created by the fabulous design team.

Thank you so much for stopping by!

Until we meet again, please stay safe and be well!

Have a beautiful day!

Crafty Hugs, 🤗🤗🤗

Janet


Wednesday, May 11, 2022

Heartfelt Creations - Debuting the Wild Poppy

 Happy Wednesday and welcome to my blog!

Today we're debuting the gorgeous Wild Poppy Collection!

"Do you feel limited by your flower sizes and selection and find yourself wanting to create a variety of flower sizes quickly and easily but don't know where to get started? Maximize your creativity with the versatility of the Wild Poppy Collection! Stamp, die cut, and shape your elegant floral arrangements like the experts! Beginners to advanced crafters will have all they need to create stunning florals for all occasions!"

I used the stems for the first time with this card and I just love them.


Instructions: Card size is 6 x 6”. Score and fold 11 1/2 x 5 3/4” Deluxe Flower Shaping Paper at 5 3/4” to create tent fold card base. Using the bottom half of sheet 5A from the Wild Poppy Paper Collection, cut the left side to 5 3/4 x 5 3/4” and adhere to the front of the card base using dries clear adhesive. Cut the right side of the paper to 5 5/8 x 5 5/8”, ink the edges with Distress Oxide Black Soot ink, Stamp the sentiment ‘I miss you’ from the For My Friend Cling Stamp set using Archival Jet Black ink. Adhere to the inside of card.

Using the Courtyard Elegance Die, cut from white cardstock, sponge with dries clear adhesive and cover with Rajni Chawla’s Crystal Clear glitter. When dry, adhere to the card front using dries clear adhesive. Stamp the sentiment ‘For My Friend’ from the Just For You Sentiments Cling Stamp set on white cardstock, diecut using the eyelet die from the Ticket and Tags Die set. Sponge with dries clear adhesive and cover with Crystal Clear Glitter. When dry, shape and adhere to the to right of the card front.

Using the Wild Poppy Cling Stamp set, stamp the Wild Poppies on red metallic card stock using Archival Mulberry ink. Diecut using the coordinating dies and shape in the 3D Wild Poppy Mold. Adhere two flowers together offset to create the flowers, pierce the centers using the Groove Golf Tool and add three green Pastel Bead Stamens – Medium to the center of the two largest flowers and add 1 green stamen to the two smaller flowers. Add dries clear adhesive around the stamens and sprinkle with Power Outage prills. Make a total of 7 flowers: 1 large, I medium, 2 small and 3 extra small. Remove one of the smallest stems from the EZ Stem Floral Wire and adhere all but one of the extra small flowers to the floral stems using hot glue. Adhere the bouquet to the card front using hot glue.

Stamp the Sweet Pea leaves in Leaf Green ink and color using the same ink. Diecut using the coordinating die and add more ink around the edges. Sponge with dries clear adhesive and sprinkle with Rajni Chawla’s Crystal Clear glitter. Adhere three of the large leaves to the base of the floral stems.

Make a multiloop bow from sheer white ribbon and adhere over the leaves. Adhere the last extra small poppy to the center of the bow using hot glue. Using a sponge, add a little dries clear adhesive just to the very edges of the poppies and sprinkle with a little crystal clear glitter.

All the products used on this project can be found in the Heartfelt Creations Gallery.

Please be sure to visit the Heartfelt Creations Blog to see all of the absolutely gorgeous projects created by the fabulous Design Team.

Thank you so much for taking the time to stop by, I really appreciate you!

Till we meet again, please stay safe, be well and have a beautiful day!

Crafty Hugs, 🤗🤗🤗

Janet


Wednesday, May 4, 2022

Heartfelt Creations - Birthday Glitter

Hi and welcome!

Happy May!!!

Today I have a quick and easy A2 card using the Decorative Dragonfly Collection and the French Courtyard Die that will fit in a regular sized envelope for mailing.


Instructions: Card size is 5 1/2 x 4 1/4”. Score and fold white cardstock 8 1/2 x 5 1/2” at 4 1/4” to create top fold card base. Cut Luxe Silver Cardstock x2 - 5 3/8 x 4 1/8” and cut Decorative Dragonfly Paper Collection sheet 3A x2 – 5 1/4 x 4”. Ink the edges of the designer papers with Distress Oxide Wilted Violet ink, adhere to the silver layers and adhere one to the inside of the card using dries clear adhesive and adhere one to the card front using dimensional tape. Stamp the sentiment ‘To the world you may be one person but to me you are the world' on the inside.

Using the French Courtyard Die, cut the middle dies from white cardstock and Luxe Silver cardstock. Sponge the white diecut with dries clear adhesive and cover with Rajni Chawla’s Crystal Clear glitter. When dry, adhere the two diecuts together, slightly offset, and adhere to the card front.

Stamp the Decorative Dragonfly on white cardstock using VersaMark, cover with Ranger Superfine Detail Silver Embossing Powder, heat set and diecut using the coordinating die. Stamp the dragonfly again on vellum using Frost White ink, cover with WOW Metallic Silver Embossing Glitter. Color the back using Wilted Violet and Picked Rasperry Distress Oxide inks and diecut using the coordinating die. Adhere the vellum dragonfly on the white diecut dragonfly by adding glue just to the bodies. You want to keep the wings free. Bend the wings up to give the appearance of flight. Adhere to the card front. Sponge with dries clear adhesive and cover with Rajni’s Crystal Clear glitter.

Add extra sparkle to the card, inside and out, by dabbing randomly with dries clear adhesive and sprinkling with Crystal Ultrafine Transparent Glitter.

Please visit the Heartfelt Creations Gallery for a list of all the products used on this project.

Also, please be sure to visit the Heartfelt Creations Blog to see all of the absolutely gorgeous projects created by the fabulous design team.

Thank you so much for stopping by!

Till we meet again, please stay safe and be well!

Have a beautiful day!

Crafty Hugs, 🤗🤗🤗

Janet