Wednesday, August 31, 2022

Heartfelt Creations - Sparkling Silver Angel

Hi and welcome to my blog!

Wow! I can't believe that tomorrow is September 1st. Where has the summer gone??? it just flew by so quickly!

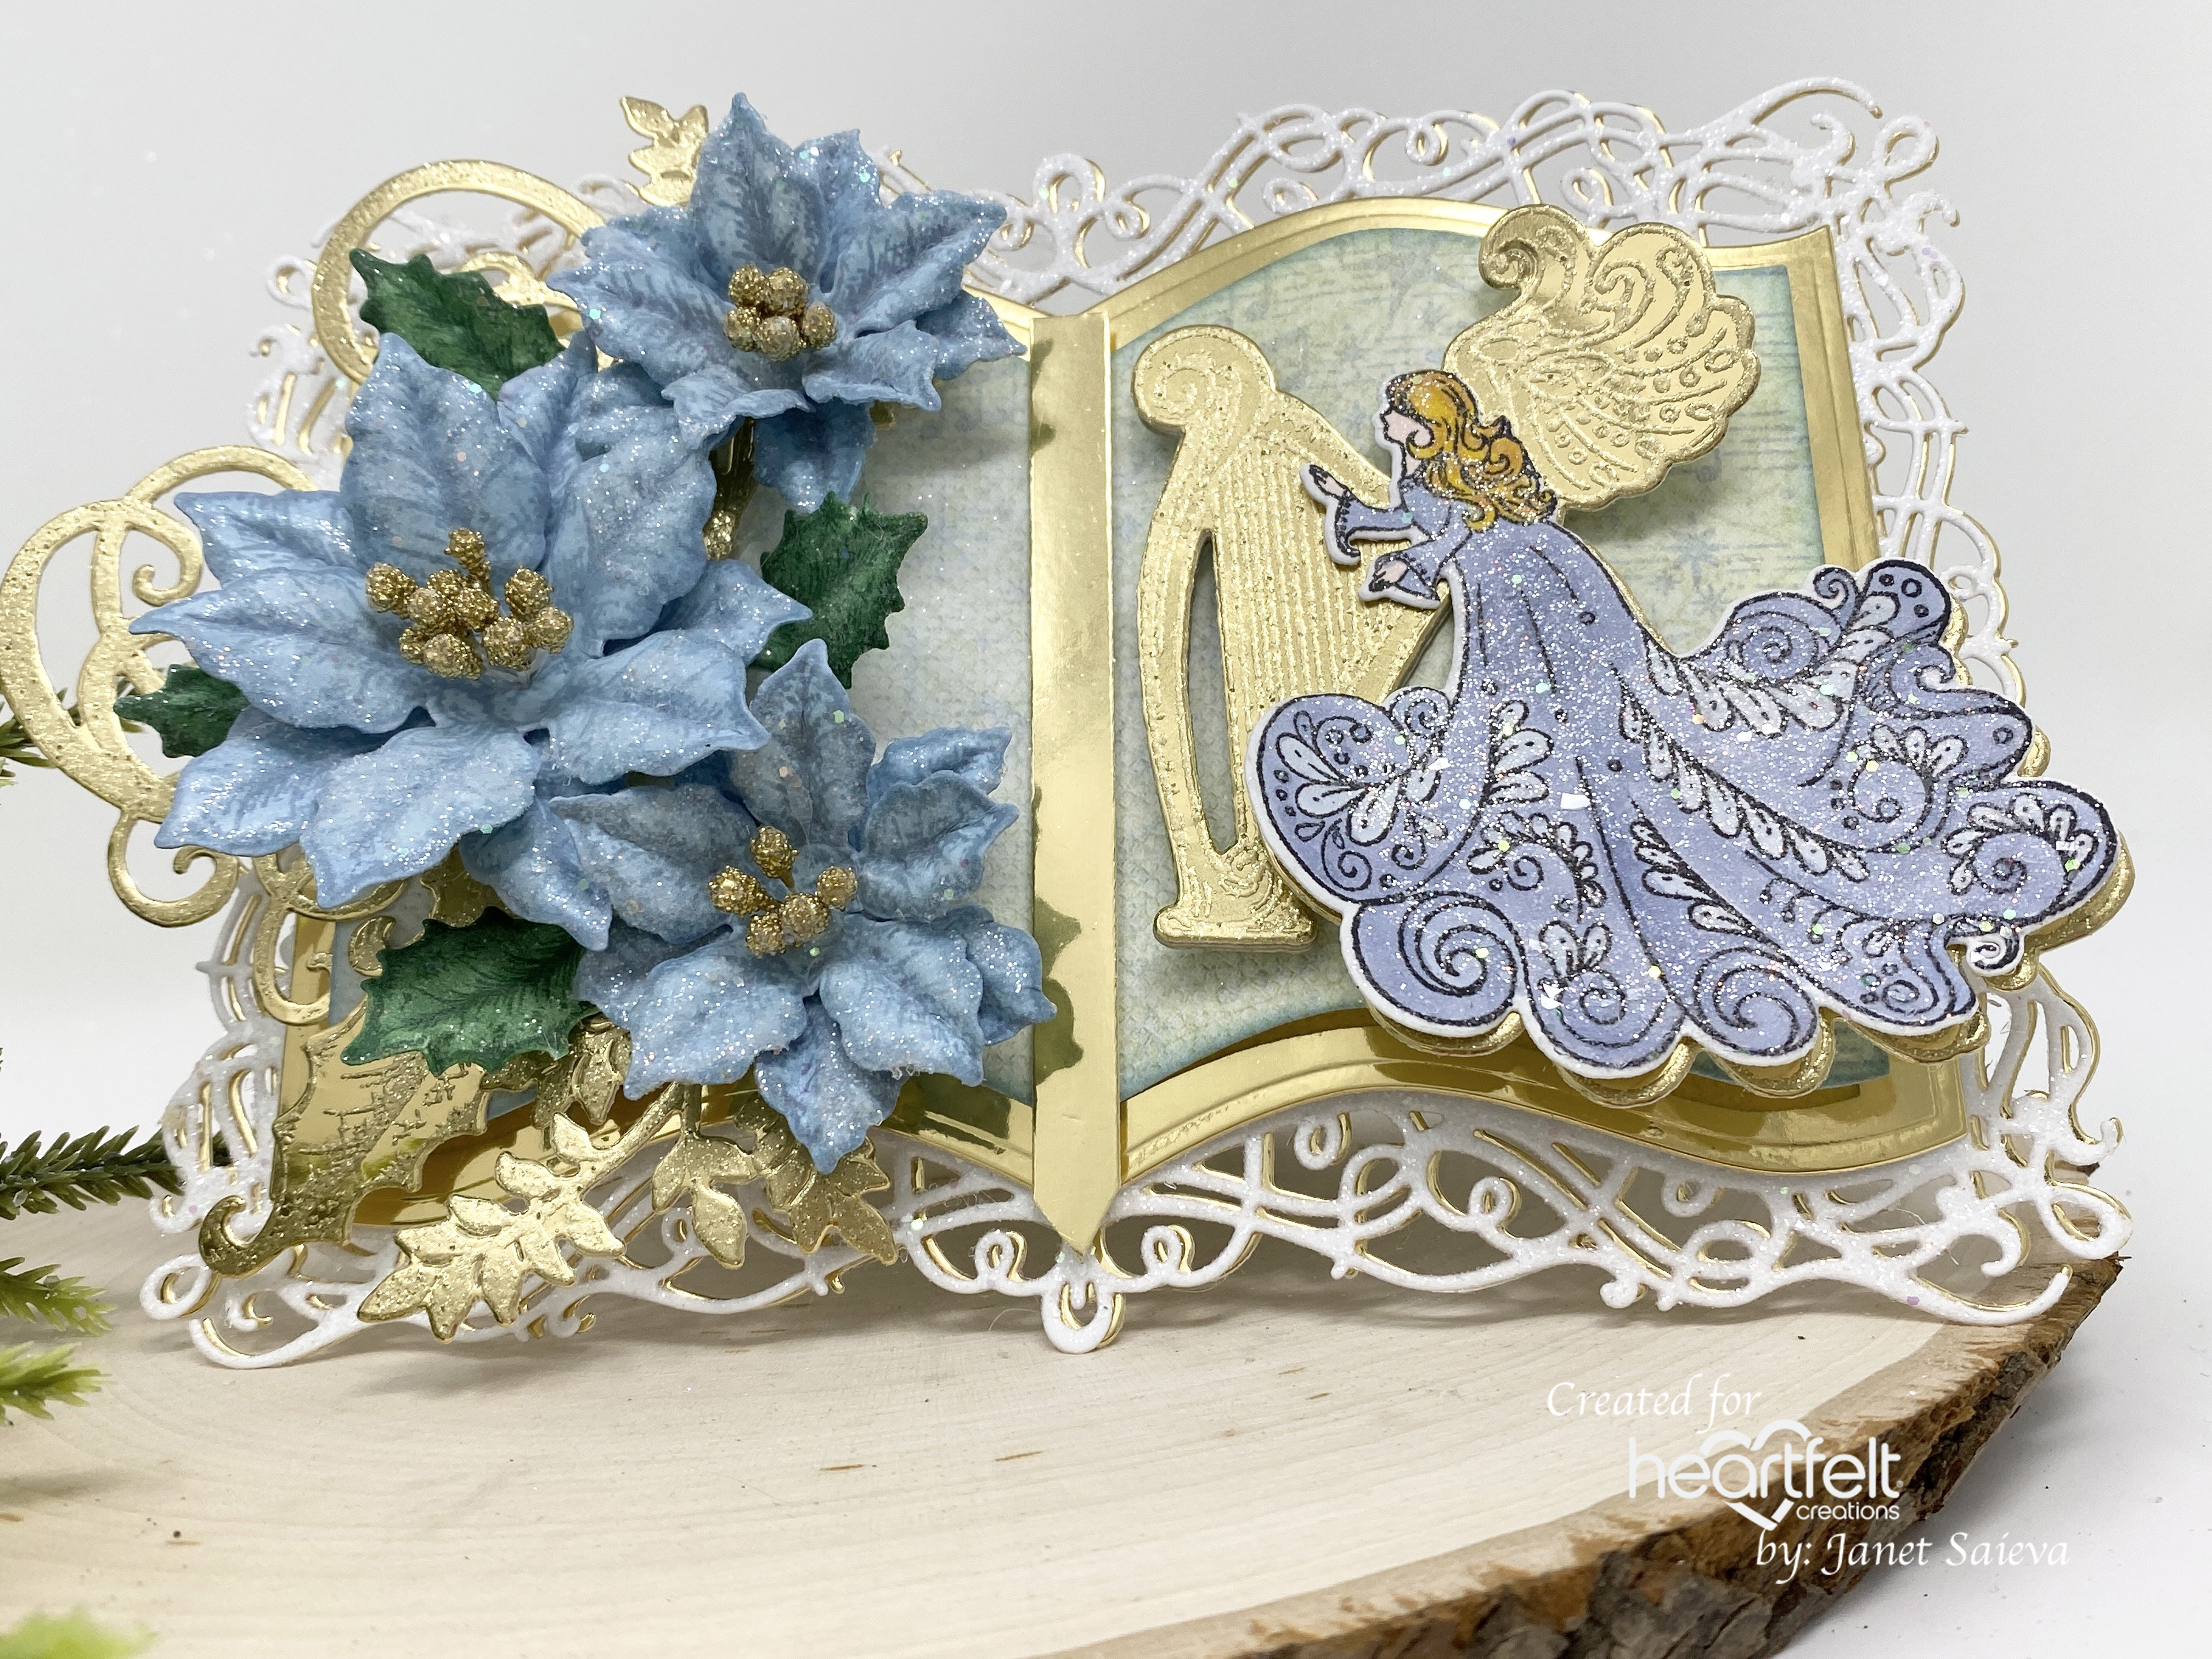
OK, let's just skip right to Christmas. 😁 I used the Joyous Noel Collection again to create today's card. It's very sparkly lol.


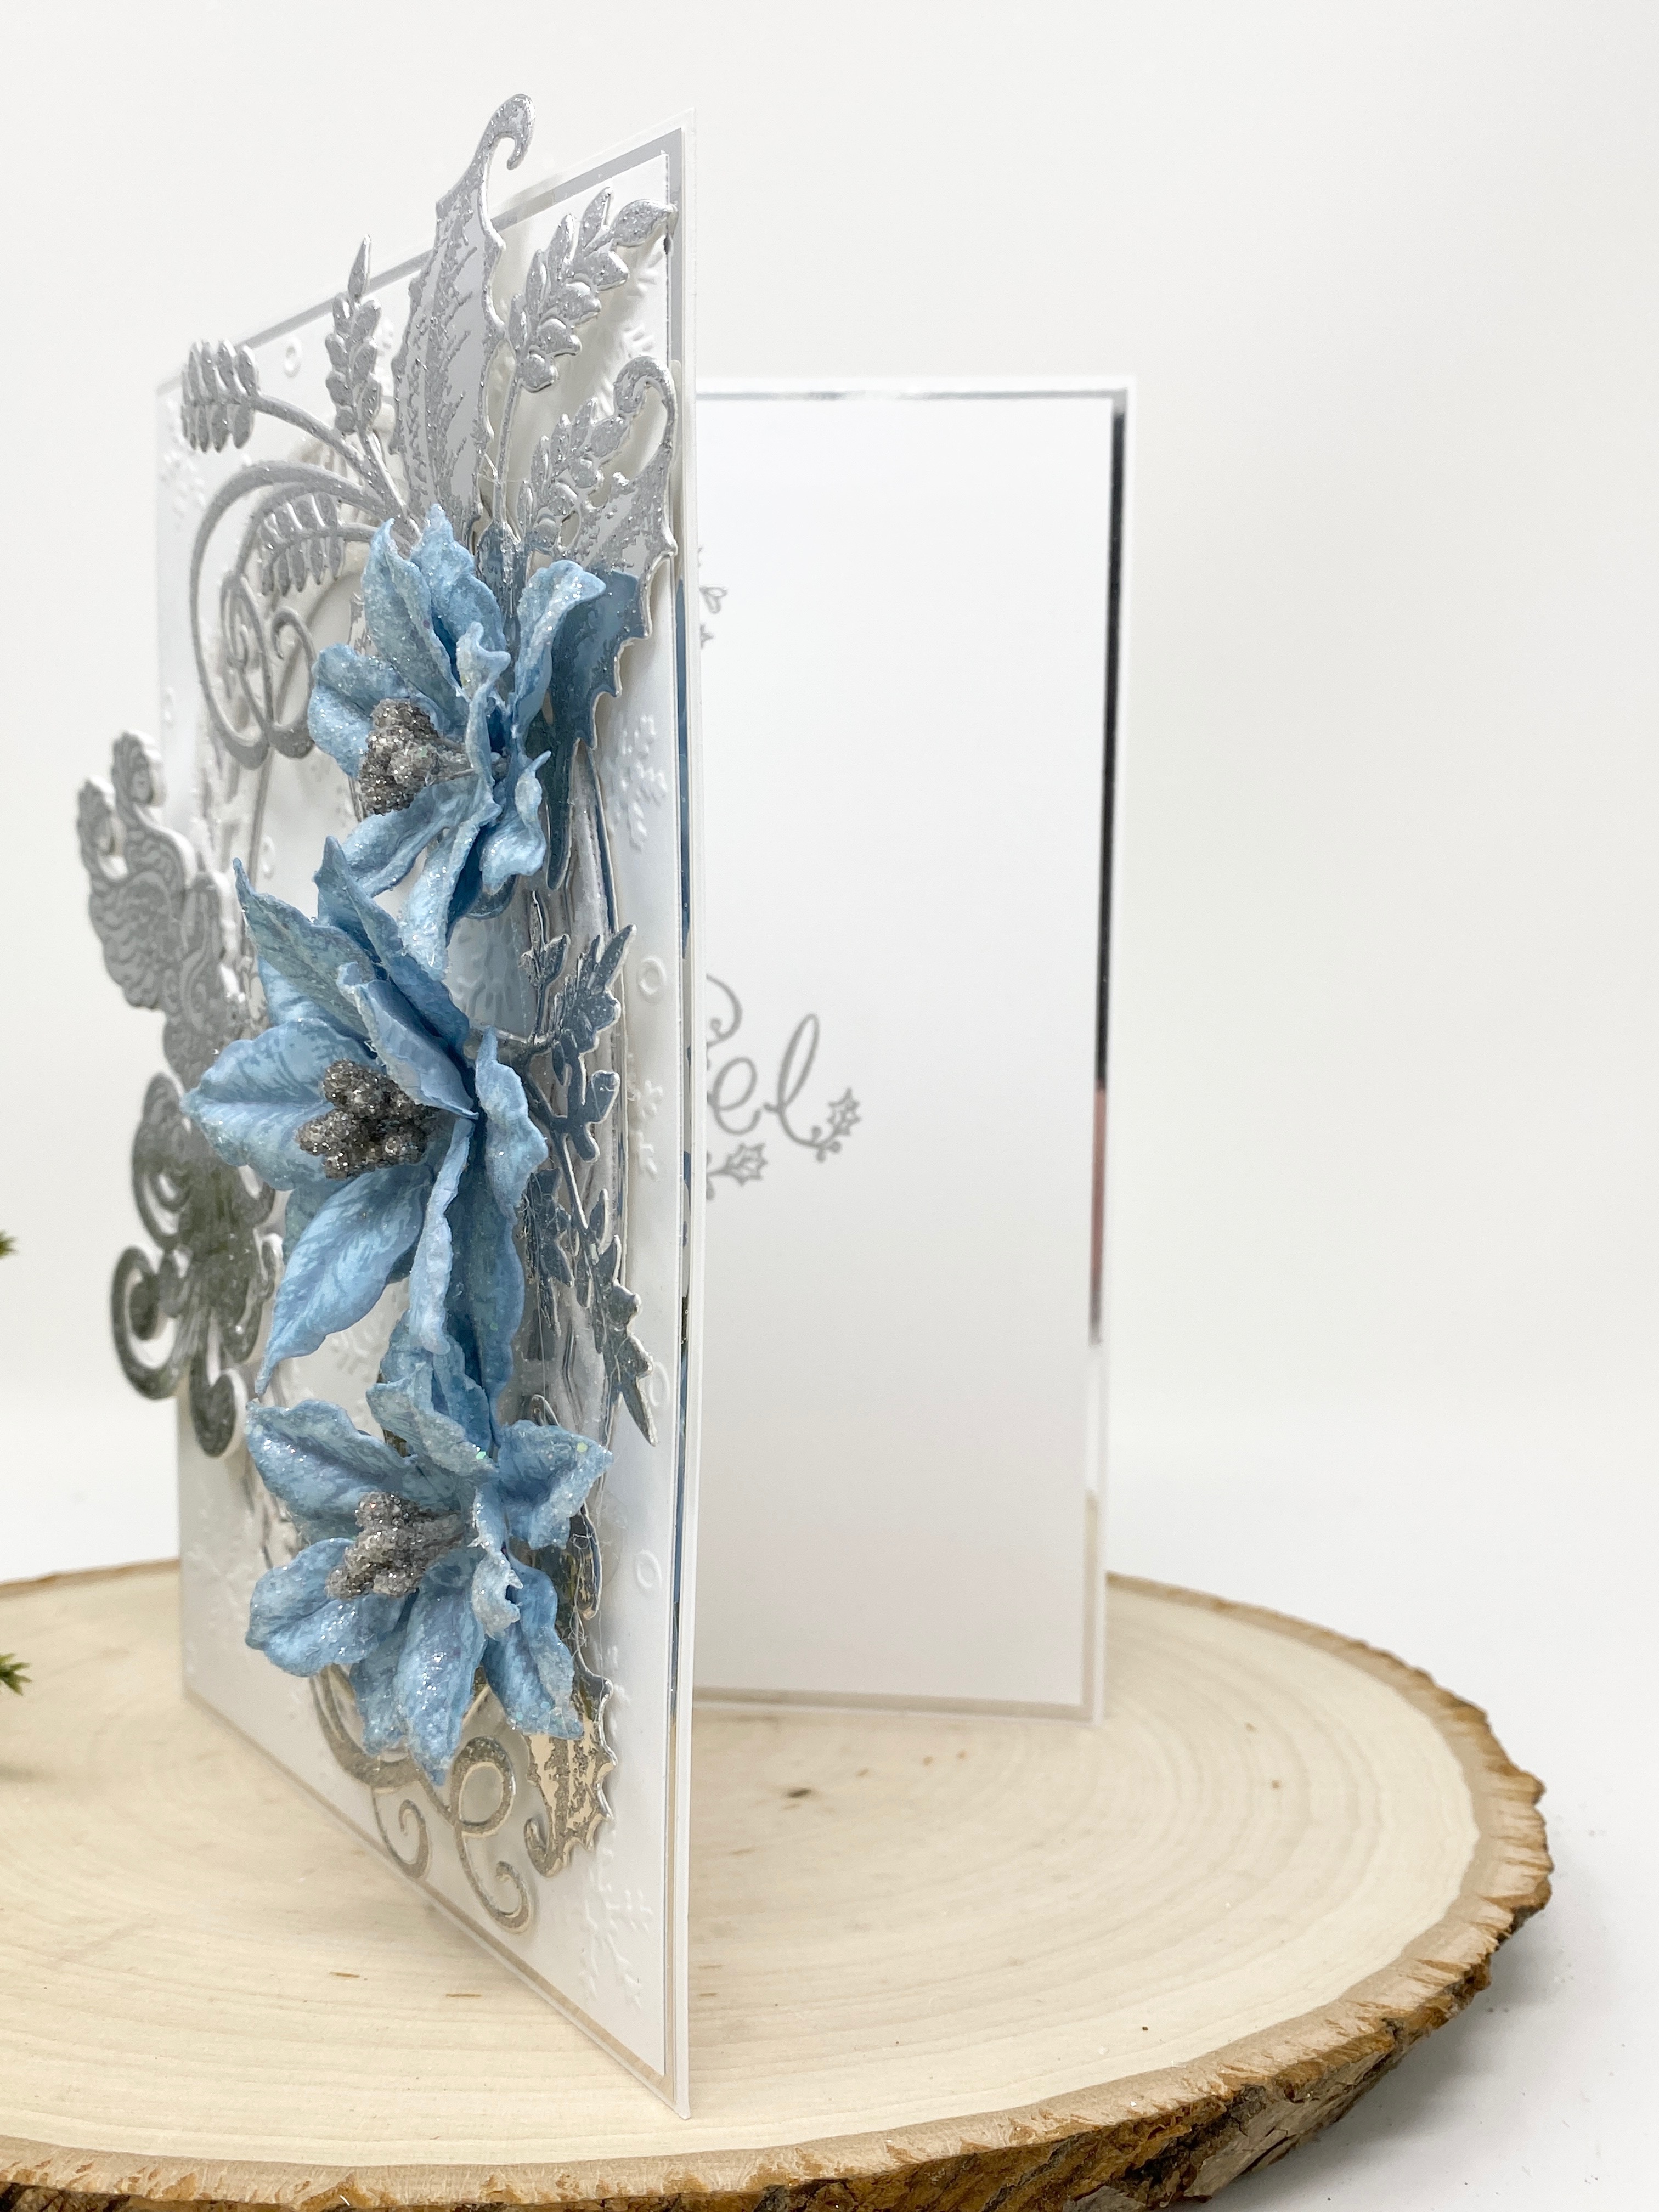
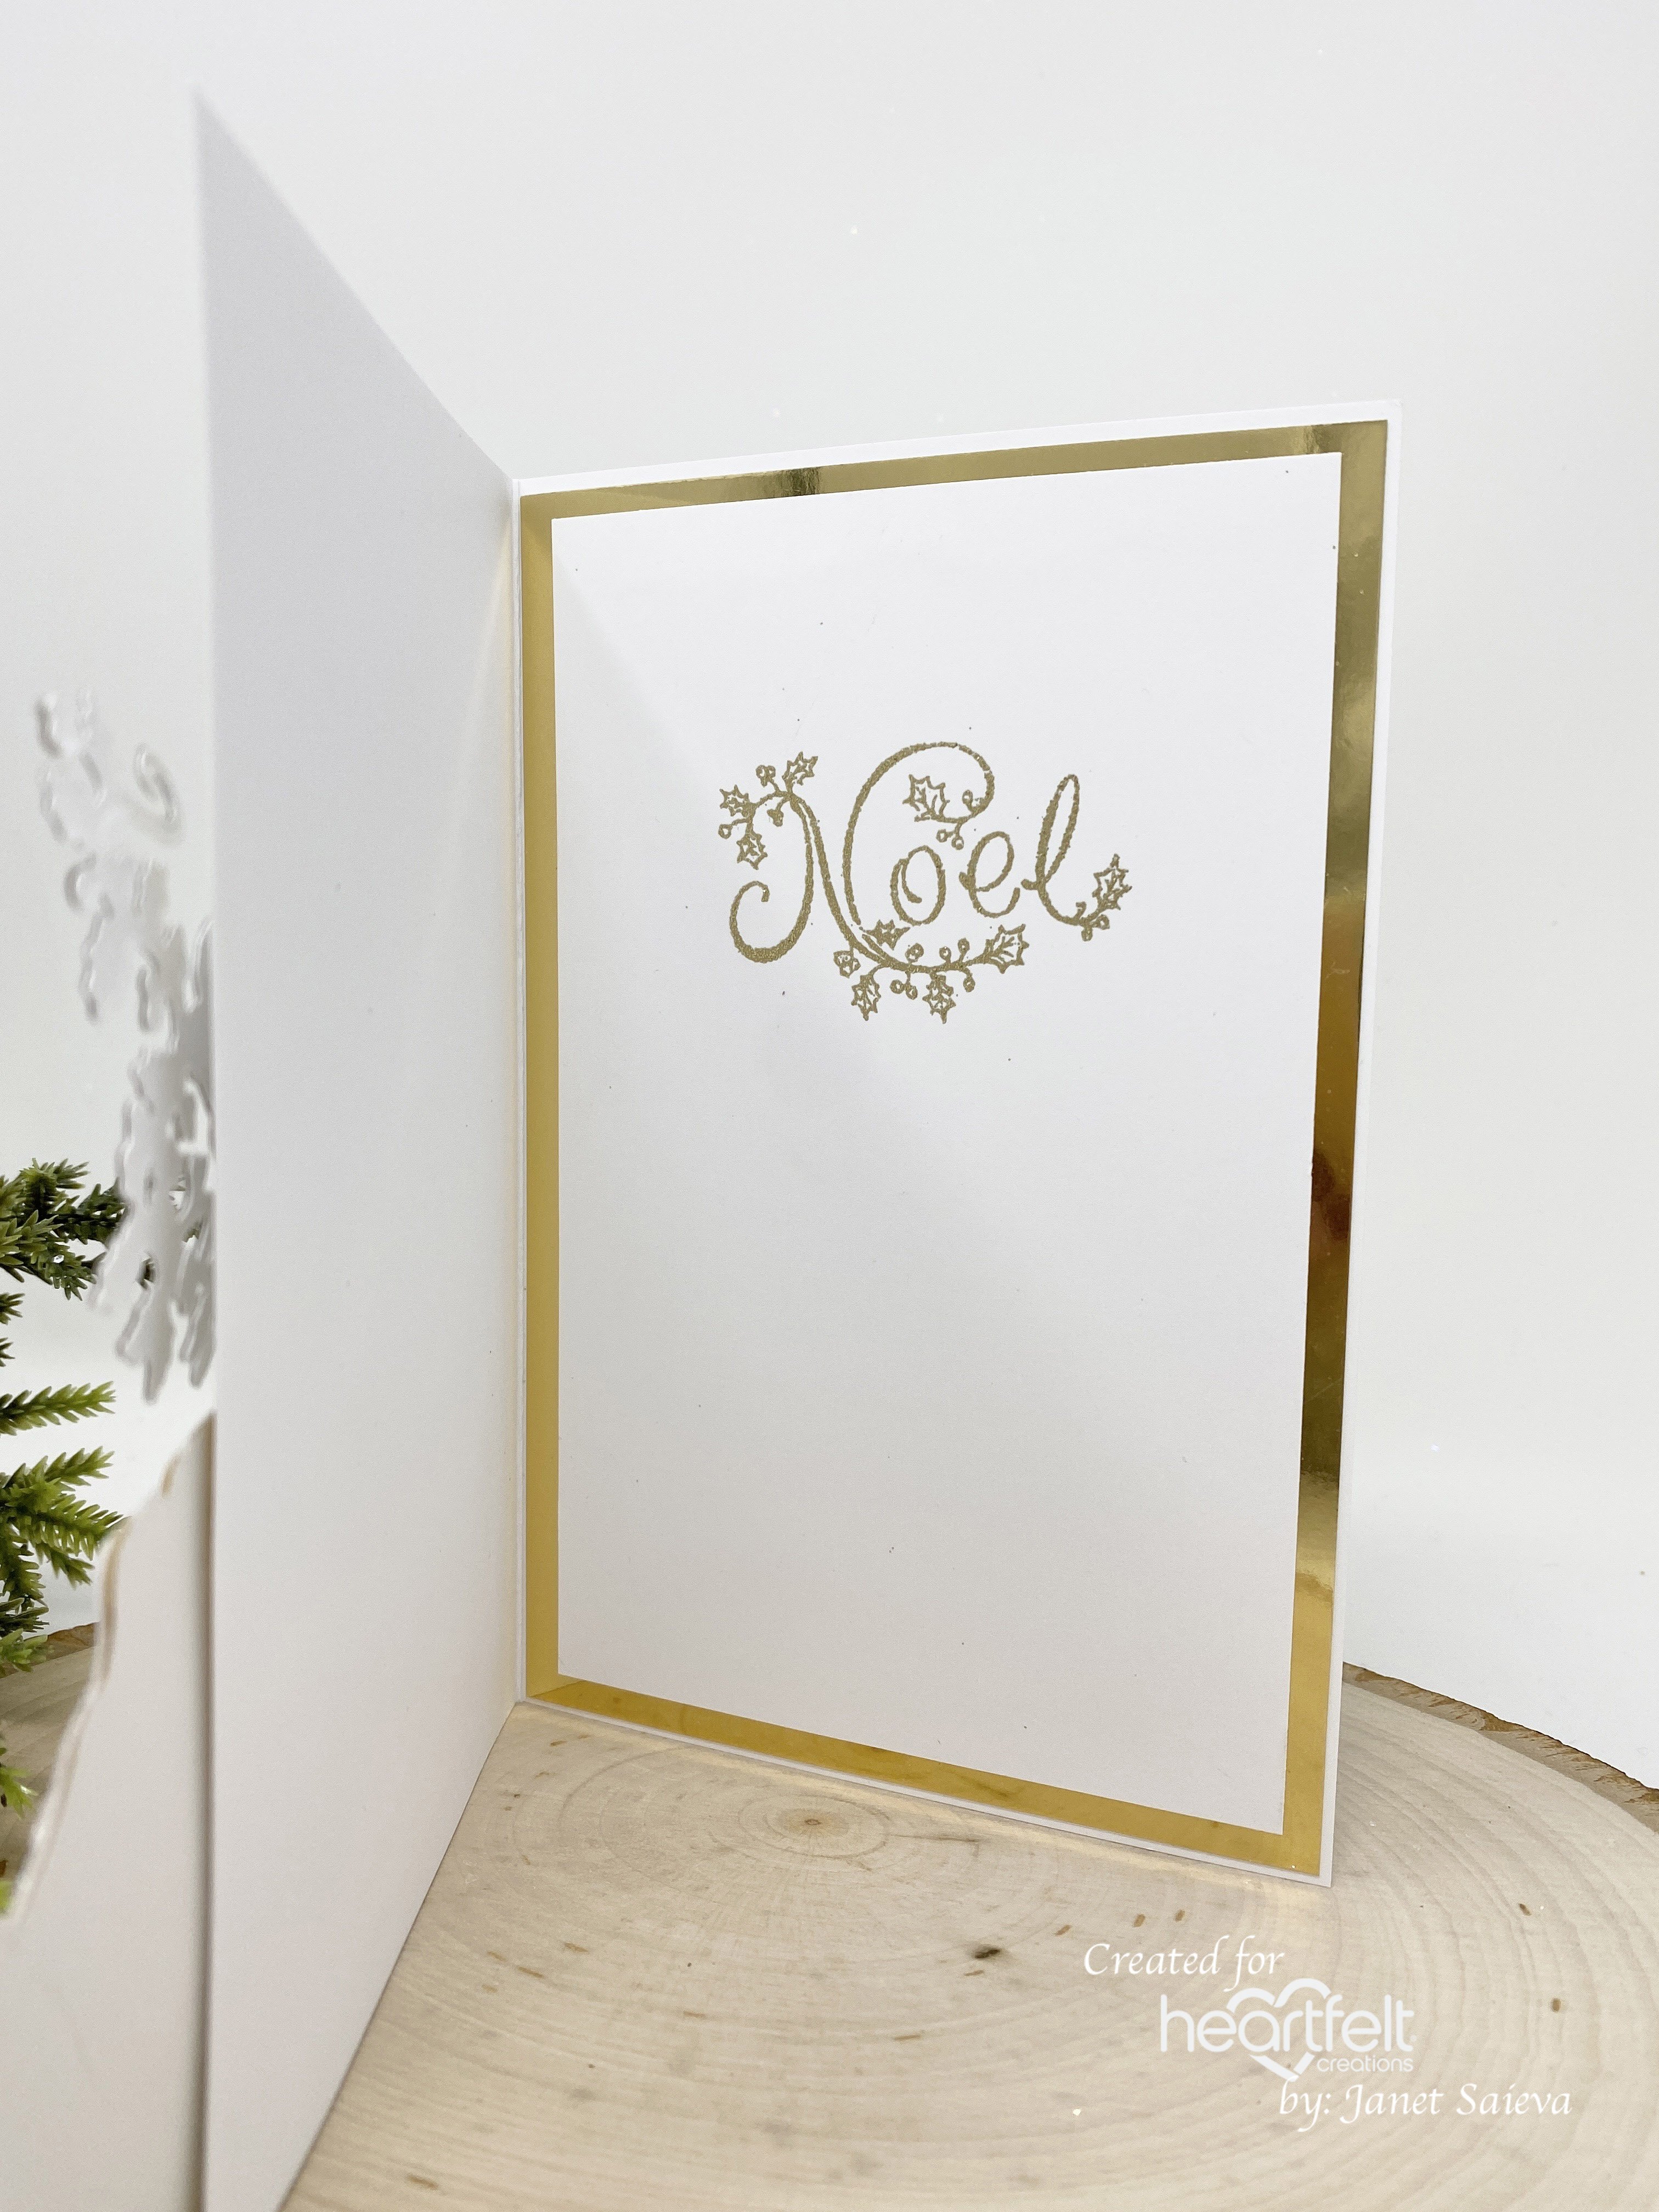
Instructions: Side fold card size is 5 x 7”. Score and fold 10 x 7” white cardstock at 5” on the long side to create card base. Cut Luxe Silver cardstock 2x at 4 7/8 x 6 7/8” and adhere one on the inside of the card and the other on the card front. Cut white cardstock 2x at 4 3/4 x 6 3/4”. Stamp the dove and the ‘Noel’ sentiment from the Starry Noel Angel Cling Stamp Set on one using VersaMark, cover with Ranger Fine Detail Silver Embossing Powder, heat set using the Heat It tool and adhere to the inside of the card. Emboss the other white cardstock using a snowflake embossing folder and adhere to the card front.

Using the third, fourth and fifth largest Simply Classic Oval Frame Dies, cut from white cardstock and Luxe Silver cardstock. Sponge the white one with dries clear adhesive and sprinkle with Rajni Chawla’s crystal Clear glitter. When dry, adhere over the silver diecut slightly offset to create a silver shadow. Adhere this piece to the card front using dries clear adhesive.

Stamp the Joyous Noel Angel on Luxe Silver cardstock using VersaMark ink, cover with WOW Metallic Silver Sparkle Embossing Glitter, heat set using the Heat It tool and diecut using the coordinating die. Diecut 3x from white cardstock, adhere the layers behind the silver angel and adhere to the left side of the oval frame.

Stamp the Small Festive Poinsettia and the Large Festive Poinsettia on Deluxe Flower Shaping paper using Seaside Spray ink, color using the same ink, diecut using the coordinating dies. Shape the flowers using the Large and Small Festive Poinsettia 3D molds, pierce the centers of the flowers using the Groove Golf Tools, insert silver Assorted Bead Stamens – Medium. Use two flowers for each poinsettia being sure to offset the flowers. Secure the stamens using hot glue. Sponge the flowers with dries clear adhesive and sprinkle with Rajni Chawla’s Crystal Clear glitter.

Stamp the Holly Berry Spray images on Luxe Silver cardstock using VersaMark ink, cover with WOW Metallic Silver Sparkle Embossing Glitter, heat set using the Heat It tool, diecut using the coordinating dies and lightly shape using the Deluxe Flower Shaping Kit stylus.

Adhere the poinsettias and Holly Berry Spray diecuts on the right side of the oval frame using hot glue.

Please visit the Heartfelt Creations Gallery to see all the products used on this project. 

Also, please be sure to go to the Heartfelt Creations Blog to see all of the absolutely gorgeous projects created by the fabulous Design Team!

Thank you so much for stopping by, I really appreciate you!

Till we meet again, please stay safe and be well!

Have a beautiful day!

Crafty Hugs, 🤗🤗🤗

Janet


Wednesday, August 24, 2022

Heartfelt Creations - Golden Wings

 Hi and welcome!

My card today is a pretty booklet card using the Joyous Noel Collection!


Instructions: Card size is 7 x 5”. Place the largest Booklet Basics Die just over the top fold of a 7 x 5” white card base and diecut to create shaped card base. Cut the largest Booklet Frames Die from white cardstock and from Luxe Gold cardstock. Sponge white diecut with dries clear adhesive and cover with Rajni Chawla’s dries clear adhesive. When dry, adhere the white diecut over the Luxe Gold diecut just slightly offset to create a gold shadow and adhere this to the card front. Using the second largest Booklet Basics Die, cut from Luxe Gold cardstock. Using the third largest Booklet Basics Die, cut from the Joyous Noel Paper Collection, sheet 5A, ink the edges with Seaside Spray ink, stamp the ‘Noel ‘sentiment from the Starry Noel Angel Cling Stamp Set in the same ink and adhere to the inside of the card. Diecut the largest Booklet Basics die from Luxe Gold cardstock, score in the middle, lightly shape over a glue bottle and adhere to the card front using dimensional dots and dries clear adhesive. Using the second largest Booklet Basics Die, cut sheet 5A again, ink the edges with the Seaside Spray ink, score, shape and adhere to the card front using the dimensional dots and adhesive. Cut a bookmark from Luxe Gold cardstock and adhere to the center using an adhesive strip.

Stamp the Joyous Noel Angel on white cardstock using memento Tuxedo Black ink, color using Stampin’ Blend markers, diecut using the coordinating die, cut off the wings, spritz with Sheer Shimmer Craft Spray – Sparkle and lightly shape using your fingers. Stamp the angel again and the harp on Luxe Gold cardstock using VersaMark ink, cover with WOW Metallic Gold Sparkle Embossing Glitter, heat set using the Heat It tool and diecut using the coordinating dies. Cut the dress off the gold angel diecut and adhere behind the colored diecut slightly offset using dries clear adhesive. Adhere the head and wings of the gold angel diecut directly behind the colored diecut. Cut the harp 3x from white cardstock, adhere together and adhere behind the gold harp. Adhere the angel and harp on the right side of the card front.

Stamp the Small Festive Poinsettia and the Large Festive Poinsettia on Deluxe Flower Shaping paper using Seaside Spray ink, color using the same ink, diecut using the coordinating dies. Stamp the Small Festive Poinsettia holly leaves on Deluxe Flower Shaping paper using Archival English Ivy ink, color using the same ink and diecut using the coordinating die. Shape the flowers and leaves using the Large and Small Festive Poinsettia 3D molds, pierce the centers of the flowers using the Groove Golf Tools, insert gold Assorted Bead Stamens – Medium. Use two flowers for each poinsettia being sure to offset the flowers. Secure the stamens using hot glue. Sponge the flowers and holly leaves with dries clear adhesive and sprinkle with Rajni Chawla’s Crystal Clear glitter.

Stamp the Holly Berry Spray images on Luxe Gold cardstock using VersaMark ink, cover with WOW Metallic Gold Sparkle Embossing Glitter, heat set using the Heat It tool, diecut using the coordinating dies and lightly shape using the Deluxe Flower Shaping Kit stylus.

Adhere the poinsettias, holly leaves and Holly Berry Spray diecuts on the left side of the card front using hot glue. Finish off the card by adding some glitter to the angel.

Visit the Heartfelt Creations Gallery to see what products were used on my card.

Please be sure to also visit the Heartfelt Creations Blog to see all of the absolutely gorgeous projects created by the fabulous design team!

Thank you so much for stopping by! I really appreciate you! 

Till we meet again, please stay safe and be well!

Have a beautiful day!

Crafty Hugs, 🤗🤗🤗

Janet


Wednesday, August 17, 2022

Happy 25th Birthday Heartfelt Creations!!!

Hi and welcome!

Woohoo...Heartfelt Creations is celebrating its 25th Birthday!

I am so blessed and so honored to be a part of this amazing company for the last five years and so pleased to be celebrating their 25th Birthday with them.

This is the birthday card that I created for them using the gorgeous special edition Diamond Fleur Die!


Instructions: Card size is 7 x 5”. Score and fold 7 x 10” white cardstock at 5” on the long side to create a tent fold card base. Cut sheet 6B from the Joyous Noel Collection 2x at 6 7/8 x 4 7/8”, edge with Leaf Green ink, adhere one to the card front using dries clear adhesive. Stamp ‘Congratulations!’ from Celebrate Love Cling Stamp set and ‘Heartfelt Creations’ in Magenta Hue ink on the other and adhere to the inside of the card.

Diecut the Diamond Fleur Die from white cardstock and from Luxe Gold cardstock. Sponge the white diecuts with dries clear adhesive and sprinkle with Rajni Chawla’s Crystal Clear glitter. When dry, adhere the gold diecuts behind the white diecuts slightly offset just to create a gold shadow. Adhere to the card front using dries clear adhesive.

Stamp the Sweet Magnolia flowers on Deluxe Flower Shaping Paper in Pink Peony ink, color with the same ink and Magenta Hue ink, diecut with the coordinating dies, place face down in the Sweet Magnolia mold, spritz with water and run through the diecutting machine. Use two petals to create one flower, pierce the flower centers and insert Bridal Bouquet stamens. 

Stamp the Sweet Pea leaves on Deluxe Flower Shaping Paper in Leaf Green ink, color with Leaf Green and Vivid Chartreuse inks, die cut with the coordinating die and shape in the Sweet Pea mold. 

Sponge the flowers and leaves with dries clear adhesive and sprinkle with Rajni Chawla’s Crystal Clear Glitter. Adhere the flowers and leaves to the bottom left of the card front using hot glue.

Stamp the ‘Happy Birthday’ Sentiment from the Speical Birthday Sentiments Cling Stamp set on white cardstock using Magenta Hue ink, diecut using the banner die from the Arrows and Banner Die set, sponge with dries clear adhesive and sprinkle with Rajni Chawla’s Crystal Clear Glitter. Cut a backer for the sentiment from Luxe Gold cardstock about 1/8” larger, adhere the two together and adhere to the card front using dimensional dots.

Diecut the number 25 using the Letters and Numbers die 3x, color one set with Magenta Hue ink, adhere the layers together, add glitter and then adhere to the right bottom of the card front.

Find out the products I used on this card in the Heartfelt Creations Gallery

Be sure to also visit the Heartfelt Creations Blog. The fabulous Design Team has outdone themselves creating gorgeous projects with this Diamond Fleur Die.

Thank you so much for stopping by, I really appreciate you!

Till we meet again, please stay safe and be well. 

Have a beautiful day!

Crafty Hugs, 🤗🤗🤗

Janet  


Wednesday, August 10, 2022

Heartfelt Creations - Debuting the Joyous Noel Collection

Hi and welcome!

Oh, this new collection is just heavenly!

"Christmas card making is made easy with the Joyous Noel Collection. Whether you’re wanting to create projects with angelic images, or feature heartfelt messages with exquisite detail and design, you can create this and so much more! Explore the angelic paper collection filled with hues of blue and heartwarming greens. Pair the paper with the stamp and die cut images to experience the magic of creating. Add the finishing touch with heartwarming messages. The Joyous Noel collection adds the perfect touch to your Christmas cards!"


Instructions: Finished card size with the diecut is 7 1/2” x 6 3/4”. Score and fold 9 x 6 3/4” white cardstock at 4 1/2” to create card 4 1/2 x 6 3/4” card base. Cut Luxe Gold cardstock 2x at 4 3/8 x 6 5/8”, adhere one to the card front and one to the inside of the card. Cut white cardstock 4 x 6 1/4”, stamp ‘Noel’ from the Starry Noel Angel Cling Stamp set using VersaMark, cover with WOW Metallic Gold Sparkle Embossing Glitter and heat set using the Heat It tool. Adhere to the inside of the card. 

Using the Joyous Noel Background Cling Stamp set, stamp onto white cardstock with VersaMark, cover with WOW Metallic Gold Sparkle Embossing Glitter and heat set using the Heat It tool. Cut around the edges using a deckle edge cutter to 4 1/4 x 6 1/2” and adhere to the card front with dries clear adhesive.

Using the Noel Decorative Die, cut both the background and decorative shapes from white and Luxe Gold cardstock. Sponge the white diecuts with dries clear adhesive and cover with Rajni Chawla’s Crystal Clear glitter. When dry, adhere the gold diecuts behind the white diecuts slightly offset to create a gold shadow. Adhere the decorative diecuts to the background diecuts and adhere to the bottom of the card front using dries clear adhesive.

Using the Starry Noel Angel Cling Stamp set, stamp the angel and the dove on vellum using VersaMark, cover with WOW Metallic Gold Sparkle Embossing Glitter, heat set using the Heat It tool and diecut using the coordinating dies. Diecut again from white cardstock and adhere the stamped images on the white cardstock.

Adhere the images on the card front using dimensional dots and dries clear adhesive.

Visit the Heartfelt Creations Gallery to get a list of all the produts used on this card. Be sure to also visit the Heartfelt Creations Blog to see all of the absolutely gorgeous projects creative by the fabulous Design Team!

thank you so much for stopping by, I really appreciate you!

Till we meet again, please stay safe and be well!

Have a beautiful day!

Crafty Hugs, 🤗🤗🤗

Janet


Wednesday, August 3, 2022

Heartfelt Creations - Embossed Silver Stars

 Hi and welcome!

I can't believe we're in August already. Time flies when you're having fun lol. 

Continuing on with Christmas, my card today is a simple one that will fit in a normal 5 x 7" envelope for mailing.


Instructions: Card size is 7 x 5”. Score and fold 10 x 7” white cardstock at 5” on the long side to create a tent fold card base. Cut Luxe Silver cardstock 2x at 6 7/8 x 4 7/8” and adhere one to the inside and one to the card front. Cut blue metallic cardstock 2x at 6 3/4 x 4 3/4”, adhere one to the inside of the card, dry emboss the other with a snowflake embossing folder and adhere to the card front. 

Stamp the Large Holiday Star 2x on Luxe Silver cardstock using VersaMark, cover with WOW Metallic Silver Sparkle Embossing Glitter and heat set using the Heat It tool. Diecut one complete image, then diecut 2 more times from white cardstock and adhere together with the silver on top for dimension. Diecut just the center snowflake from the second image and adhere to the full image just to add a little dimension to the center. Adhere to the center of the card front using dimensional foam strips. Stamp the snowflakes and star images from the same set on Luxe Silver cardstock using VersaMark, cover with WOW Metallic Silver Sparkle Embossing Glitter, heat set using the Heat It tool and diecut using the coordinating dies. Adhere some to the card front as shown using dries clear adhesive.

Stamp the ‘Happy Holidays’ using the Holiday Greetings Cling Stamp Set on Luxe Silver cardstock using VersaMark, cover with WOW Metallic Silver Sparkle Embossing Glitter and heat set using the Heat It tool. Diecut using the coordinating die and adhere to the inside of the card along with one of the larger stars using dries clear adhesive.

Now you’ll have a beautiful holiday card that you can mail in a regular 5 x 7” envelope. 

You can see a list of all the products used for this card in the Heartfelt Creations Gallery.

Please be sure to visit the Heartfelt Creations Blog to see all of the absolutely gorgeous projects created by the fabulous Design Team.

Thank you so much for stopping by, I really appreciate you.

Till we meet again, please stay safe and be well. 

Have a beautiful day!

Crafty Hugs, 🤗🤗🤗

Janet