Wednesday, April 27, 2022

Heartfelt Creations - French Gate Dragonfly

 Hi and welcome!

Oh my goodness, today we're debuting the gorgeous French Gate and courtyard Dies. They're absolutely beautiful!

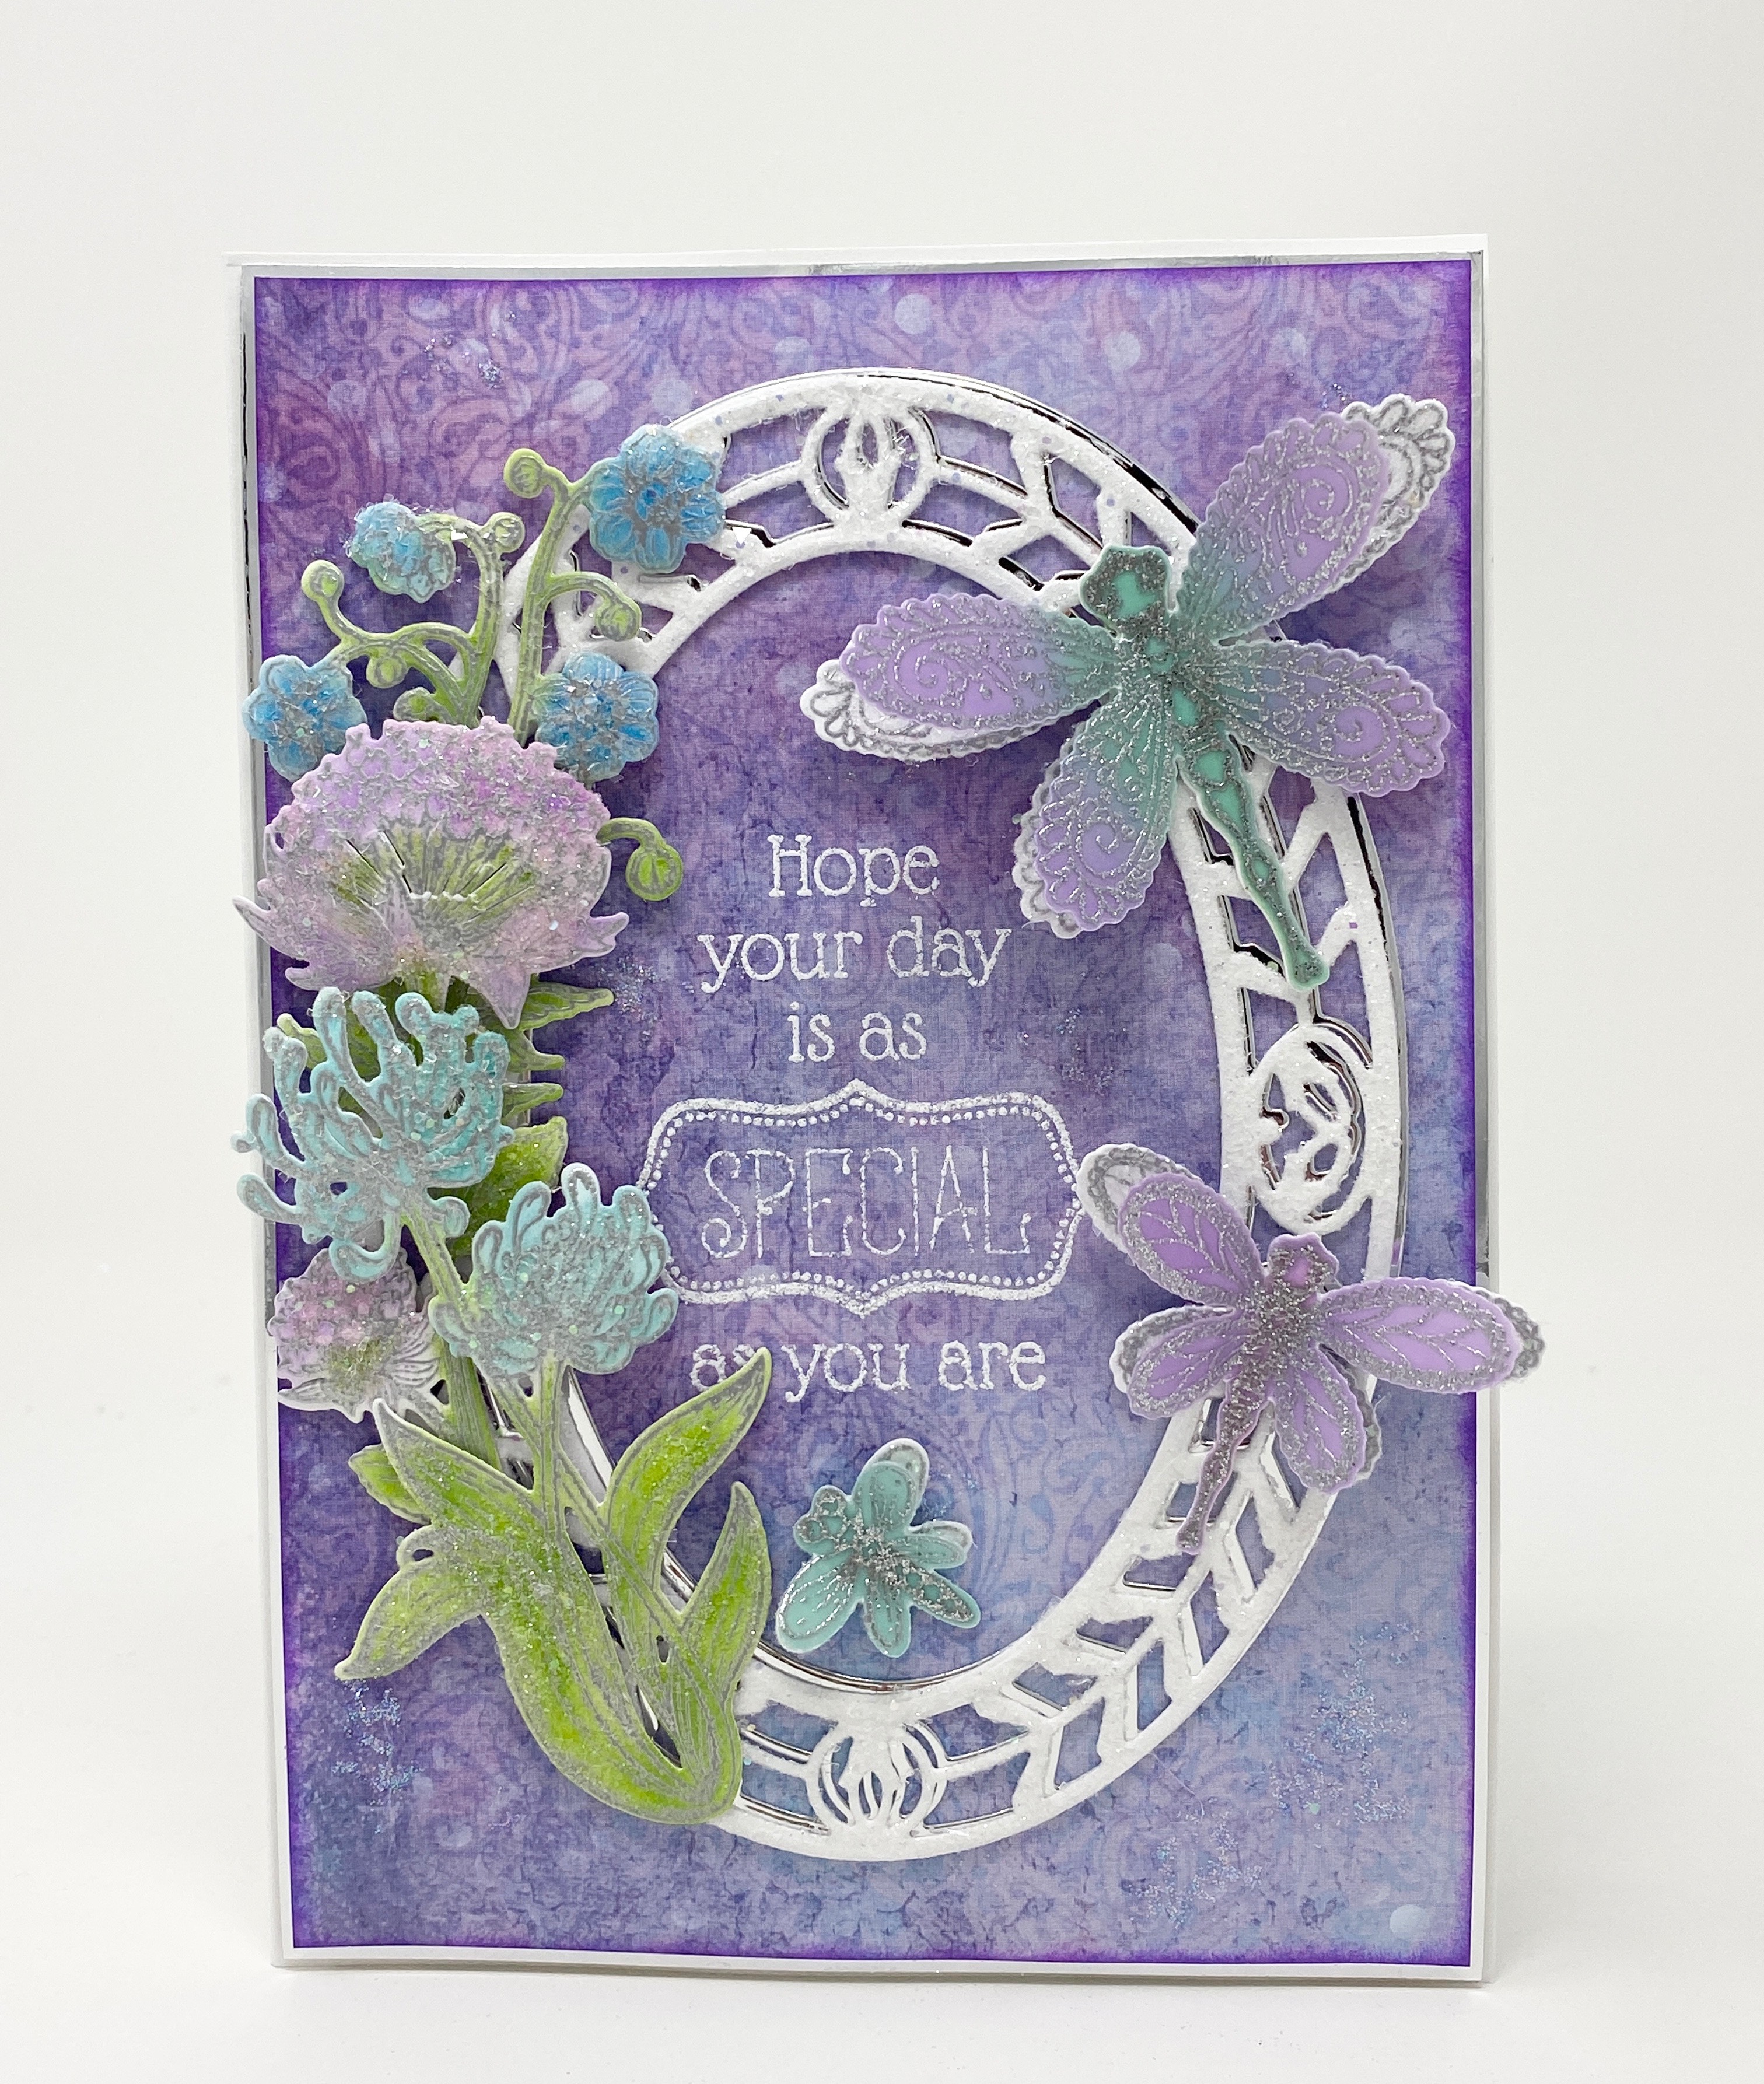
I have a very simple but elegant card for you today.


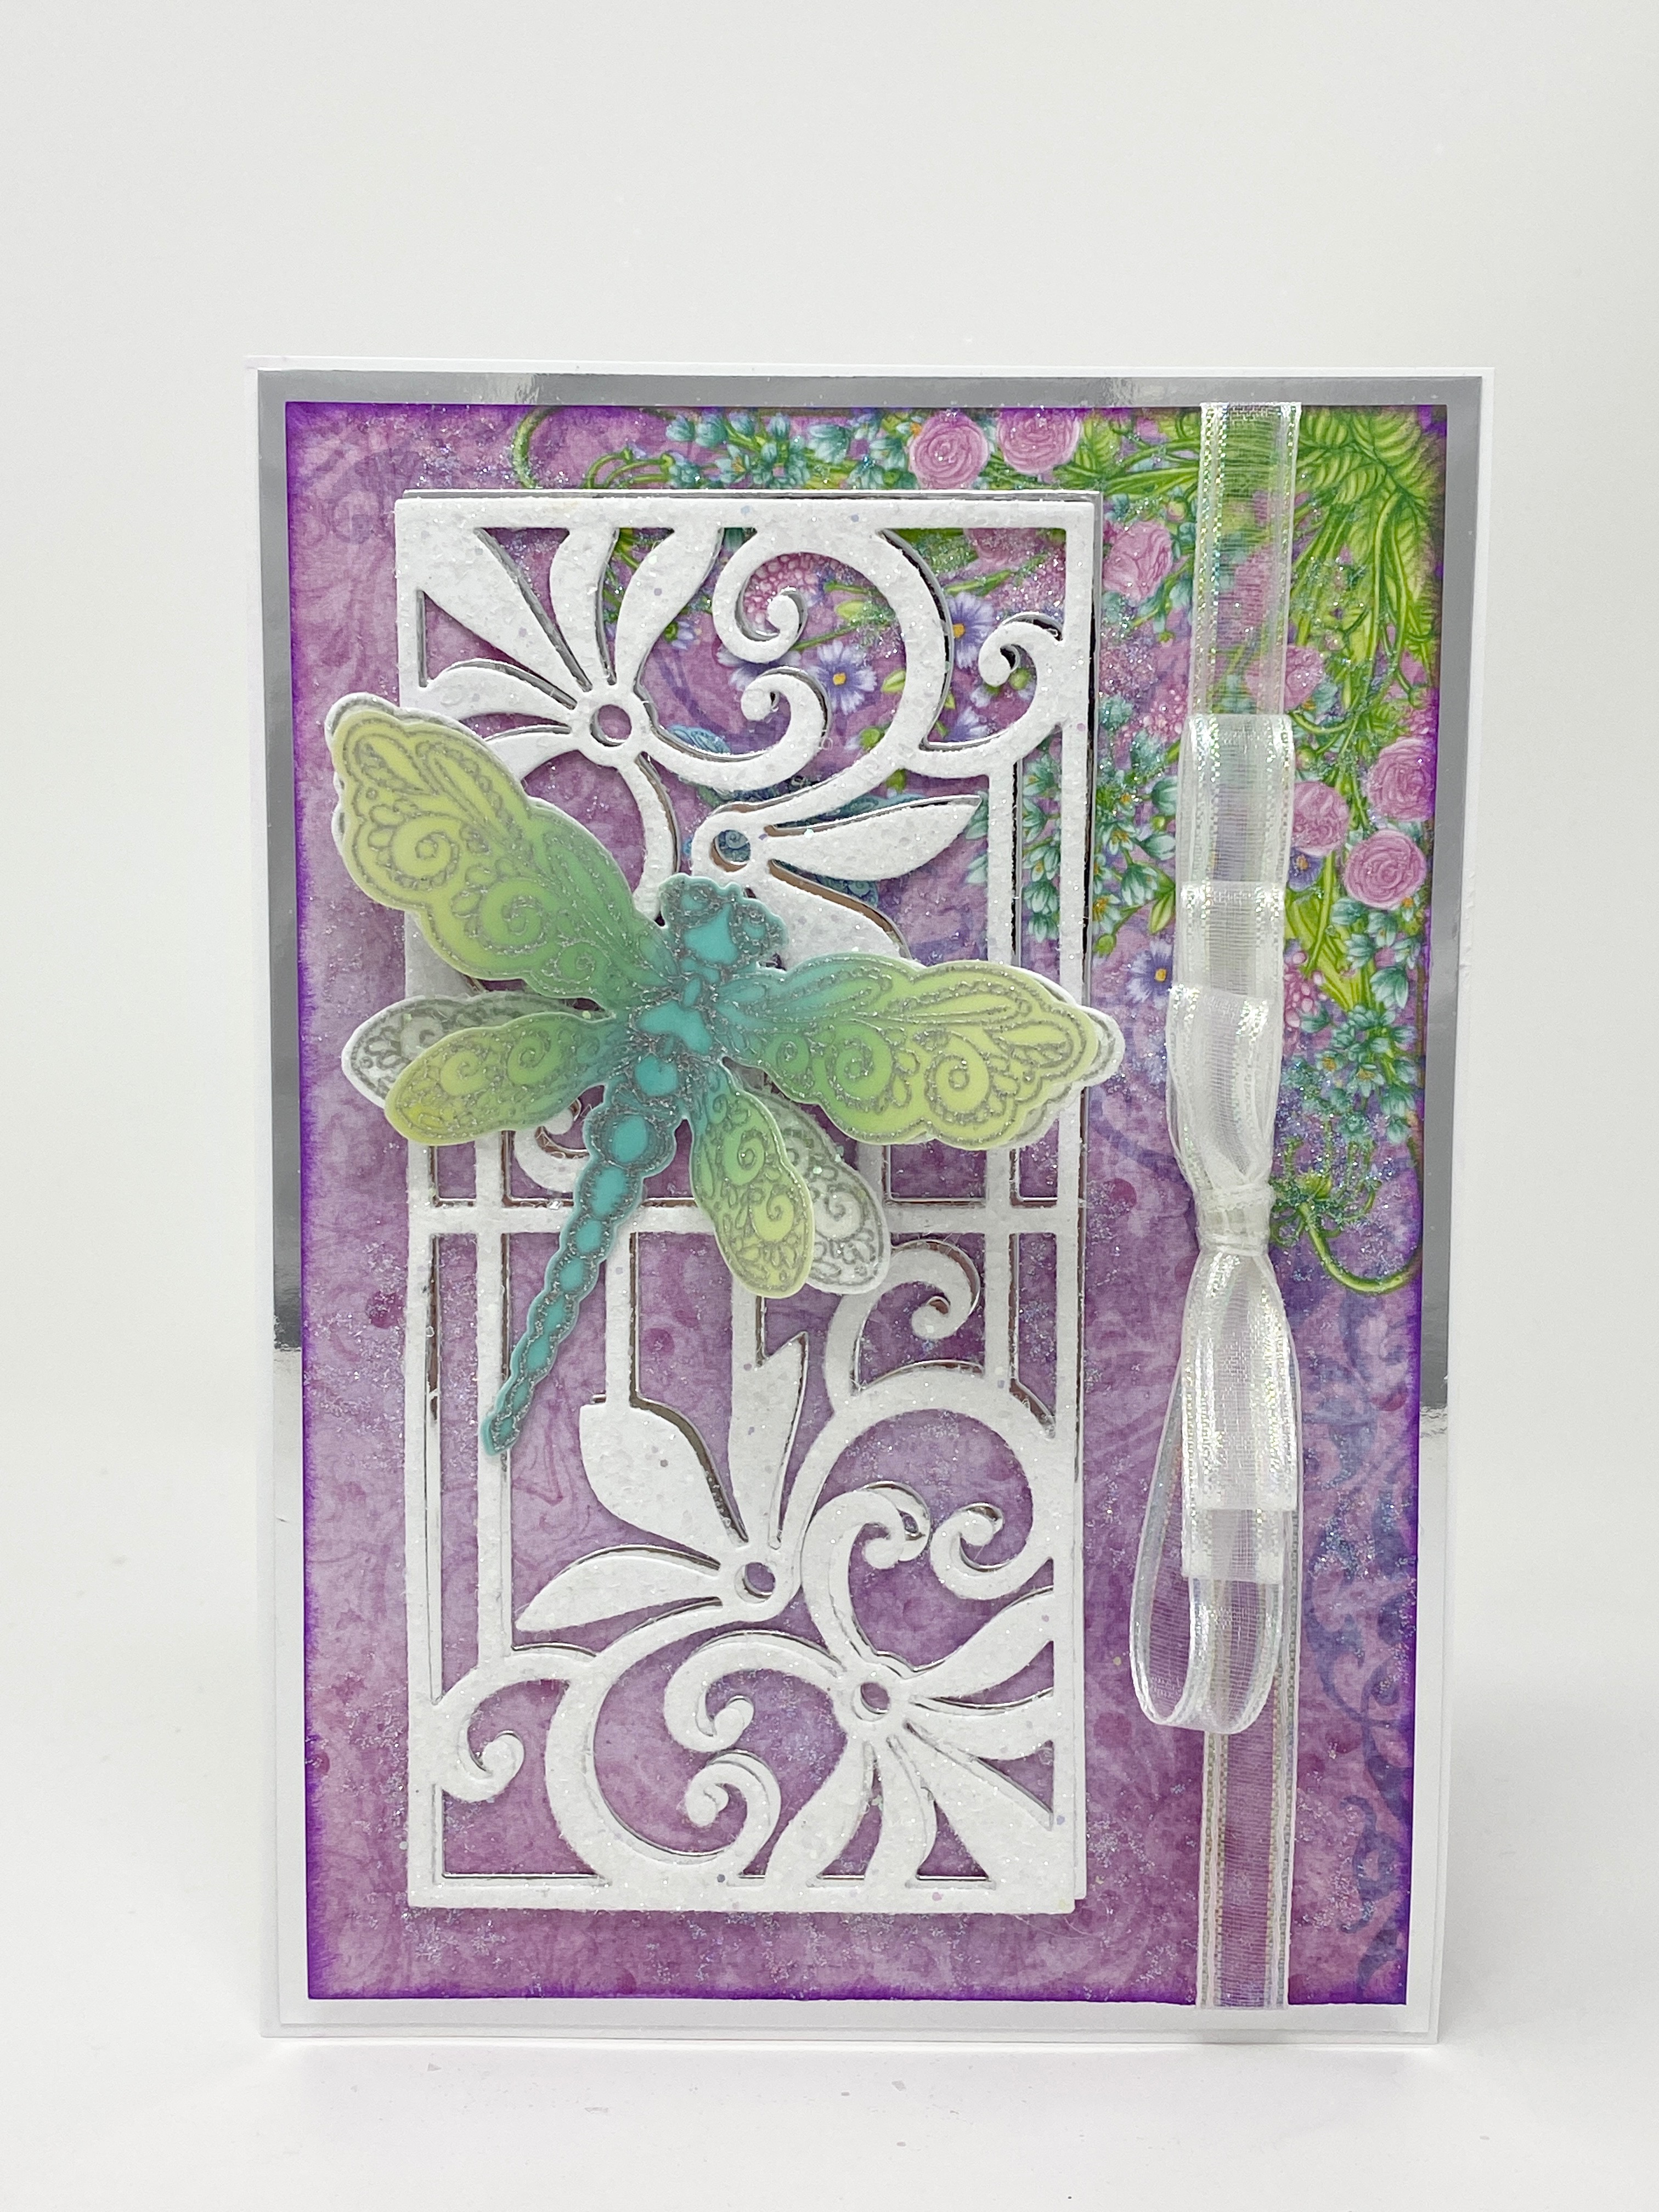
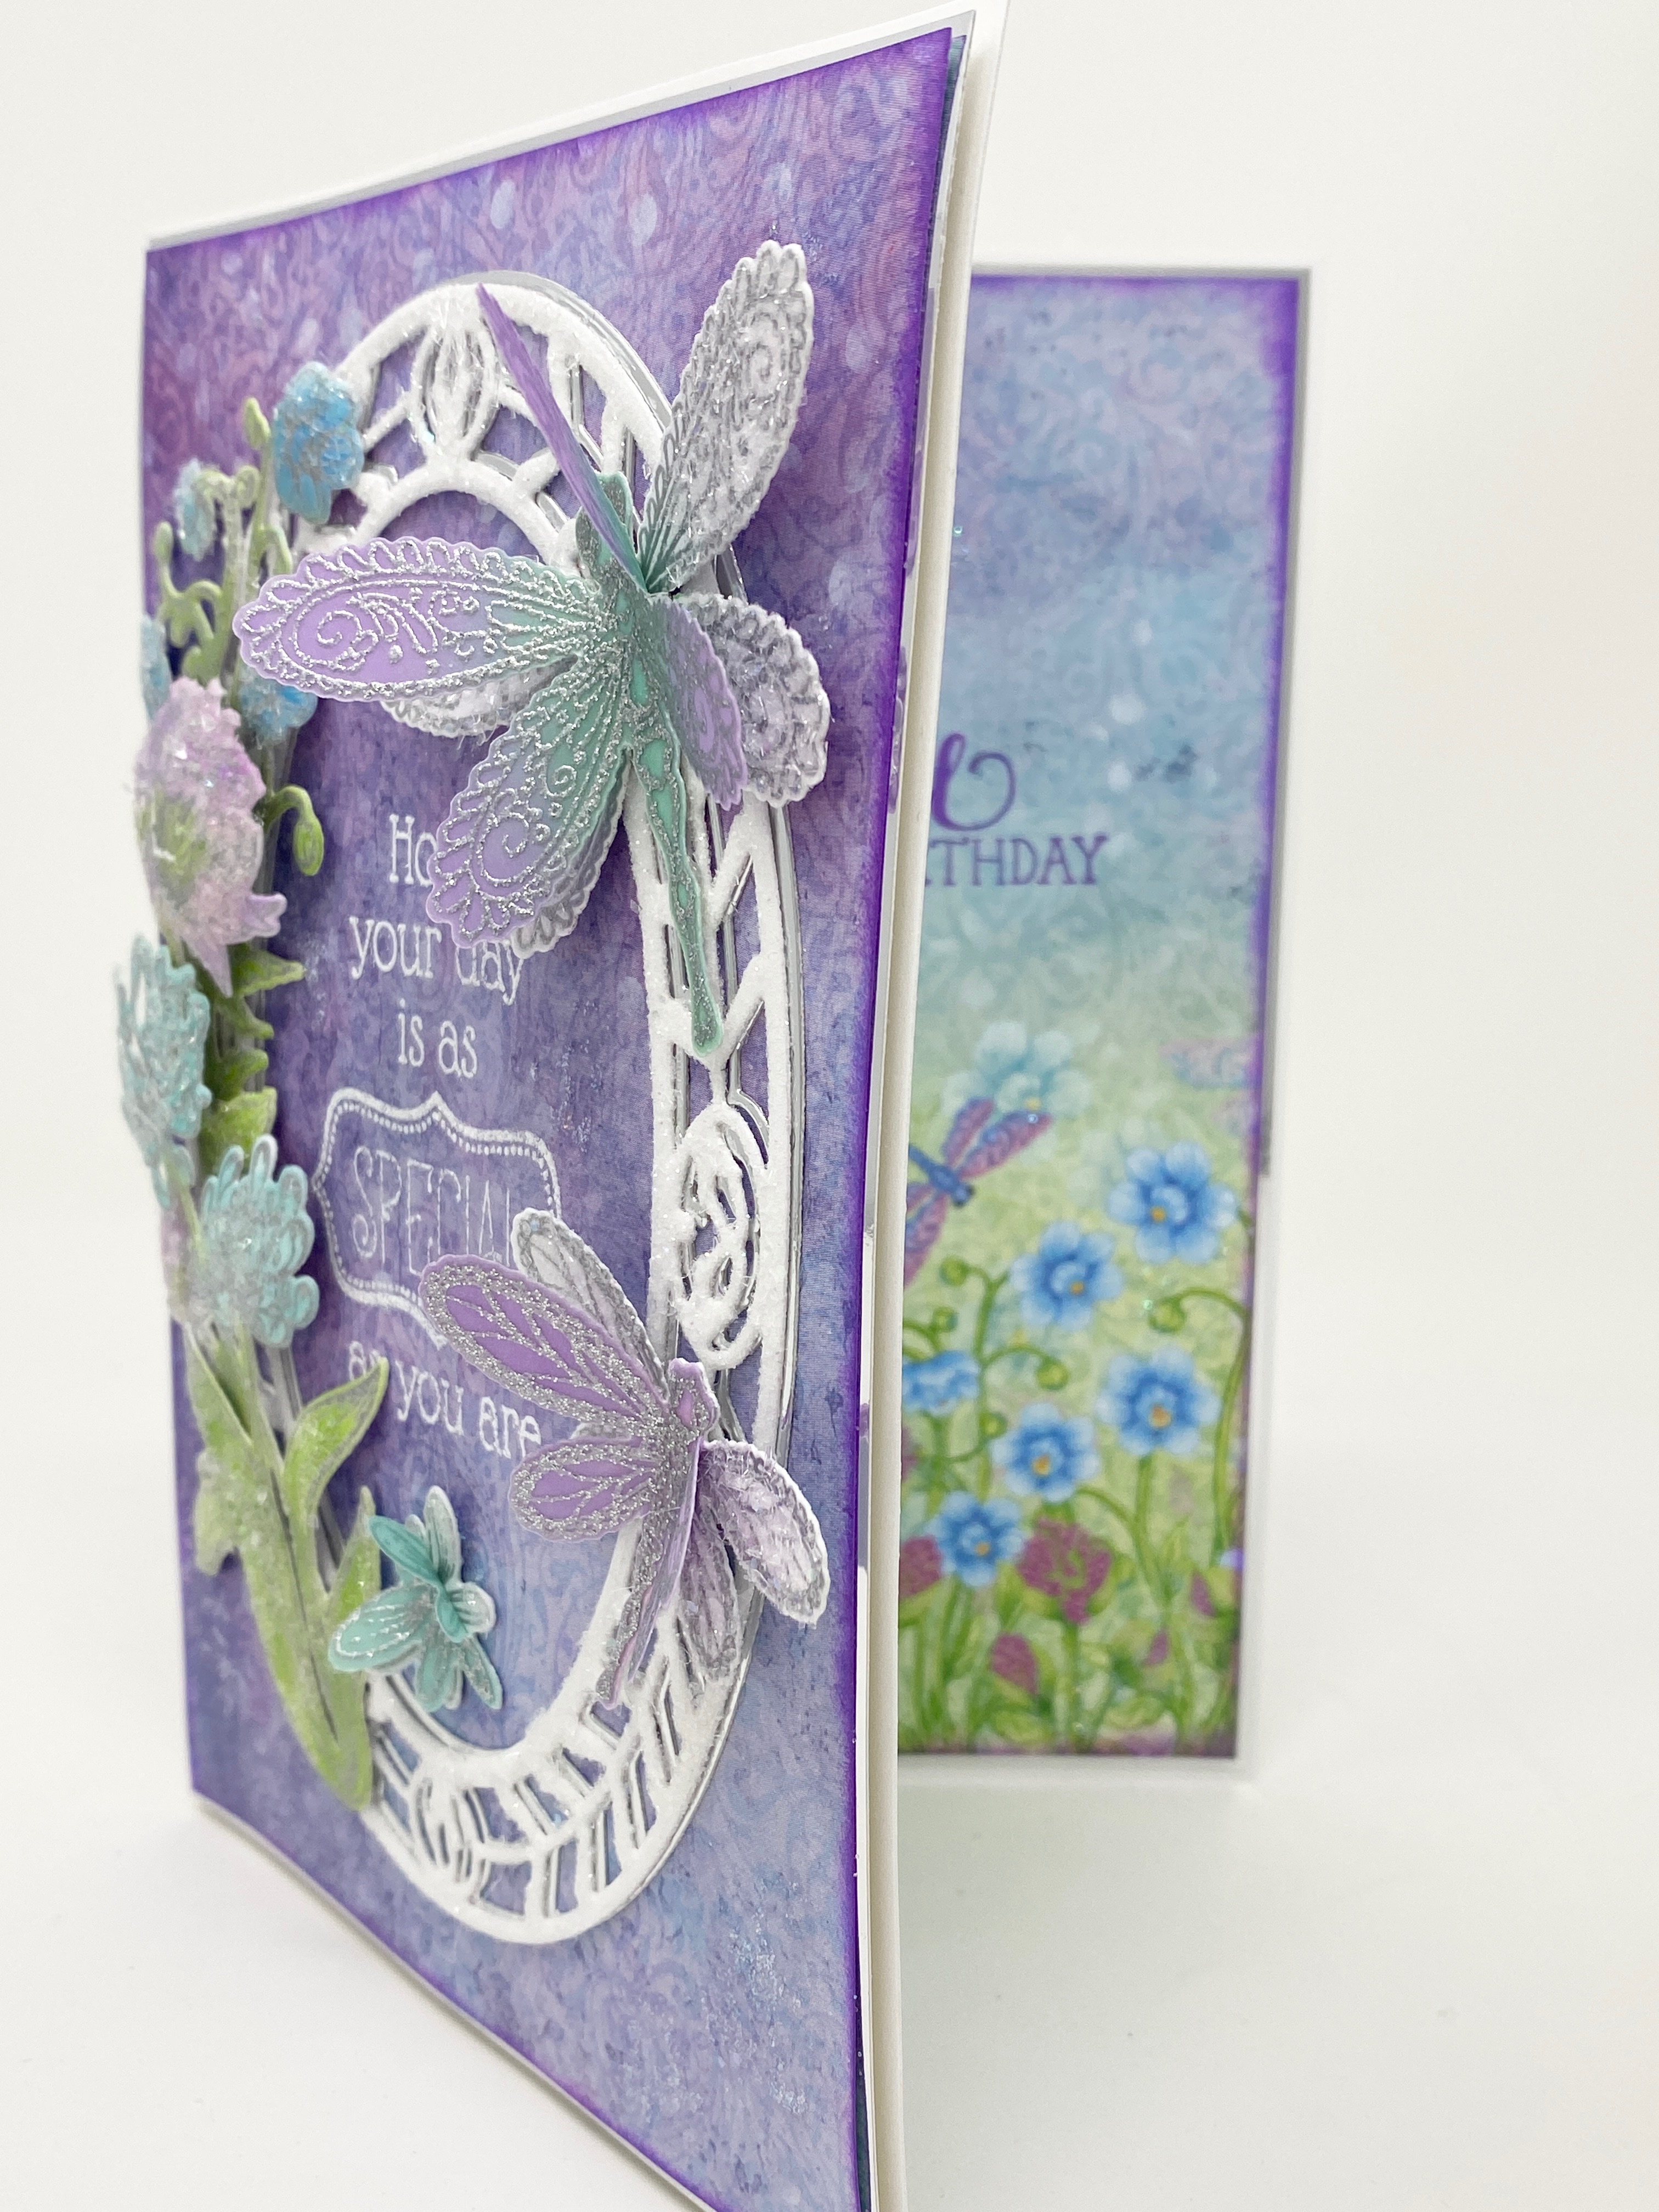
Instructions: Card size is 5 x 7”. Score and fold 10 x 7” white cardstock at 5” on the long side. Cut Luxe Silver cardstock x2 – 4 7/8 x 6 7/8”. Cut Decorative Dragonfly Paper Collection sheet 1B x2 – 4 5/8 x 6 5/8”, ink the edges with Distress Oxide Wilted Violet ink. Stamp ‘I’m thinking of you’ sentiment from For My Friend Sentiments Cling Stamp Set on one of the designer papers using Distress Oxide Wilted Violet ink and stamp a dragonfly on the same paper from Decorative Dragonfly Cling Stamp set using Distress Oxide Peacock feathers. Adhere this to one of the silver pieces and adhere to the inside of the card using dries clear adhesive. Using the Bow-It-All and sheer ribbon, make a triple loop bow and adhere to the other designer paper, adhere to the silver cardstock and adhere to the card front using dries clear adhesive.

Using the French Gate Die, cut x2, once from white cardstock and once from Luxe Silver Cardstock. Sponge the white diecut with dries clear adhesive and cover with Rajni Chawla’s Crystal Clear glitter. When dry, adhere the two diecuts together, slightly offset, and adhere to the card front.

Stamp the dragonfly from the Dragonfly Florals Cling Stamp set on white cardstock using VersaMark, cover with Ranger Superfine Detail Silver Embossing Powder, heat set and diecut using the coordinating die. Stamp the dragonfly again on vellum using Frost White ink, cover with WOW Metallic Silver Embossing Glitter. Color the back using Peacock Feathers and Twisted Citron Distress Oxide inks and diecut using the coordinating die. Adhere the vellum dragonfly on the white diecut dragonfly by adding glue just to the bodies. You want to keep the wings free. Bend the wings up to give the appearance of flight. Adhere to the French Gate Diecut. Sponge with dries clear adhesive and cover with Rajni’s Crystal Clear glitter.

Add extra sparkle to the card, inside and out, by dabbing randomly with dries clear adhesive and sprinkling with Crystal Ultrafine Transparent Glitter.

Visit the Heartfelt Creations Gallery to find out all the products used on this project.

Please be sure to visit the Heartfelt Creations Blog to see all of the absolutely gorgeous projects created by the fabulous Design Team.

thank you so much for stopping by.

Until we meet again, please stay safe and be well.

Have a beautiful day!


Crafty Hugs, 🤗🤗🤗

Janet


Wednesday, April 20, 2022

Heartfelt Creations - Dragonfly Slimline

Hi and welcome!

I'm so excited that spring is finally here. I just wish it felt a little more like spring. lol

My card today is a slimline that's easy to mail in a regular envelope. 


Instructions: Card size is 9 x 4”. Score and fold 9 x 8” white cardstock at 4” on the short side to create top fold card base. Cut Luxe Silver Cardstock x2 - 8 7/8 x 3 7/8” and white cardstock x2 – 8 5/8 x 3 5/8”. Using a corner punch, round all of the corners. Stamp one of the white pieces with the sentiment ‘I am so grateful for you’ from the For My Friend Sentiments Cling Stamp set using Picked Raspberry and Wilted Violet inks. Stamp the dragonflies using Picked Raspberry, Salty Ocean, Peacock Feathers and Wilted Violet Distress Oxide Inks. Adhere to silver cardstock and adhere to inside of the card.

Dry emboss the other white cardstock using Anna Griffin Slimline Georgette Lace Embossing Folder, adhere to the silver cardstock and adhere to the card front using dimensional tape. Cut a silver eyelet circle frame using the second largest eyelet die from Decorative Circle Frame Die and the third largest plain die from the Eyelet Circle & Basics Small Die and adhere to the center of the card front using foam strips.

Using the Decorative Dragonfly, Daydream Florals and Dragonfly Florals Cling Stamp sets, stamp on white cardstock using VersaMark, cover with Ranger Superfine Detail Silver Embossing Powder, heat set and diecut using the coordinating dies. Color the florals using daubers and Distress Oxide inks – Picked Raspberry, Peacock Feathers, Salty Ocean, Wilted Violet, Twisted Citron and Mowed Lawn. Leave the dragonflies white. Lightly shape all elements using the Deluxe Flower Shaping kit.

Stamp the dragonflies again on vellum using Frost White ink, cover with WOW Metallic Silver Embossing Glitter. Color the backs using the same inks and diecut using the coordinating dies. Adhere the vellum dragonflies on the white diecut dragonflies by adding glue just to the bodies. You want to keep the wings free. Bend the wings up to give the appearance of flight.

Adhere the flowers and dragonflies as pictured using hot glue, sponge with dries clear adhesive and cover with Rajni’s Crystal Clear glitter.

Add a few color coordinating sequins to the inside and outside of the card.

Visit the Heartfelt Creations Gallery to find out what products were used to create this card.

Please be sure to also visit the Heartfelt Creations Blog to see all of the gorgeous projects created by the fabulous Design Team.

Thank you so much for stopping by, I really appreciate you!

Till we meet again, please stay safe and be well!

Have a beautiful day!

Crafty Hugs, 🤗🤗🤗
Janet


Wednesday, April 13, 2022

Heartfelt Creations - Special Day Dragonfly

 Hi and welcome!

"Add the beauty of fluttering dragonflies for crafting projects of all shapes and sizes! From focal points, to finishing touches, the decorative dragonflies are the perfect addition to every crafty stash! So join us as we add more fluttering beauty to our florals and papercrafting, and delight in the ease of bringing more life to our crafting projects...Introducing the NEW Decorative Dragonfly Collection!"

Here's my first project using this gorgeous collection.


Instructions: Card size is 5 x 7”. Score and fold 10 x 7’ white cardstock at 5” on the long side to create side fold card base. Cut x2 Luxe Silver cardstock 4 7/8 x 6 7/8” and x2 sheet 5A from the Decorative Dragonfly Paper Collection. Ink the edges of the designer paper with Wilted Violet Distress Oxide ink and adhere to the silver cardstock. Stamp ‘Have a wonderful Birthday’ from Special Birthday Sentiments Cling Stamp set using Wilted Violet ink on one and adhere to the inside of the card. Stamp ‘Hope your day is as special as you are’ from the same set on the other designer paper using Frost White ink, cover with WOW Embossing Glitter – Sparkling Snow and heat set using the Heat It tool. Adhere to the card front using dimensional tape.

Diecut the Simply Classic Oval frame from white cardstock, sponge with dries clear adhesive and sprinkle with Rajni Chawla’s Crystal Clear Glitter and heat set. Cut again from Luxe silver cardstock and adhere the two frames together, slightly offset so that the silver is just peeking through. Adhere to the card front over the sentiment using dries clear adhesive.

Using the Decorative Dragonfly, Daydream Florals and Dragonfly Florals Cling Stamp sets, stamp on white cardstock using VersaMark, cover with Ranger Superfine Detail Silver Embossing Powder, heat set and diecut using the coordinating dies. Color the florals using daubers and Distress Oxide inks – Picked Raspberry, Peacock Feathers, Salty Ocean, Wilted Violet, Twisted Citron and Mowed Lawn. Leave the dragonflies white.

Stamp the dragonflies again on vellum using Frost White ink, cover with WOW Metallic Silver Embossing Glitterand heat emboss using the Heat It Tool. Color the backs using the same inks and diecut using the coordinating dies. Adhere the vellum dragonflies on the white diecut dragonflies by adding glue just to the bodies. You want to keep the wings free. Bend the wings up to give the appearance of flight.

Adhere the flowers and dragonflies as pictured using hot glue, sponge with dries clear adhesive and cover with Rajni’s Crystal Clear glitter.

Add extra sparkle to the card, inside and out, by dabbing randomly with dries clear adhesive and sprinkling with Crystal Ultrafine Transparent Glitter.

Visit the Heartfelt Creations Gallery to find all the products I used for this project.

Please be sure to visit the Heartfelt Creations Blog to see all of the gorgeous projects created by the fabulous Design Team.

Thank you so much for stopping by.

Till we meet again, please stay safe and be well!

Have a beautiful day!

Crafty Hugs, 🤗🤗🤗
Janet


Wednesday, April 6, 2022

Heartfelt Creations - Diecut Foldout Easel Card

 Hi and welcome to my blog!

Today I'm sharing another sweet pea card with a fold that I never used before. It was so much fun to create and I hope you'll like it as much as I do. I was inspired by this card by Jan B. I just changed it up a bit and used the Heartfelt Creations Vase instead of the flower pot. 


Instructions: Finished card with the flowers measures 4 1/4 x 6 1/2”. Create two white card bases. For the first one, cut white cardstock 4 1/4 x 11”, score at 3” and 5 1/2”. For the second one, cut white cardstock 4 1/4 x 10 3/4” and score at 5 3/8”. Using the large vase die from the Classic Floral Vase set, place at the bottom of the open large card base and partially die cut up to the 3” score line. The best way to do this is place the card base on the bottom cutting plate so that the end of the plate is at the score line. Using a scissor, cut way the excess card on each side of the base on the score line. Stamp the vase on sheet 12B of the Sweet Pea Paper Collection using archival Deep Purple ink and edge with the same ink. Diecut again from white cardstock, ink the edges and adhere the two together. Diecut the decorative die x2 from white cardstock and adhere together using dries clear adhesive. Fussy cut an oval from white cardstock to fit on the back of the decorative diecut. I’m the worst fussy cutter in the world so don’t judge me lol. Adhere this to the back of the top of the vase. Set all the diecuts aside.

Using dries clear adhesive adhere the second card base to the inside of the first card base upside down so that the fold is at the bottom. Cut gorgeous grape cardstock x2 - 4 x 5 1/8”, x2 - 4 x 2 1/4” and x1 - 4 x 5 1/4” (this one is for the center section when the card is open). Cut white cardstock 3 7/8 x by 5 1/8” stamp the sentiment ‘sending you a hug’ from the Just For You Sentiments Cling Stamp set and stamp a partial image of the Vining Sweet Pea at the bottom using Archival Deep Purple ink. Adhere the white to the purple and adhere to the center inside section. Cut paper from the Sweet Pea Paper Collection, sheet 3B, 2x - 3 7/8 x 5” and 2x – 3 7/8 x 2 1/8”. Ink all the edges with the Deep Purple and adhere these to the gorgeous grape pieces. Adhere the matted layers to the panels of the card base.

Adhere the vase diecuts to the card base. Stamp the ‘You are so thoughtful’ sentiment from the Just For You Sentiments Cling Stamp set on white cardstock using Deep Purple ink, diecut using the Majestic Swirl die, ink the edges and adhere to the card base as shown using three layers of dimensional tape to act as a stop for the easel.

Stamp the Sweet Pea flowers and leaves on Deluxe Flower Shaping Paper using Deep Purple and Leaf Green inks, color the centers of the flowers with the Deep Purple and color the leaves with the Leaf Green. Stamp and color the calyx using Leaf Green. Diecut all using the coordinating dies, add more color to all the edges and color the backs of the flowers and leaves. Place the flower petals, the leaves and the calyx in the 3D Sweet Pea Mold face down, spritz with water and run through the diecutting machine to shape. Add a little additional shaping using the Deluxe Flower shaping kit. Adhere the three petals to the top of the two petals and the calyx to the bottom to create flowers. Create one large and two small flowers and two large and three small leaves. Sponge with dries clear adhesive and sprinkle with Rajni Chawla’s Crystal Clear glitter.

Stamp the Vining Sweet Pea on Deluxe Flower Shaping paper x4, twice using Leaf Green ink, once using Vibrant Fuchsia ink and once using Majestic Violet ink, diecut using the coordinating dies and color using the same inks. Fussy cut the small fuchsia flowers and one large violet flower adhere to the green diecut stems and lightly shape using the Deluxe Flower Shaping kit. Sponge with dries clear adhesive and sprinkle with Rajni Chawla’s Crystal Clear glitter.

Adhere the dimensional Sweet Pea flowers, the leaves and the fuchsia vining flowers to the decorative die on the vase using hot glue. Adhere a couple of vines on the vase. Adhere the majestic Violet vining flower to the inside and one small Fuchsia flower on the sentiment tag,

Add some awesome sparkle by randomly sponging the diecuts and the designer papers using dries clear adhesive and sprinkle with Crystal Ultrafine Transparent glitter.

You can find all the products I used for this project in the Heartfelt Creations Gallery.

Thank you so much for stopping by, I really appreciate you.

Till we meet again please stay safe and be well.

Have a beautiful day!!!

Crafty Hugs, 🤗🤗🤗

Janet