Wednesday, April 26, 2023

Heartfelt Creations - Tall Irises

 Hi and welcome!!!

Well, Heartfelt Creations made the big announcement last week that they will be closing their doors by the end of the year. I am oh so sad but I truly understand why they have come to that decision. They have blessed me for these past six years by making me a part of their crafting family. Not only have I been on the Design Team for all this time, I have been working for them behind the scenes ever since I joined the team. I will be forever honored and grateful to have stumbled on their booth at an Expo all those years ago. I love my Heartfelt Family!!!!!

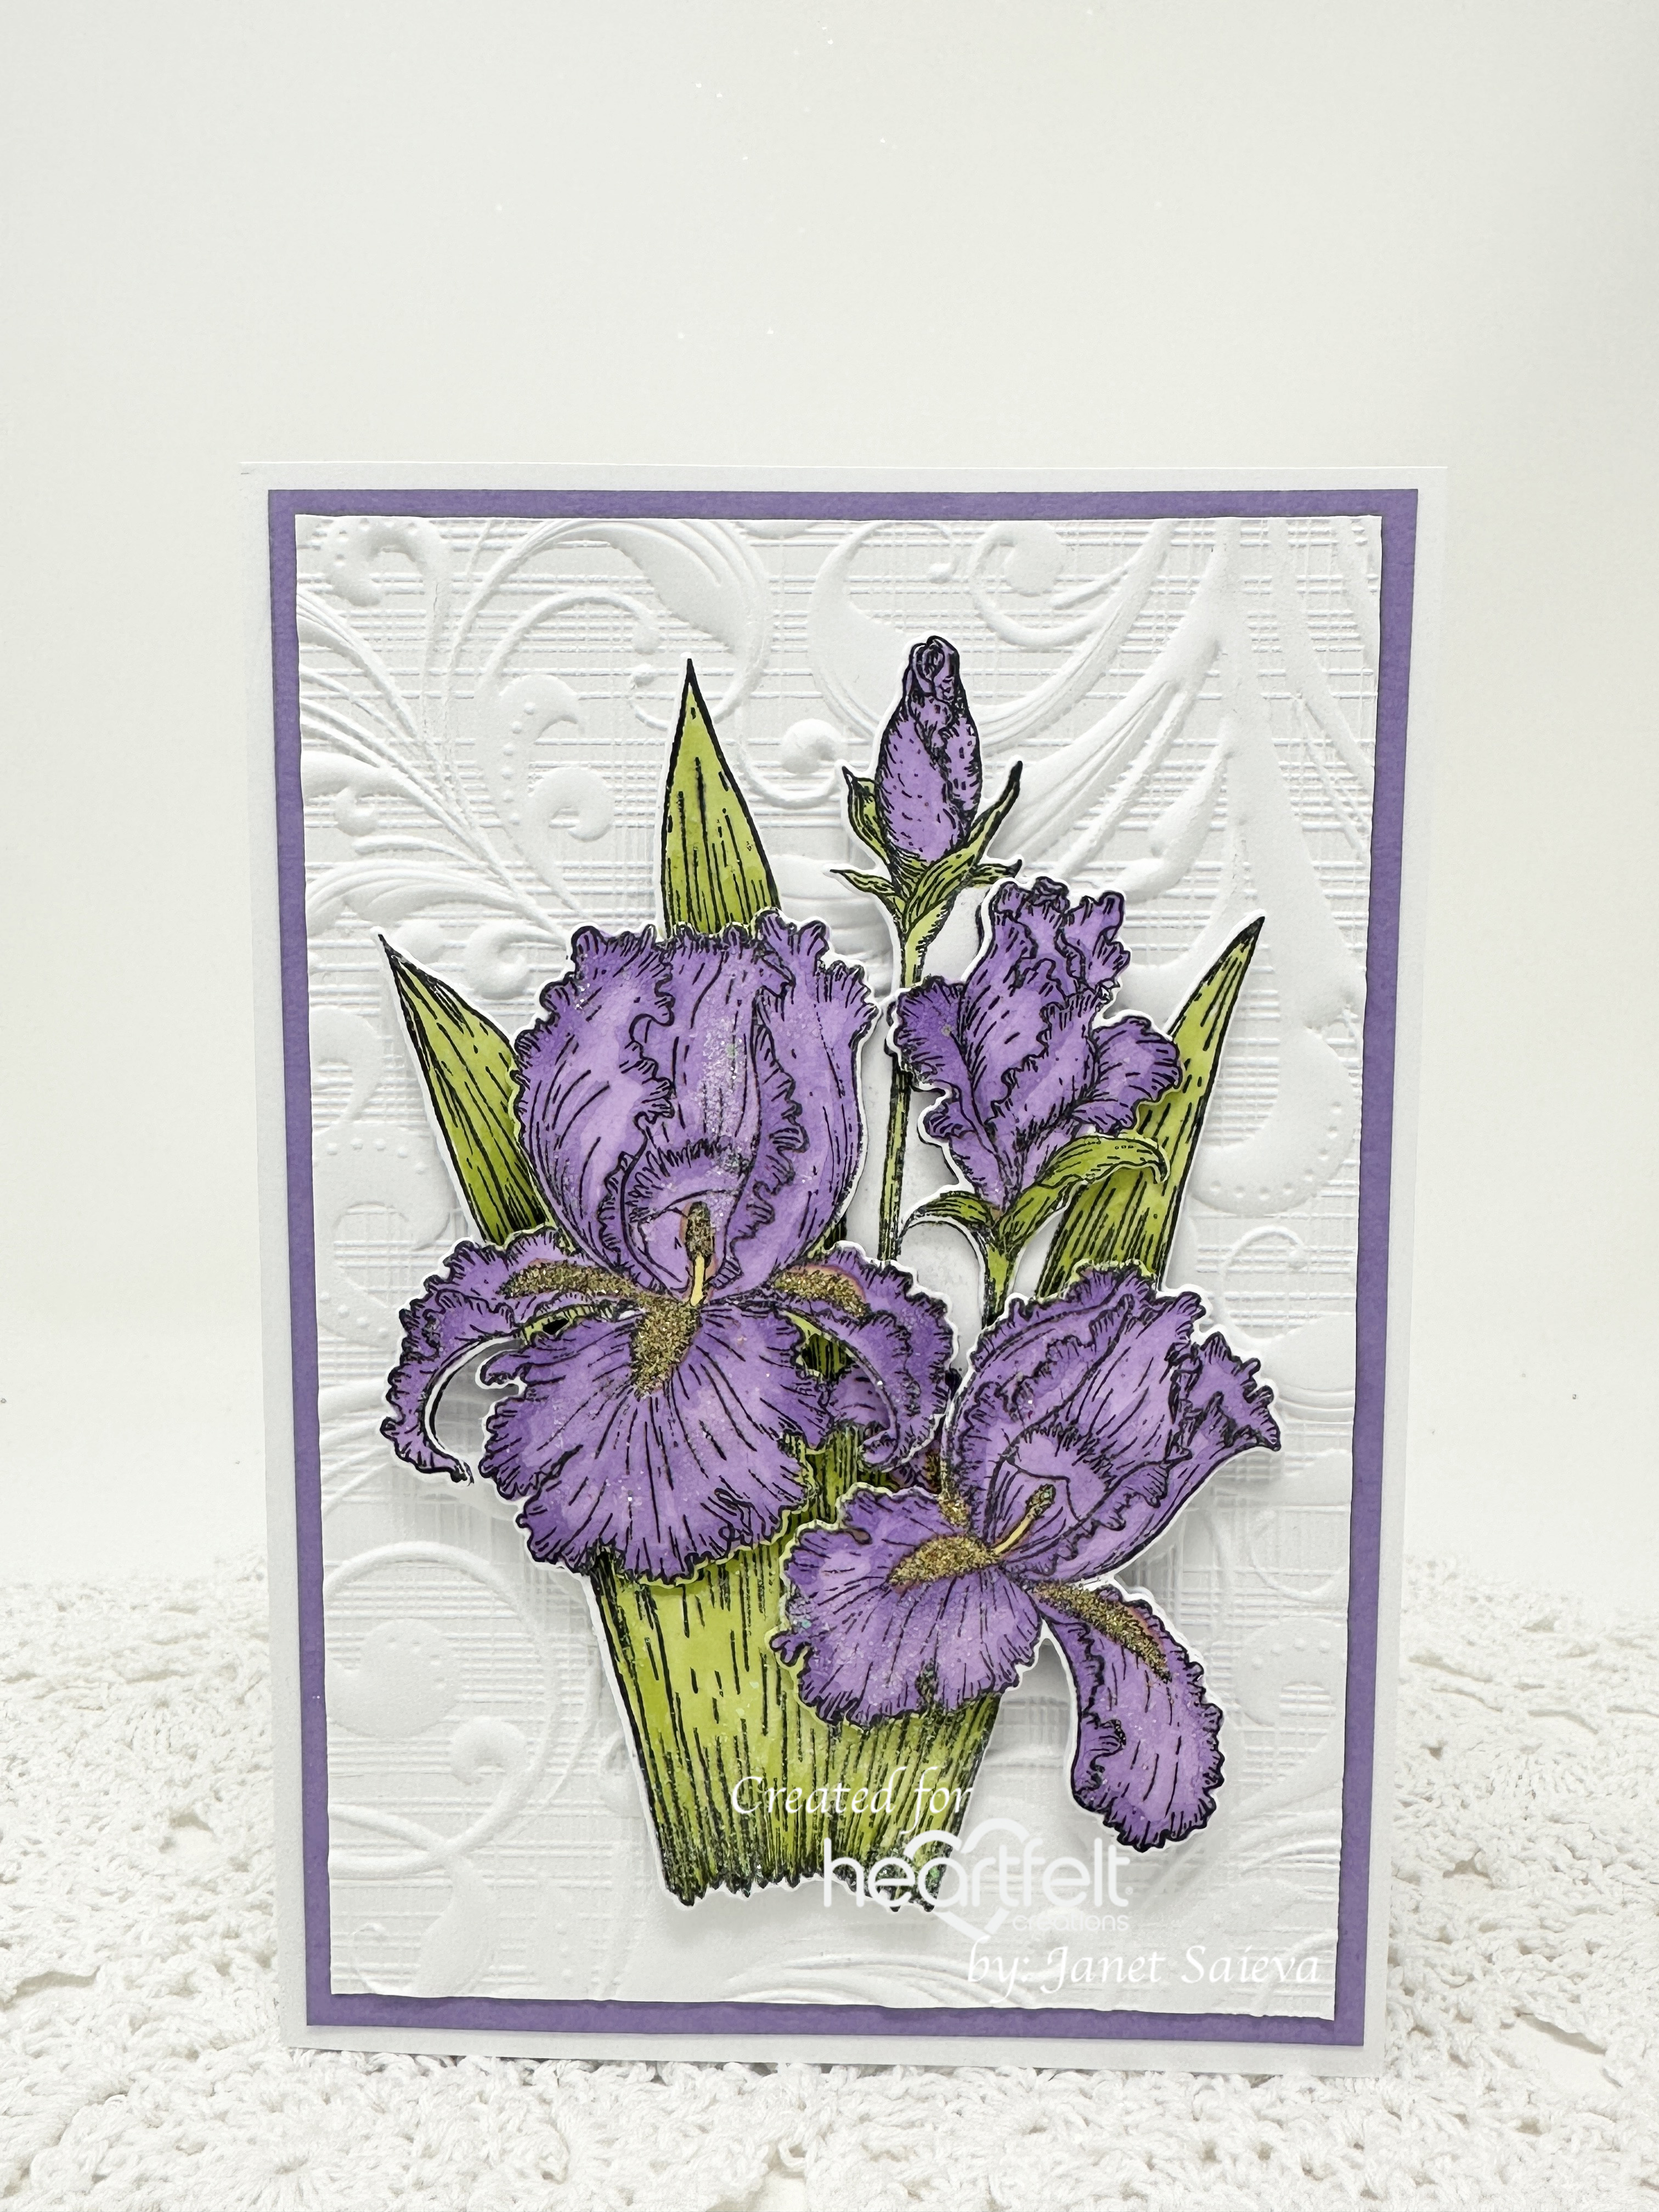
I have another Iris card to share with you today.


Instructions: Card size is 4 wide x 9” tall. Using the largest Slim Eyelet Heart Rectangle Die, cut 2x from 4 1/4 x 9 1/4” white cardstock. Before cutting the second one, add double sided 1/2” tape to the side. Score that one just below the tape, remove the backing and adhere the two diecuts together to create the shaped card base. Use the same die to cut Garden Lily Paper Collection sheet 6B 2x, trim the side of one to fit inside the card, ink the edges of both using Deep Purple ink and adhere to the inside and front of the card base. Using the smallest eyelet die, cut from white cardstock, stamp the sentiment ‘Just a Note to Cheer you’ from the Cheerful Note Sentiment Cling Stamp Set using Deep Purple ink and adhere to the inside of the card. Using the same die set, cut the decorative frame and the largest eyelet rectangle, sponge with dries clear adhesive and cover with Rajni Chawla’s Crystal Clear glitter. When dry, adhere to the card front.

Stamp the Irises 2x in Deep Purple and 2x in Buttercup Archival inks on Deluxe Flower shaping Paper. Color with the same colors and diecut using the coordinating dies. Add additional color to the backs and edges of the petals and color the beards of the purple one using Daffodil Delight Stampin’ Blend marker. Add additional color to the edges. Place the flowers in the 3D Iris Shaping Mold, spritz with water and run through the diecutting machine. Use the Deluxe Flower Shaping Kit for additional shaping. Add dries clear adhesive to the beards of the irises and cover with glitter. Use Lion’s Mane glitter on the purple flower and Orange Crush glitter on the yellow flowers. Pierce holes in all the petals, insert a stamen and adhere the petals together using hot glue.

Stamp the leaves from the Garden Lily Cling Stamp Set on Deluxe Flower Shaping Paper using Archival Olive ink, color using the same ink and diecut using the coordinating die. Add additional color to the edges and color the backs of the leaves. Place in the Garden Lily shaping mold, spritz with water and run through the die cutting machine.

Using a paint brush, add dries clear adhesive to the flowers and leaves and sprinkle with Rajni Chawla’s Crystal Clear glitter. Adhere the flowers to the EZ Stem Floral Wire using hot glue and adhere to the card front along with the leaves using hot glue.  

Get a list of all the products used on my card in the Heartfelt Creations Gallery. Please be sure to also visit the Heartfelt Creations Blog to see all of the absolutely gorgeous projects created by the fabulous Design Team. 

Thank you so much for stopping by, I really appreciate you!

Till we meet again, please stay safe and be well!

Have a beautiful day!

Crafty Hugs, 🤗🤗🤗

Janet


Wednesday, April 19, 2023

Heartfelt Creattions - Blooming Iris

 Hi and welcome!

Love this simple card using the Iris Garden Collection.


Instructions: Card size is 5 x 7”. Score and fold 10 x 7” white cardstock at 5” on the long side to create side fold card base. Cut Highland Heather cardstock 2x to 4 3/4 x 6 3/4”. Cut white cardstock 2x to 4 1/2 x 6 1/2”. On one of the white cardstock layers, stamp the ‘I appreciate you so much’ sentiment from the Thank You Sentiments Cling Stamp set using Highland Heather ink. Adhere that white cardstock to a Highland Heather cardstock and adhere to the inside of the card. Dry emboss the other white cardstock layer using any embossing folder, adhere to the other Highland Heather cardstock layer and adhere to the card front.

Stamp the image from the Garden Blooms Cling Stamp set on heavy weight white cardstock 3x using Memento Tuxedo Black ink and color the full image on one using Stampin’ Blend markers - Highland Heather, Granny Apple Green and Daffodil Delight. Color just the large and small flowers on the second one and just the medium flower on the third one. Diecut all and lightly shape the individual flowers using the Deluxe Flower Shaping Kit. Adhere the individual flowers over the flower images on the complete image using dimensional squares and dries clear adhesive. Adhere the complete image to the card front using dimensional squares. Add some dries clear adhesive to the dimensional squares to make them adhere better to the embossed panel. 

Add dries clear adhesive to the beards of the irises and sprinkle with Lion’s Mane glitter. Using a paint brush, lightly add dries clear adhesive randomly on the flowers and sprinkle with Magic Glitter Powder to add a little sparkle. 

You can find a list of all the products used on this card in the Heartfelt Creations Gallery. Please be sure to visit the Heartfelt Creations Blog to see all of the amazing projects created by the fabulous Design Team.

Thank you so much for stopping by! I really appreciate you. 

Till we meet again, please stay safe and be well.

Have a beautiful day!

Crafty Hugs, 🤗🤗🤗

Janet


Wednesday, April 12, 2023

Heartfelt Creations - Debuting the Iris Garden Collection

 Hi and welcome!

The weather is warming up and we should soon see irises everywhere!


Instructions: Card size is 5 x 7”. Using the largest Oval Filigree Frame Die, cut 2x from heavy white cardstock. Before cutting the second one, add 1” two-sided tape to the top of the cardstock. Score that one just under the tape and fold. Remove the tape backing and adhere the two diecuts together to create card base. Using the plain oval die from the set, cut 2x from white cardstock and dry emboss using any embossing folder. Before embossing the one for the inside of the card, stamp the ‘Happy Mother’s Day’ Sentiment from the Thank You Sentiments Cling Stamp set using Archival Deep Purple ink. Adhere the two ovals to the card base.

Stamp the Irises 2x in Deep Purple and 2x in Buttercup Archival inks. Color with the same colors and diecut using the coordinating dies. Add additional color to the backs and edges of the petals and color the beards of the purple ones using Daffodil Delight Stampin’ Blend marker. Stamp the leaves using Olive ink diecut using the coordinating dies and color the fronts and backs with the same color. Add additional color to the edges. Place the flowers and leaves in the 3D Iris Shaping Mold, spritz with water and run through the diecutting machine. Use the Deluxe Flower Shaping Kit for additional shaping. Add dries clear adhesive to the beards of the irises and cover with glitter. Use Lion’s Mane glitter on the purple flowers and Orange Crush glitter on the yellow flowers. Pierce holes in all the petals, insert a stamen and adhere the petals together using hot glue.

Stamp the images from the Iris Garden Accents Cling Stamp set on deluxe flower shaping paper using Olive and Deep Purple inks, diecut and add additional color to the images. Shape using the Deluxe Flower Shaping kit.

Using a paint brush, add dries clear adhesive to the flowers, leaves and accents and sprinkle with Rajni Chawla’s Crystal Clear glitter. Adhere the flowers, leaves and accents to the EZ Stem Floral Wire using hot glue and adhere to the card front. 

You can find out which products were used on my card by visiting the Heartfelt Creations Gallery. Also, please be sure to visit the Heartfelt Creations Blog to see all of the gorgeous projects created by the fabulous Design team. 

Thank you so much for stopping by! I really appreciate you!

Till we meet again, stay safe and be well!

Have a beautiful day!

Crafty Hugs, 🤗🤗🤗

Janet

Wednesday, April 5, 2023

Heartfelt Creations - Lilies for Easter

 Happy Easter my friends!

May this joyful season of Easter fill your heart with 

renewed hope, love and peace!


Instructions: Card size is approximately 7 x 5”. Place the largest Palace Gateway Die about 5/8” over the top of a tent fold 7 x 5” card base and die cut to create shaped card base. Using the same die, cut again 1x from white cardstock and 2x from Garden Lily Paper Collection sheet 4A. Ink the edges of the designer paper using Cactus Flower Archival ink, adhere one to the white diecut, stamp the ‘Happy Easter’ sentiment with the same ink and adhere to the card front using dries clear adhesive. Trim the top of the second designer paper, stamp the cross image and the ‘He is Risen’ sentiment using Archival Shadow Gray ink and adhere to the inside of the card. Using the same die set, cut the decorative die once from white cardstock and once from Luxe Silver cardstock, adhere the two together, slightly offset, with the white on top, snip the gate open and adhere to the card front.

Stamp the Garden Lilies on Deluxe Flower Shaping Paper using VersaColor white pigment ink, cover with Opaque Embossing Powder – White and heat set using the Heat It Tool. Color using Cactus Flower ink, diecut using the coordinating die and shape in the 3D Garden Lily Mold. At this point, I had forgotten to add some color to the backs of the flowers, so I took a dauber and added some Cactus Flower ink to the embossed backs and got a really pretty effect. Adhere two petals of the same size together, offset, to create the lilies. Using the Groove Golf tool, pierce a hole in the flower centers, insert the Petite Pollen Stamens and secure with hot glue. I used the white stamens, sponged them with dries clear adhesive, dipped them in the Crystal Ultrafine Transparent Glitter and added a dab of Cactus Flower ink to the tips. Stamp the Garden Lily leaves using Archival Olive ink, color using the same ink, diecut, add more ink to the edges and the back of the leaves and shape in the 3D Garden Lily Mold. 

Using a paint brush, brush the flowers and leaves with watered down dries clear adhesive and cover with Rajni Chawla’s Crystal Clear glitter. Adhere the flowers and leaves to the card front as shown using hot glue. 

You can find all the products used on my card by visiting the Heartfelt Creations Gallery. Please be sure to also visit the Heartfelt Creations Blog to see all of the gorgeous projects created by the fabulous Design Team.

Thank you so much for stopping by, I really appreciate you!

Till we meet again, please stay safe and be well!

Have a beautiful day!

Crafty Hugs, 🤗🤗🤗

Janet