Hi and Welcome to my blog!
"Do you love to create heartwarming shaped cards with endless creative possibilities, but you feel stuck in a rut using the same designs? This collection is filled with bright, beautiful whimsical images featuring the most adorable village of mushroom houses that you can pair together and create fairy-like scenes with.
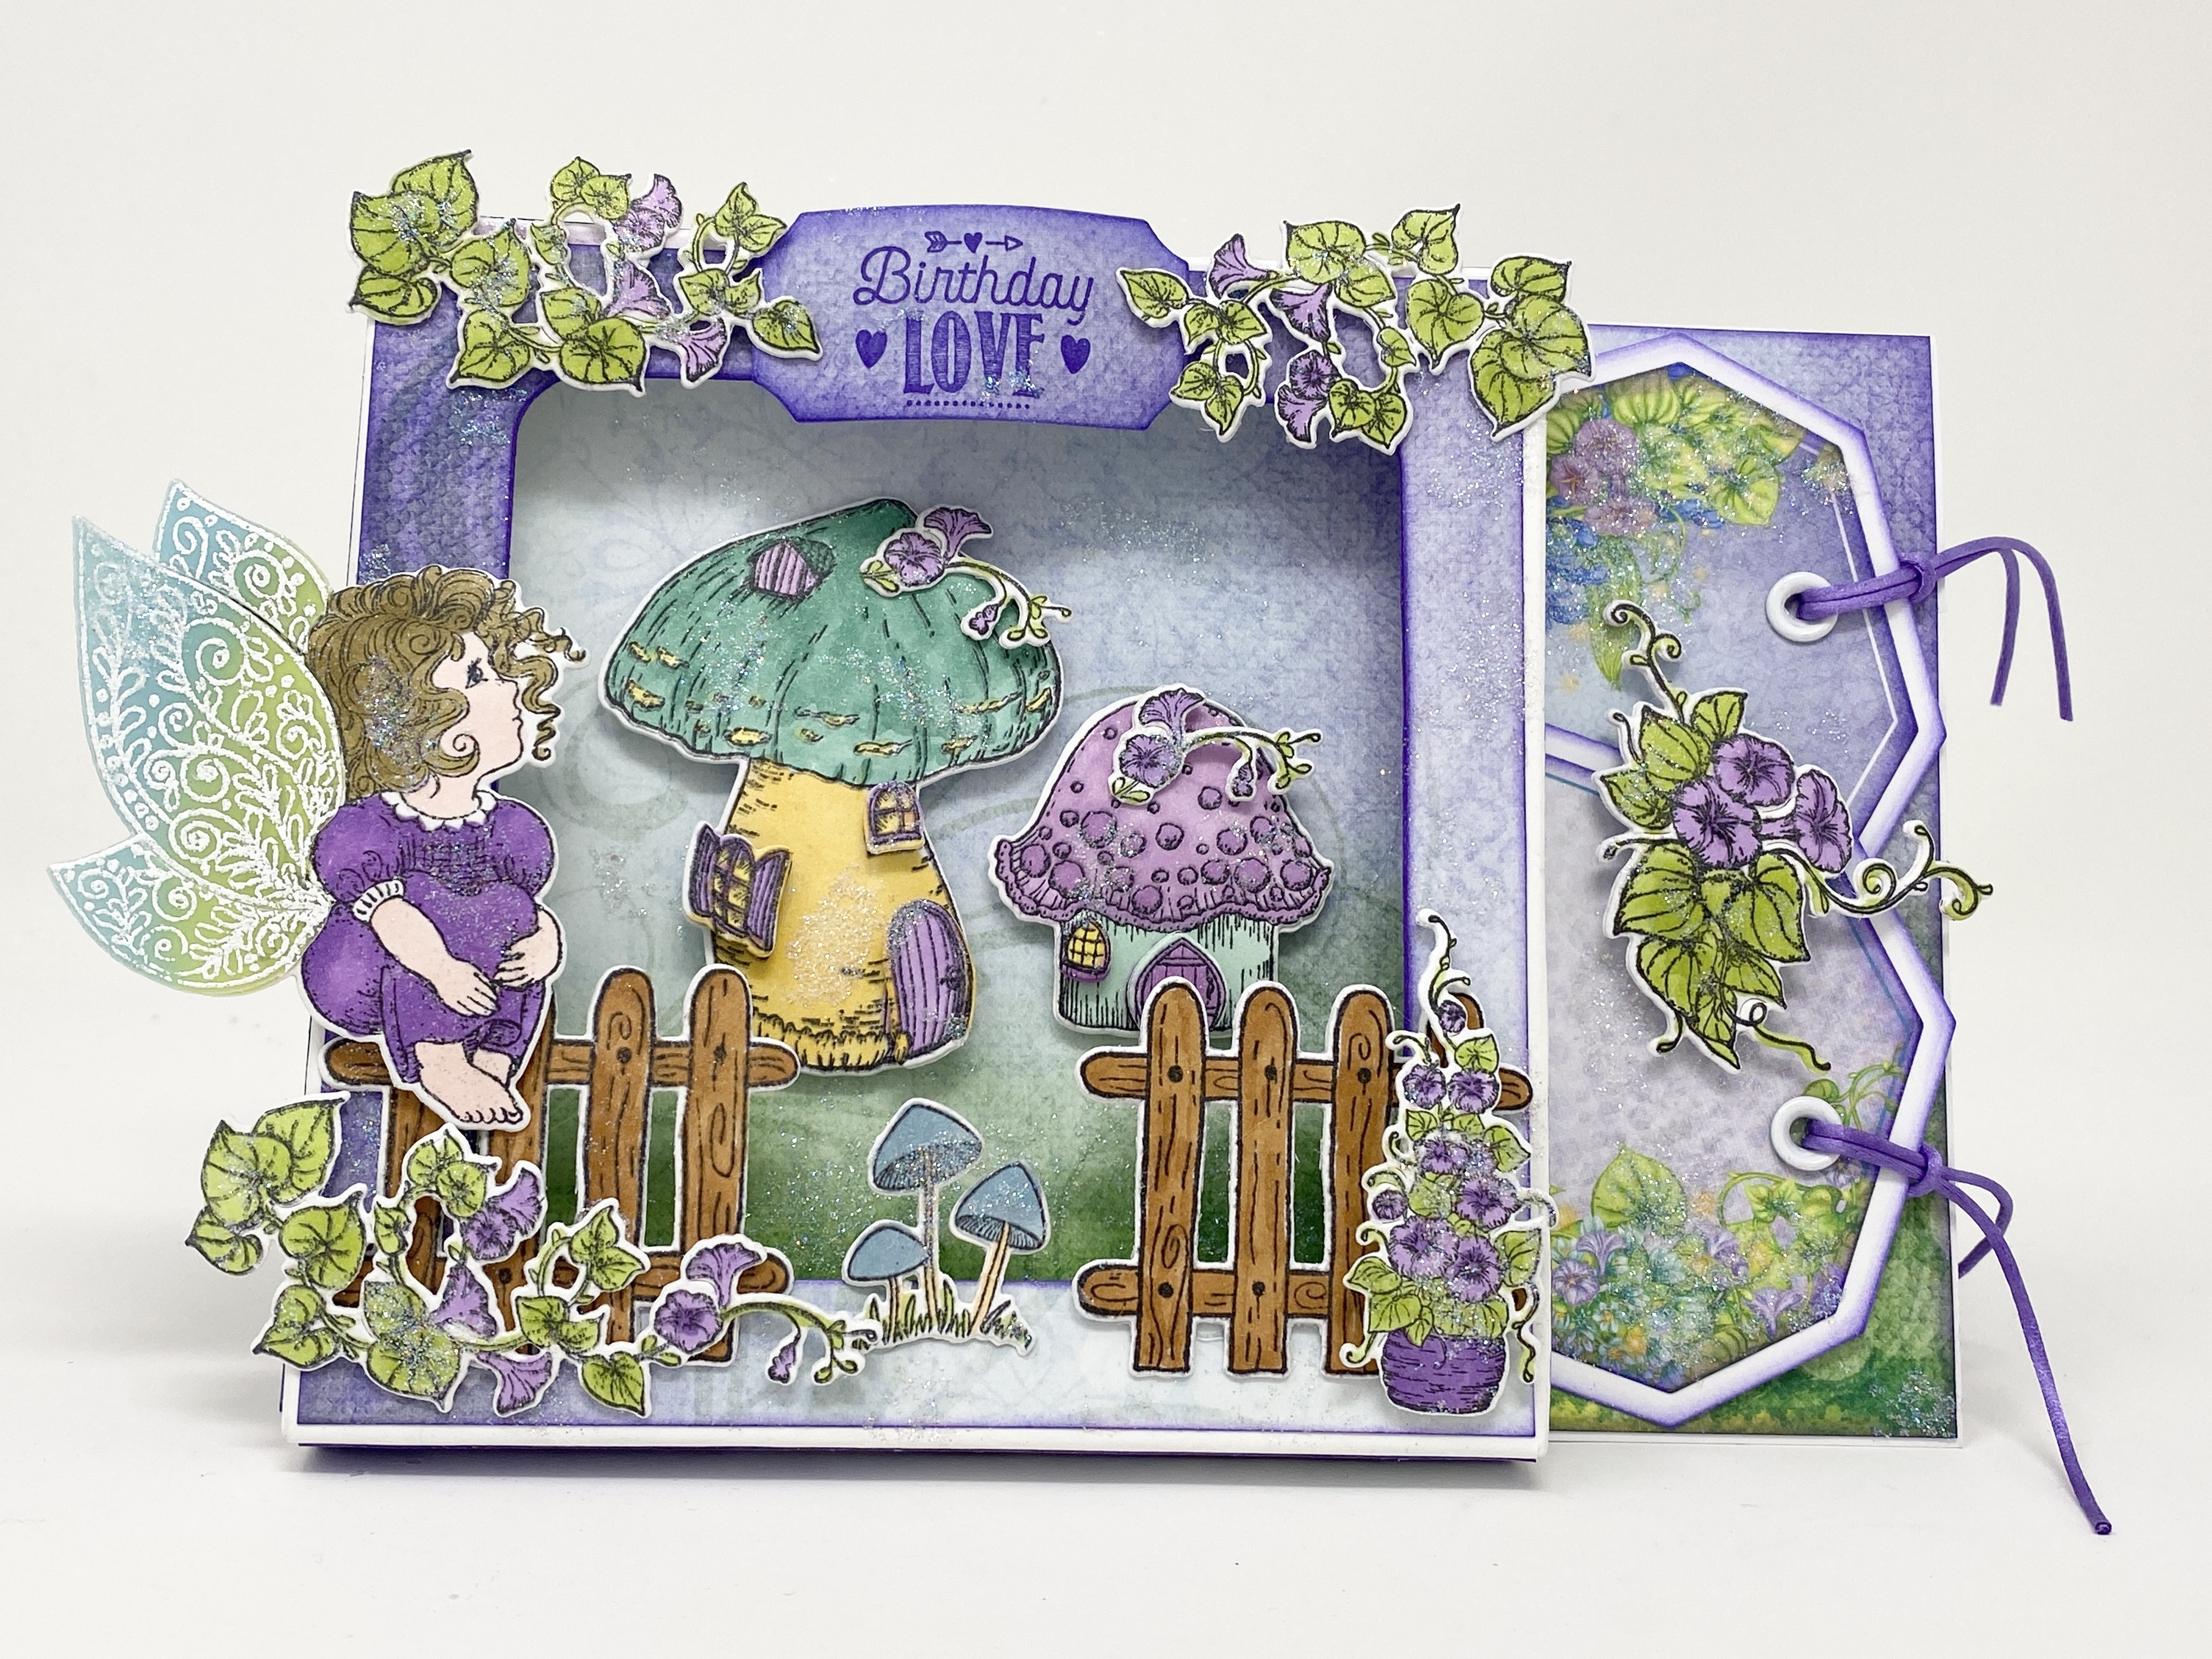


Instructions: Card size is 7 x 5”. Score and fold 7 x 10” white cardstock at 5” on the long side to create card base. Cut sheet 6A of the Mushroom Cottage Paper Collection 6 15/16 x 4 15/16”, ink the edges with Archival Deep Purple ink and adhere to the card front using dries clear adhesive. Cut white cardstock 6 7/8 x 4 7/8”, color about 1/4” all the way around with Deep Purple and adhere to the inside of the card. Cut lower left of sheet 6A 6 3/4 x 4 3/4”, ink the edges with the Deep Purple, Stamp the sentiment ‘ Happy Birthday to You’ from the Special Birthday Sentiments Cling Stamp set with Deep Purple and adhere to the inked cardstock on the inside.
Create a 5 x 5” shadow box. Score a 7 x 11 1/2” piece of Deluxe flower Shaping Paper on the short side at 1/2”, 1”, 6” and 6 1/2”. Score both sides on the long side at 1/2”, 1”, 6” and 6 1/2”. Trim the right top and bottom score lines off up to the first vertical score line, use a scissor to cut tabs. (See sample on my blog.) Use the Cut Mat Create 2A Die to cut the aperture in the front of the box. Cut paper sheet 6A of the paper collection x2 4 7/8 x 4 7 /8”, x4 3/8 x 4 7/8” and ink the edges with Distress Oxide Deep Purple ink. Use the Cut Mat Create 2A die to cut the aperture in one of the 4 7/8 x 4 7/8” pieces for the front of the shadow box. ink all the edges with Deep Purple ink and adhere the papers to the box prior to assembling. Finish folding at all score lines and adhere to form the shadow box.
Stamp the Mini Mushroom Cottages on white cardstock 2x using Memento Tuxedo Black ink. Color the full image on one using stampin’ blend markers and just the windows and doors on the other and diecut using the coordinating dies. Diecut the cottages and all the windows and doors again from white cardstock and adhere behind the stamped images. Adhere the windows and doors to the main images using dimensional squares and dries clear adhesive. Spray the diecuts with Imagine Sheer Shimmer Craft Spray – Sparkle.
Diecut two tags from designer paper sheet 12A using inside Ticket and Tags die and ink the edges with Deep Purple ink. Cut two tags from white cardstock using the outside Ticket and Tags die and ink the edges. Adhere the designer paper tags to the white tags, punch a hole, add an eyelet using a Crop-A-Dile and add purple satin cord to each tag. Adhere the tags to the back of the shadow box and adhere the shadow box to the card base.
Lightly shape all of the images using the Deluxe Flower Shaping kit and adhere to the inside and outside of the shadow box and the card front using dimensional squares, dries clear adhesive and hot glue. Randomly add glitter to the card front, the inside of the card and the images by sponging with dries clear adhesive and sprinkling with Crystal Ultrafine Transparent Glitter.
You can find a list of all the products used on this card in the Heartfelt Creations Gallery.
Please be sure to visit the Heartfelt Creations Blog to see all of the gorgeous projects created by the fabulous Design Team.
Thank you so much for stoping by!
Till we meet agin, please stay safe and be well.
Have a beautiful day!
Crafty Hugs, 🤗🤗🤗
Janet
4 comments:
I love your card! Such a great design and I love the little fairy!
Love, love your shadow box card, it`s beautiful and inspiring :)
What a beautiful card!! I love the shadow box with the hidden tags and the colours are just gorgeous!
I so want to use your shadow box idea at some point in the future. Such a wonderful idea for these adorable fairy scenes. Beautiful work my friend!!!!
Post a Comment